Like many others, I enjoy changing up my decor for holidays, and the change of seasons. But, I prefer to not purchase a lot of seasonal or holiday items in the pursuit of said decorating. I tend to challenge myself to spending only a minimal amount of money and to use items I either already have on hand, or something I have made.
With the Fall season, we also have the two holidays Halloween and Thanksgiving, and pumpkins are certainly represented for all of those.
I wasn't wanting to purchase more pumpkins for now that,
a) I wouldn't use long, or might not last long if they were fresh.
and...
b) If artificial, I didn't want more stuff or bulk to store away when the season was over, either.
I like recyclable, reusable, or even disposable, if at all possible. I know fresh pumpkins fall into that category and all, but I also wanted to keep to a more neutral, or lighter style. I have noticed a change with more cream, and white pumpkins available, which is a welcome change for me, since it goes well with my decor. And, dare I say I am not really in love with the color orange.
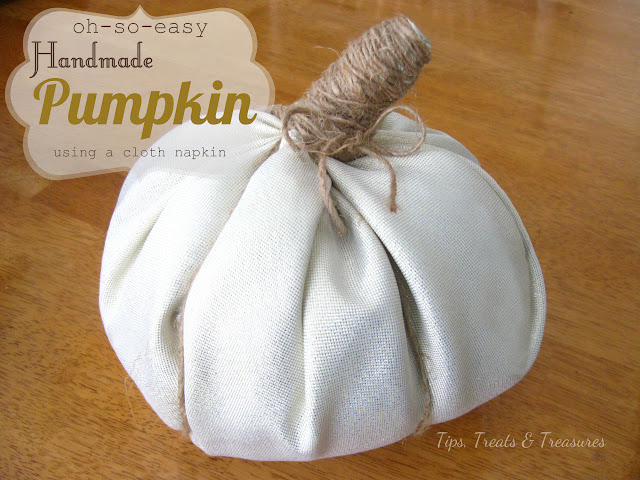
Well, often I'll be doing one thing and an idea comes to mind. Case in point, I was gathering up my plastic shopping bags to put away after a trip to the store, when it came to me. The bag of bags was familiar in shape. Kind of like ...a pumpkin! It took me only a matter of a few minutes to gather up a couple other items, and I then had myself a new pumpkin. I think it's adorable, too.
~ Easy Handmade Pumpkin ~
These are so easy to make:
I began by putting several of the plastic bags inside one bag. I placed it on a square cloth napkin, then gathered the corners up together and tied on a piece of jute/twine. I carefully tucked in the sections below the gathered area.
Next, I wrapped the twine around in a criss-cross pattern several times, slightly moving over each time to form the pumpkin sections, then ending at the top. Next to form the stem, I started wrapping the jute twine neatly around at the top of the pumpkin, firmly and close together each time I made a wrap around it.
The stem looked as if it would be a bit too long, so I folded the extra napkin-tips in half before I started wrapping with twine. I continued wrapping the twine around, until I liked the look of the stem.
I finished it off with a little bow around the base of the stem. I adjusted the sections as I pulled and squished-(technical term) the pumpkin into shape, trying not to be too fussy with it.
Ta-da ...a Pumpkin!
And, I like that this pumpkin is also recyclable. I won't have to store it away either, but, if I do, it is soft and can flatten to take up less space! And, it was basically free, since I already had all of the materials at hand. I have more napkins, bags, and jute twine ...hmm, there just may be more of these Easy Handmade Pumpkins making an appearance around here real soon!
Happy Crafting!...


