Thanksgiving Tablescape


I love to set a pretty table.  Paying a little extra attention to details that make the table more inviting and interesting, and also for the meal that will be enjoyed there.  Just as in the statement that "food is even better when it looks good," I think it is similar for the table setting in adding to the whole experience.


...______________________________...


This year for my Thanksgiving table I chose a creamy and golden look, with lots of sparkle.  I've gone with a neutral color scheme for fall that blends well with the neutral palette of the current decor in my home.


I recently purchased the large fork and spoon set and since I hadn't fully decided yet on just where I would hang them, I thought they worked quite well placed near my centerpiece on my Thanksgiving table.   After all, Thanksgiving is about enjoying delicious food and eating, and we need forks and spoons for that!  I thought it added a nice touch and it was definitely something different. 


The cut-glass and crystal pieces add lots of sparkle to my table.  I think the tone of it feels calm and relaxed, while being simple and elegant.


I've been collecting the cut-glass and crystal pieces for a few years and have been fortunate to find and purchase some of my pieces inexpensively from antique malls, and thrift shops.  Other pieces are gifts that have been given to me over the years.


The beautiful two tiered dish was a recent thrifty treasure which I transformed by giving it a makeover, using bronze paint.  I also painted the mini pumpkins and gourds I have displayed on it.  Using chalk paint and gold craft paints took them all from orange to the soft neutral colors that now go so well with my dining room.


For each place setting I used a cut-glass plate topped with a gold ruffled plate, and gold flatware.  It's fine to place the flatware how and where you like, it doesn't always have to be so formal when setting a beautiful table.  Sometimes I like to use a napkin folded into a pocket to hold each place setting of flatware tucked inside, then placed on top of the plate,

The acrylic napkin rings I've had for years.  I gave the cloth napkins a simple fan fold, before tucking them into the napkin rings, giving them a ruffle look to match the plates beneath them.

The cut-glass goblets are also recent thrifty treasures found at an antique mall.  I had to have them the moment I saw them, along with the beautiful pitcher seen in some of these photos, and a tray they were all sitting on at the time.  It was a very good day when I discovered those pieces!


I gave my table a light scattering of golden-colored faux leaves, they added a Fall touch to my Thanksgiving table.

The pretty octagon shaped and cut-glass plate was found a while back along with two other matching ones, those are also more thrifty treasures from an antique shop.  


This beautiful leaf was wearing its own sparkles and added to the sparkle of my tablescape.  A little more sparkle is always OK with me!  I wished that more of the leaves looked like this one, it was one of several different leaves in a pack that I found on mark-down at the craft store.


...______________________________...


My beautiful table was easy to set-up and I did it mostly with items I already had.  I did a bit of crafting using paint, and some thrifty-treasure bargain hunting, in pulling it all together too.  I purchased the faux leaves and they were the only other new expense, and that was only a couple dollars.  I think with just a few changes, I can easily take the look of my tablescape on into the Christmas holiday!    I'll enjoy this look for now though, or at least for a few more days.  We will see what I come up with next!


I wish you all a wonderful Thanksgiving spent with Family and Friends, enjoying delicious food and good times together.


Crock-pot Mashed Potatoes


The first time I made Crock-pot Mashed Potatoes using my crock-pot/slow cooker I was hooked and quickly said "I'll never make mashed potatoes any other way!"  So easy and so delicious.  Seriously the easiest and best way to make mashed potatoes!


I had just made Crock-pot Mashed Potatoes for my family, and after having told other family members and friends about how easy they are to make, and how delicious, I was then asked for the recipe.  Sometimes I tend to cook using an -a bit of this and a bit of that- method, and measurements are more of a guesstimation, as it is with this dish.  So, I put together a recipe, it can easily be tailored and tweaked, and additional ingredients can be added.

I simply tossed chopped red potatoes into a greased crock-pot, placed the lid on and cooked them until tender, then I added some butter, milk, salt and pepper, and mashed everything all together.  That's about it basically!  I used my small crock-pot [pictured above] for the recipe below, I would double the recipe and use a large crock-pot for a larger serving. 

I really love that these crock-pot mashed potatoes are practically no-fuss, require only a little attention, and are much less mess then the old way I use to make mashed potatoes, and these are far better than any boxed type.  It's one less thing to worry about when preparing a meal, especially when it is a large gathering like Thanksgiving or during the Holidays.  And just one pot to cook and serve in, too!

I hope you will give this method a try, and you will also see that it really is the easiest and best way to make mashed potatoes.


Crock-pot Mashed Potatoes


4-6 servings

Ingredients:
2 lbs red potatoes, chopped -skins on is my preferred method
1/2 to 1 cup whole milk, cream, or half and half
4 Tbsp butter
1 tsp salt
1/2 tsp black pepper


Optional Ingredients:
fresh minced garlic or shallots
fresh parsley finely chopped
dried herbs -basil, oregano, thyme parsley
sour cream or plain yogurt
grated cheese-cheddar, monterey jack, parmesan
cooked bacon bits or pieces


Directions:
Add chopped potatoes to a greased crock-pot/slow cooker.  Do NOT add water!  Cover with lid and cook on high 2-3 hours, or on low 5-6 hours.   When fork tender, add butter, milk, salt and pepper.  Mash with a masher or use electric mixer.  Add any optional ingredients, combine well.  
No need to mash completely, leave a bit of texture to the potatoes.  Leave at low on the ready in the crock-pot until ready to serve.  Serve as is, or with gravy, cheese, bacon, sour cream or other toppings.


Enjoy!...


Thoughts and Things - This Week ... Feeling Thankful


We celebrated our Thanksgiving early this year, doing it on the Saturday before so we could share in some time with loved ones that couldn't be here on Thanksgiving Day.  With everyone leading busy lives and going at a fast pace, it's always nice to have a day to slow down and spend quality time together.  Enjoying delicious food and sharing a day of love and laughter, and the many things we are grateful and thankful for.


Just four of us here this year, our youngest daughter and future son-in-law sharing the day with us.  But it was still a grand-sized feast we all enjoyed, with several delicious side dishes to accompany one beautiful slow-smoked Turkey.  The Mister gets most all the credit for preparing a perfectly cooked turkey that was juicy, tender, and so delicious!  I helped in that just a little by whipping up a basting recipe of chicken stock, apple cider vinegar and honey, which he used to baste on the turkey throughout the cooking process. 


We had a delicious meal, Sweet Potatoes, Dressing, Crockpot Mashed Potatoes and Gravy, Macaroni and Cheese, Green Bean Casserole, Deviled Eggs and Rolls.  Plus the star of the show the Smoked Turkey cooked on our big green egg!  I had a Chocolate Cake on the ready for dessert, but we were pretty satisfied and quite full, so we never got to that! 


The beautiful Turkey being basted during cooking   Cooked beer-can-chicken style, while cooking low and slow at 275 degrees, for about 5 hours on our big green egg.  It was juicy, tender, and so very delicious!  A baste made of 1 cup chicken stock, 2 Tbsp apple cider vinegar, and 2 Tbsp. honey, basted on about every 45 minutes kept it moist.   


A few of the side dishes fresh from the oven. (left to right) Sweet Potatoes with melted mini-marshmallows, Macaroni and Cheese, and Cornbread and Herb Dressing.

Leftovers were divided up so we all could have a bit of do-over later on, or the next day.  Speaking of which I think I need to go warm up some of that!


I hope you will have lots of family time together with those you love on Thanksgiving Day, and your tummy will be as delighted as mine was after our delicious meal.  And, may you have more than plenty of love and laughter to fill your heart!  


Also I wanted to add a special message to my Mom who had a birthday yesterday!  

~*~  Happy Birthday Mom!  ~*~
I Love you so much! OXOX


Wishing everyone a Happy and Blessed Thanksgiving!...


Ceramic Plaque to Fancy Chalkboard


I think after previously making a chalkboard from a photo frame, and finding how easy it was, I've wanted to change just about everything I see into a new fancy chalkboard.  Well, now I have made another and this is the latest one I've done.


I picked up a plain, white, ceramic plaque at the thrift store knowing I could transform it by making it a chalkboard.  The price was only a buck-fifty for what appeared to me to be an un-finished ceramic plaque.  


I felt it would make a perfect-sized chalkboard to use in my home.  I already had chalkboard paint on hand in my paint supplies, and I had just purchased some pretty gold metalic craft-paint the day before. 

I couldn't wait to get started on the transformation of my thrifty treasure!  I gave the outer edges a new look with the pretty gold paint, 'champagne' is the actual color name.  I thought it was a gorgeous gold, and I loved the look of it even more so out of the bottle!  I painted on two layers of the gold paint, allowing time for drying between coats, and after the second layer I let it sit over night to dry thoroughly.


The next day I taped off the edge of the gold painted area using painters tape, then began applying the black chalkboard paint in the flat recessed area of the plaque.  I considered painting it free-hand but, I didn't want to make any mistakes on the newly painted gold area.  So taping seemed the best way to go.  Although I did tape it by using several small pieces, since it wasn't a straight line and in order to get the protected coverage, and clean edge I preferred.

I let the first layer of chalkboard paint dry, then painted on a second layer in the opposite direction -per the instructions on the paint bottle.  I did three layers in total of chalkboard paint.

And, before applying each additional layer I sanded over the chalkboard paint lightly using a fine grit sandpaper.  This, I feel helps to minimize brush marks in the paint if any, and smooths the surface.  This step isn't really necessary, I usually do this and prefer the look in the end if I've used a paint brush, or paint sponge, to apply the chalkboard paint.  Plus, I like the fine scratches that appear after chalk is used, it gives it an aged or used look.  It's a personal preference.


Note:  Before writing on the new chalkboard it needs to be "prepared or seasoned" by rubbing a piece of chalk over the entire chalkboard painted surface, then erased using either a chalkboard eraser, dry cloth, or paper towel.  This will prevent a 'ghosting effect' of the first thing ever written on the chalkboard.    


I used a paper towel and also rubbed in a circular motion all over the chalkboard surface.  This step can be messy, due to the chalk dust, so I recommend doing it over a sink, outside, over a trash can, or a surface you can clean up easily.


Here it is completed.  Now it's all ready and is a usable chalkboard.   I love it!


So, that is the first thing I wrote on it.  "Love it!" ...and, I really do!


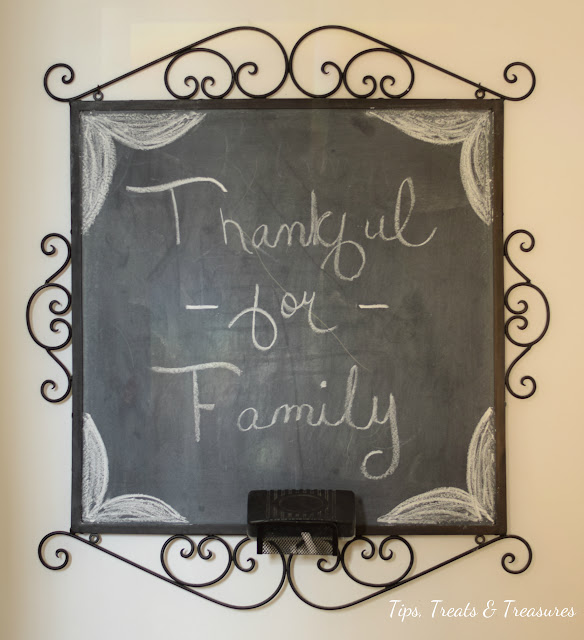
Then, I began wondering what I might write on it to use in my dining room, for Thanksgiving.  The word "Gather" came to mind.  "Thankful" would also work well.


"Beautiful Fall" was the choice of words I have written on it for now, and I also drew on some falling leaves since we are having some beautiful fall colors right now, and the leaves are sure falling!  I love my new chalkboard, it was so easy to make, and it cost me so little.   And, I'm happy to use it and display it in my home!   


I have other painting projects in the works at the moment, not a chalkboard though!  Although, I feel there will be more chalkboards in the future, but for now there will definitely be some 'chalk paint' being used.  I'll be sharing another transformation/up-cycle of something real soon!  


Until then, as always, 


Happy Crafting!...


See another chalkboard project here: Easy DIY Chalkboard


Thoughts and Things - This Week ... Fall Fever


Once November arrived we really began to take notice of the change outside.  Fall is even more apparent around here now with all of the beautiful colors.  The leaves have been falling and covering the areas below, occasionally blowing to a new location with a bit of a breeze or gust of wind.  All the while giving most everything a topping of leaves.


Showers of rain, and leaves, have been taking place at late.  While some days have just been a bit wet and misty.  The freshly cut grass provides a clean slate, if only for an afternoon!  It's a pretty sea of green surrounded by the many colors of Fall.  Although, the grass will be dormant before long, and then I'll surely be missing its green color.


And soon, there will only be the green of the evergreens among all the other trees, which will be bare.  Some of the trees have become bare more quickly than others.  I feel the change coming all too quickly!


My Crepe Myrtle tree really stands out with it's show of fall colors.  Its leaves change color and drop rather quickly.  This tree offers many different looks throughout the year.  It was only about two-feet tall when I planted it, a discounted find from the local nursery, which I hoped would survive with a little tlc and some love.  So far, so good!  The green seen here will be gone all to soon, and will be missed until next spring!  


Seeing the beautiful fall colors while out on a drive makes me wish to be an artist, a painter, and paint the beautiful scenery viewed from all different directions around me.  Like individual oil paintings, each spot of sight is a new, and interesting picture.  I guess I've fallen for fall with being captivated by the look of it, I must have caught the fall-fever!

One thing is for certain, like it, love it or not, we are in the midst of the fall-season.  Fall can be messy, wet, and even cold.  But, it is undeniably ...beautiful!


Fall Mesh-Ribbon Wreath
~Easy How-to tutorial


I tried my hand at creating a mesh ribbon wreath, I've been wanting to make one like those popular types seen all over pinterest!  I actually tried to make one of them before, and well, instead of having one like those to hang on my door, my patience ran out the door on me!  

Still, I did mange to make a beautiful mesh wreath, even though it wasn't the type I set out to make in the beginning.  I worked it out by making one that I ended up loving, so it was all good!   You can see it here if you'd like, and I explained how I made it.-(also at the time of this post, the wreath I mentioned is featured in the photo at the top of my blog).  Now on to this wreath below! 


I suppose it got to me that I had not made one of those 'typical' puffy or poofy mesh wreaths yet, and that pushed me to give it another go.  I found several tutorials online and lots, and lots of photos.  I took all of them into consideration and applied what I had seen, and learned, to achieve this project once and for all!

I viewed several videos where the mesh is attached to a wire wreath form via twist-ties or chenille stems/pipe cleaners.  And, I also viewed several videos for making wreaths using burlap ribbon, where the burlap is pulled through the sections of the wire wreath form into loops.  I used the latter method to make my 'fall mesh-ribbon wreath' because I liked the effect and didn't want to fuss with all the twist-ties.  And, truth be told, I didn't have enough twist ties, let alone chenille stems at the time.

Also, this method made the project just seem to flow so easily, and it really went quickly as well.  And, I actually preferred the look overall, especially since it wasn't over the top poofy.  Either way would work, but this is the look I was going for! 

I used a small wire wreath form, and a roll of mesh ribbon in a burlap/tan color with a white band down the center of it.  I thought the color was perfect to go with my neutral decor and would also work well for fall.

I'm loving my new mesh wreath.  I think it turned out well and now it hangs on my door, on the inside, so I can view and enjoy it.  Hmmm, I guess I could say I technically still really haven't made a 'typical' mesh wreath.  Leave it to me to do things my own way.  It's what I do!

Below are the steps used and items needed to make this Fall Mesh-Ribbon Wreath.

Wooden Pumpkin Sign - makeover.


I transformed a thrifty, discounted, wooden pumpkin sign into a piece of art to display on my door, by giving it a makeover using chalk paint!


While at the grocery store I took a moment to look through some discounted fall items located on their seasonal isle, I came across a wooden sign, among the other items.  I wasn't really in love with it at first glance, but the three-dollar price had me giving it another look.  My thoughts of planning a makeover for it had me quickly deciding it just might be worth the purchase and so I grabbed it up.


I liked the pumpkin shapes, the metal leaves and bells, but the burlap with the word HARVEST printed on it, not so much!


A bit of tugging, pulling, and some cutting had it down to a bare surface in short order.  A little sanding with fine grit sandpaper had it free of any glue residue, smooth, and ready for some paint.


I was going for a neutral look, since that is more my style, and has been my theme this year for fall.  With my stash of paint to the rescue, I gave it a base layer using white chalk paint, followed by a paint technique I used by applying another color of chalk paint called-timeless, and wiping it off slightly with a damp paper towel.


I kept at it until I had the look I wanted, and it looked like a pumpkin.  Uh, make that four pumpkins!


I have to admit that I kind of fell in love with it after it was all finished.  I was considering adding some letters to it, maybe spell out "Fall" or something?  But, for now, I like it just the way it is!


Thoughts and Things - This Week ... A Day to Celebrate!


On my birthday, 35 years ago today, we said "I do."


That's something to Celebrate!

........................................................................

........................................................................


That's a lot of

It's still Fall for me! ~ Sharing more Fall decorating ideas.
Tiered Tray & Cloche


It seems to me each year that Halloween gets pushed by so quickly with a hurried rush on into Christmas, but I am not quite ready for that just yet!  It leaves me with the feeling of "wait, slow down a minute!"  Fall isn't even over.  Believe me when I say, "I am still clinging to summer in my mind!" 

For now, I'll still be lingering in fall.  I know some are excited to get Christmas started now that Halloween is over, and there's nothing wrong with that.  I myself like to get through Thanksgiving, or kind of mosey through it, to slow down and enjoy that time before moving on to begin celebrating Christmas.  Then after that, I'm all-in and can fully embrace all the joy and wonder of the Christmas holiday.  And I might add, Christmas is in winter, and I really don't feel comfortable even saying that word right now!  But don't get me wrong, I do love Christmas!        

So with that said.  I am happy to stay put with fall for now, and share more fall-ness, if you don't mind.  After all, it's only the first week of November!


I discovered this pretty two tiered serving dish, while shopping for thrifty treasures at the antique market.  Well, it's 'pretty' now in my opinion, but, when I first noticed it, it was very apparent that it had been loved before by someone else. 

And, they loved it, blue.

Bright blue!
Or, maybe they didn't?!
"To each his own, or, her own," as they say.  But, I saw through what was not my color of choice, to 're-imagine' it in a color that would work for me. 


Well, as you've already seen above, I re-loved it bronze!

A little bronze paint has it fitting in very nicely in my dining room.  And, it is another Wexford style piece to add to my growing collection of cut-glass and crystal pieces.   


I am drawn to these cut-glass and crystal pieces like a moth to the flame, I'll tell ya.  Their sparkle draws me in and gets me every time!  It's beautiful!


I recently painted more of those sweet little pumpkins, changing them from bright orange to a neutral creamy color, to go with my neutral palette in my dining room.  Gold and bronze appear in there also, so I painted some mini-pumpkins and mini-gourds pretty golden colors.  

Later I'm sure I'll use my tiered dish for food goodies, but for now I've dressed it with my faux pumpkins, gourds and fall flowers, then I placed it on my dining room table to add a pretty touch of fall in there.


Over on the side-table, I also tucked some of the painted mini-pumpkins under my cloche, and added some berries and leaves to a saucer that serves as the base.  The cloche is another thrifty treasure found at the antique market!   

I've been working on the final touches for my Fall/Thanksgiving tablescape in the dining room.  I'll share more on that soon.


Enjoy November!


And, as always, happy decorating!...


How to lighten Pine Cones


~ How to lighten pine cones using bleach ~


This was a simple project that was very easy to do, although a bit time-consuming to accomplish.  I have been asked a few times where I got the light pine cones used in my Fall Table Centerpiece.


As much as I'd like to take credit for coming up with the whole idea, it wasn't mine.  I discovered it via eHow, and I had read a few comments that it didn't work for some people who had tried their method.  But, after succeeding with lightening my pine cones, I wanted to share the process I used to achieve the look I got.   


My fondness for neutral colors has me loving the outcome of this project!  I was quite skeptical when I first saw info about doing this, but my curiosity said "do it!"  I figured, what's the harm in trying?  I have an abundance of pine cones around my yard, and bleach doesn't cost very much!

After I had collected a few pine cones from my yard, I placed them in a trash bag, sealed it up tightly, then left it outside on my deck for a few days.  I figured if there were any kind of bugs or critters in there they wouldn't last long!  I surely didn't want them in my house! (I've read about putting the pine cones in the oven to do this and to dry out the pine cones, but like I said, I didn't want any bugs or critters in my house, or my oven either! YUCK!)   

To bleach the pine cones: 
I placed a large plastic pitcher in my kitchen sink and filled it about three quarters full with pine cones, then slowly and carefully poured in the bleach covering them over half way up the pitcher.  It was approximately two thirds full, then I added water the rest of the way to cover the pine cones completely.  I'd say it was a little over a two-to-one measure of bleach-to-water (I didn't have a lot of bleach at the time so I added water, full bleach may be fine and might produce quicker results).  I used my collected pine cones from my yard, and a few other small ones I had gotten from the craft store last year.  

I placed a saucer over the pine cones and weighed it down with a heavy mug filled with water so the pine cones would stay submerged in the bleach solution.  I let them sit like that for about two days, leaving them off to the side of my sink in the kitchen.  During this time the pine cones closed up, and they then took up less room in the pitcher.  


Next, I removed the pine cones carefully from the bleach and pitcher over my sink and placed them into a colander, rinsed them and left them to drain off in the sink over night.  They appeared only slightly lighter in color at the time and I was skeptical as to whether it had worked.  In the morning they were still not dry or opened all the way, I took them out of the colander, placed them on a large cookie sheet lined with paper towels, set them aside and left them to dry out.

The pine cones opened up again as they were drying, but it did take a few days before they were fully opened.  The pine cones I had collected began to look lighter, a beige and taupe color.  The small store bought pine cones didn't lighten up as much.  I suspect they may have been color-enhanced, and might have just needed more time in the bleach.  I may give those another try! 


Overall this project was easy, it did take a while, but the result was worth the effort.  I'm not skeptical anymore!


I used the lightened pine cones in decorating my fall table centerpiece.


And, also in decorating my fall mantel.


As you can see the bleached pine cones are lighter than the other pine cones.  I like the look of both types, but I am a little partial to the lighter, bleached pine cones at the moment.  I like the color results after bleaching.  They work well with my other home decor, and blend in nicely with my neutral colors.  And, I like using both types together because of their contrast.


.

.

.

.
Tammy is the design enthusiast behind the blog, Tips, Treats & Treasures, where her creativity is explored with a mixture of her artistic abilities and style through her home decorating, thrifty finds, DIY and creative craft projects, along with her family favorite recipes. She shares through her blog her ideas and helpful tips on everything she has learned over the years and much of which she is passionate about in the hope of inspiring others, with her own unique style storytelling.