Monday Message


~ My Monday Message ~


I came across the message below and it appears to be written early in 2014, it's unedited and I don't know the original source, but I found it to be a worthwhile read and a great message!  Enjoy!


... AND THEN IT IS WINTER.
You know .... time has a way of moving quickly and catching you unaware of the passing years. It seems just yesterday

Thoughts and Things - This week...Office Storage on a dime, Hibernate? & Hero/Dad!


I like using conventional items in an unconventional way, and always enjoy finding new ways to do so.  These great Better Homes and Gardens organizing ideas, offer many ways to do just that.  Take a look at one of the cute ideas I used for making a pen and pencil holder using a tin can.  But, what I liked best about it is being able to change the look, quickly and inexpensively, when ever I want to change my desk decor or even to make it fun for the holidays too.


In keeping with my winter decor, I simply wrapped a tin can with white paper and gold ribbons. 

Such  a cute idea and endless possibilities to custom make to match any decor.  And to me it's a plus that it's a recycle project too.  I like the coordinating paper on these holders above, and those were mounted to the wall via pan-head screws.  There are many more ideas you can find and use for your home office, just visit this link to Home Office Storage on a Dime at bhg.com to see for yourself.


Brrr-ville


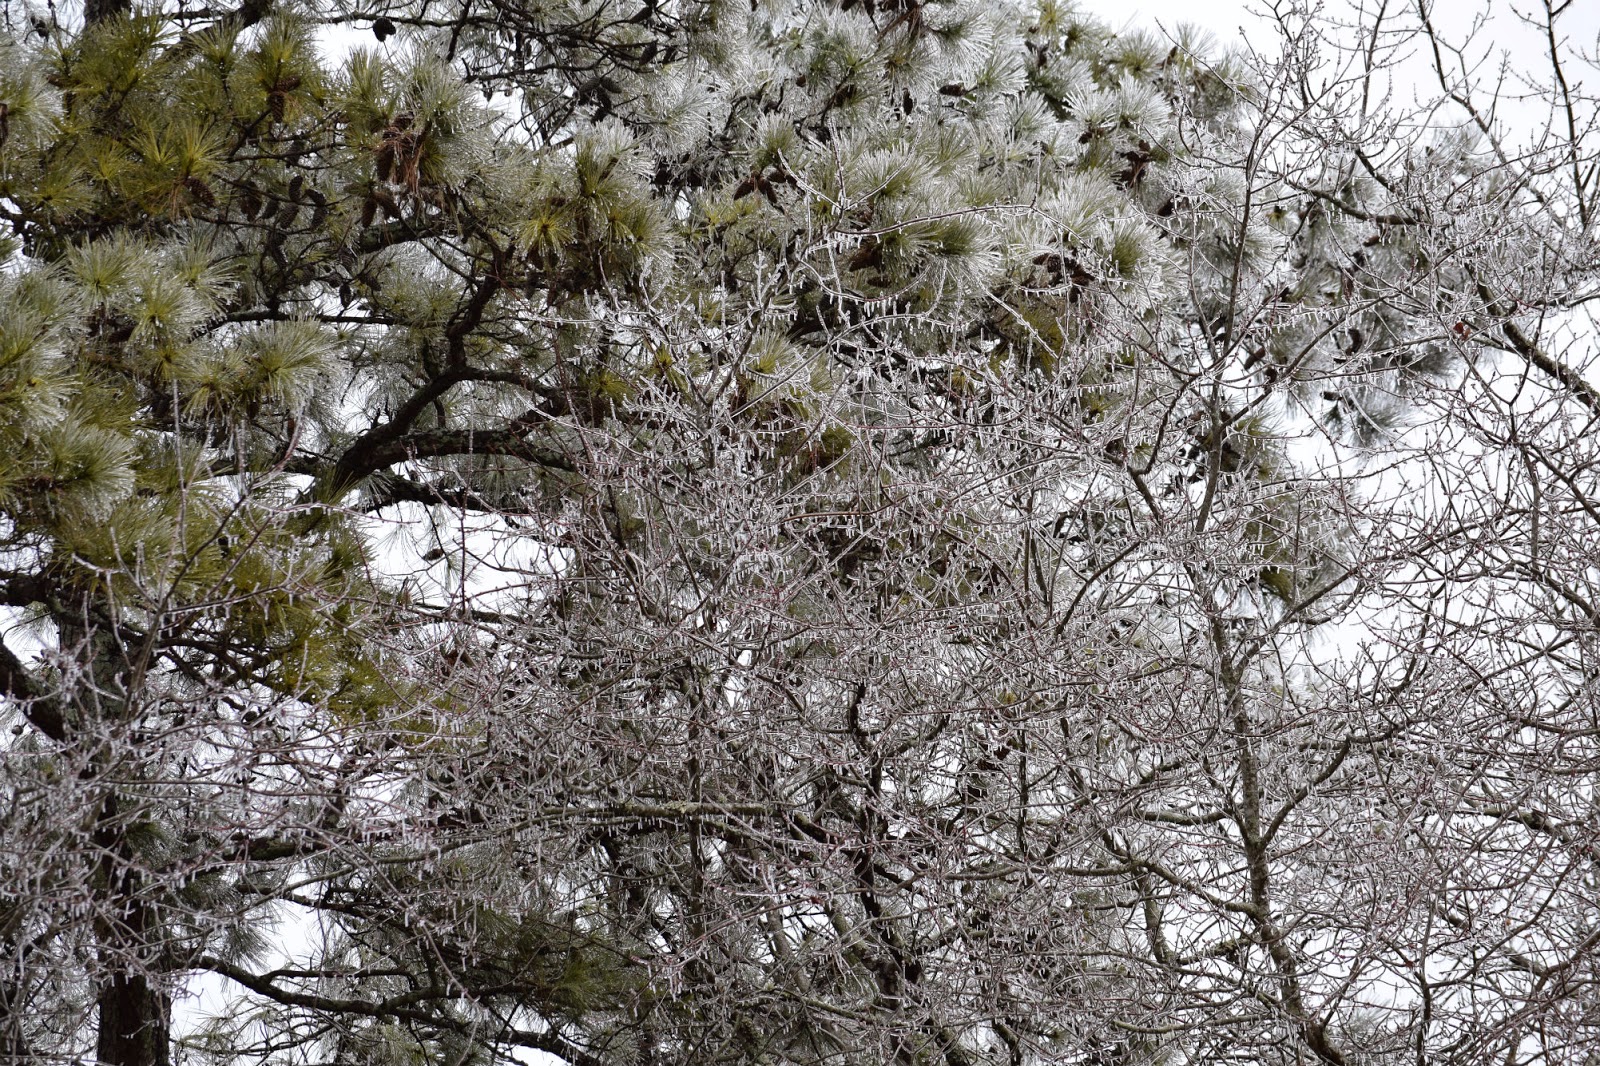
As winter lingers here, we have been in a bit of a deep freeze over the past few days.   Monday brought with it much rain and the possible threat of snow and ice.  By nightfall the treat was more of a reality with ice forming on the trees, while the roads appeared only to be wet, but relatively safe for travel.  We were out and about at that time and it was actually very picturesque.  


Over the remainder of the night many suffered broken tree branches, fallen trees and even power outages.  We were fortunate to have only a few small branches fall in our back yard.  By morning the rain had ended as much of the ice on the trees remained.  The temps hovered around the freezing mark, and many made the choice to stay home from work as some businesses were closed and also some schools.  The weather can change all that is planned in no time.  This is nothing in comparison to the blast of a blizzard some are experiencing!  We are just not prepared for any type of it here!


I captured the images below from my back porch of ice on our trees the next morning.  


We will be continuing to see much of this for a few more days with the temperatures staying below freezing.  In the mean time, I'm sure I'll be asking ..."Is it Spring yet?"


I hope it's warm where you are!


Brrr-ville!...


Happy LOVE Day!


Happy Valentine's Day!  

A day of LOVE.  

So what better to display on my front door than those four letters!


LOVE... 


Lots of LOVE to you and yours!...


Valentine Decorating


A Valentine greeting from my heart to yours!

I just couldn't pass up the chance to add some Valentine touches to my home's decor, and spread a little love and hearts around.  It is the month of 'LOVE' after all.  Uh oh ...I think I caught the heart fever, the love bug!


I shopped my handy decor stash of lovely hearts and pretty things, all of which I had on hand from years past.  I was enjoying each discovery and remembering where, or when, I got this, or that, and why I loved it, and before I knew it I was fallin' in love with it all over again!


I decided to begin by adding a little Valentine decor on my mantel.   I started with just a few red hearts and the love started to spread from there.  I added a few simple on-hand goodies from around the house.  I love the idea of not spending any extra money or at least only spending a few dollars to do quick-change decor.  

A while back I shared how to make my Roses Heart Wreath, it is still one of my favorites.  I chose to display it by hanging it from a plain black frame, which I gave a little lift for height.  I had planned on placing a mirror behind those, but instead decided not to use it.  I picked up the little "Happy Valentine's Day" sign and the cute Gold hearts garland at Target, last month actually, from their 'mostly a dollar' area ...I always find something there to love.  The garland lights-up (battery operated), and I thought it was just the cutest, a real 'me' kind of thing!  I added a few felt hearts to tie it in with the others I used on the small mirrors hanging above. I had everything else so this was almost no-cost decorating.

The Teddy Bear belonged to my daughter and is now a favorite of the grands when they visit, he just seemed like he belonged in the grouping so I sat him in front just begging for a hug!  The big red heart (in front), once held some chocolates and the fabric covered box was too pretty not to keep it, I knew I'd want to see and use it, again and again.


These flame-less pillar candles were an easy dress-up with layers of ribbon, and they're no-cost decorating since I already had everything on hand.  I shared how to make them in a previous post, they too are another easy craft, you can learn how here.  The candle sconces I've had for sometime now, the heart design on them had my heart at first glance, with my loving hearts like I do!


Speaking of roses, you may have seen my tutorial on making old fashion paper roses, and also how I made this lamp shade go from plain - to - pretty with my handmade paper roses!  You can learn how here.


This Willow Tree "I love You" statue has a special place in my heart because my Valentine gave it to me, one Valentine's Day.  The red-glass vase, which once held anniversary flowers from my sweetie, is perfect for the pretty, faux, red roses and they also have a sweet treat among them.  Did you notice?  My handmade Hershey's Kisses roses are in the arrangement also!  They certainly are sweet, in more ways than one, and are one of my more popular posts.  It's so easy to make them too, you can learn how to make them for your sweetie here


Over in the kitchen the love continues.  Above the frig is a little message of "I love you",  I simply hand wrote it in red on a piece of copy paper, cut it to size and then added it to the cute frame.   Above and next to it is a pretty heart I made by wrapping crepe paper around wire and also embellished it with felt hearts and glitter ribbons.  A simple heart card sits up there too.


More touches of red really pop over on the kitchen counter.   We have plans to (one of these days), paint the cabinets (when we actually decide on a plan ...and we've had other more important home improvements come first i.e., tile floors, and a covered porch and new patio), but, for now they are the original 'pickled oak' we chose for them when we built the house over nineteen years ago.  I'm seeing them either white or off-white in the near future.  I'm also dreaming of new counter-tops too!


These canisters are always a little something extra to add to my decor, and not only are they functional, they are fun to decorate too.  I had some left-over peppermints from the holidays, and also some of my favorite red candy on hand 'fireballs' and Jolly Rancher's 'cinnamon fire' hard candy, (shhh) I usually have a stash of one of those, or both  here somewhere.  A little heart ribbon dresses each of them up real pretty-like.  In keeping it real, I only had a small amount of sugar on hand, but not to worry ...I think it still looks very 'sweet' though. 


My cute little chalkboard/cutting-board lets you know that my recipes are "Seasoned with Love", and more felt-hearts add a touch of red there.  And, although it may be a bit of an eyesore, my toaster-oven is a well used kitchen helper and so it is a must have for us!  I dress it up a bit with a pretty disguise like it's another shelf to decorate.


This side of the kitchen is all about the coffee ...and we love our coffee as you can see here, we have two ways to brew ...espresso and kuerig.  Maybe that is why I chose to use just a simple touch of 'love' on my fancy red tin, and a pretty red heart behind the initial M.


Just the other day, I shared a post for this Love-ly printable I added to an inexpensive frame.  It's another easy and low-cost craft project too!  You can also make one, and find out how I made it here.


Oh, and my Baker's rack, I couldn't forget that, it also got some love!


I gave it some love, hearts, and paper roses too!


*** *** ***

I love doing budget friendly decorating, and enjoy sharing what I have done with others and to show that it can be done, inexpensively.  I have collected items over the years and I also shop the dollar stores, thrift shops, and am always on the lookout for a good bargain.  

I hope you enjoyed my Valentine Decorating tour, and also hope that maybe you were inspired to add a touch of hearts and love to your home's decor too!


Happy decorating and have a Happy Valentine's Day!

XOXO


It's time to share some LOVE!


It's that time of the year when our hearts are reminded ...LOVE is in the air, and hearts are everywhere.  Do you see it?  Can you feel it?  With Valentine's Day approaching I've been thinking about LOVE.  I don't know about you, but I do have to admit to being a bit of a romantic.  This woman is all about, all of the sweet, sappy, heart gushing feelings associated with all things...Love.  I'm not ashamed of it either!  I believe it is one of the greatest feelings.

Of course there is the ever powerful romance type of love shared between two people.  There is the very special love you feel for family - your children and grandchildren, your parents and grandparents, your siblings, aunts, uncles, cousins and more - Also the love for friends.  There's the love for treasured items, favorite things, places, even our pets...I know I love my dog!  There are so many kinds of love.  You can share love, give love and yeah, also make love!

Isn't love grand?...


Speaking of all things love.  I found the black wooden LOVE plaque (pictured above) at Hobby Lobby and I fell in love with it, had to have it, so it came home with me to add more love to my life!  I'm reminded of LOVE every time I look at it!


*** *** ***


I created the LOVE-ly printable below after seeing the phrase (at the bottom of it), some time ago.  I wanted to use it in a frame to display some - LOVE - in my home decor.  It was so easy to make by simply printing it in the size I wanted and then adding it to a inexpensive frame.  I always love easy, and inexpensive!  You can download a copy for personal use, and make one too!  Click on the image below, then right click on it to choose "save image as..." to save to your computer.  I simply used my printer settings to choose the size to print!    


There that's more like it and what I had in mind!  I LOVE it!


Sharing some LOVE...


"Early Spring" says Beau! - Groundhog Day


February arrives and we have the annual Groundhog Day events to begin the month!

Well, Punxsutawney Phil of Punxsutawney, Pennsylvania saw his shadow today, predicting six more weeks of winter!  {Blah!}


But, Gwinnett County Georgia's own General Beauregard Lee, famous groundhog residing at the Yellow River Game Ranch, saw NO shadow.  So Beau is predicting an early spring!  I'm definitely going with Beau!  Especially since he lives right up the road from us!


Beau has a reputation for being spot on with his predictions.  He has only been wrong once in 34 years!
I like that Beau!


Thoughts of Spring put a smile on my face!...


Shutters Project

I'm so excited to be sharing the finish of our new custom made shutters that we recently added to our covered porch.  My Husband and a dear friend of ours, who oh so kindly, not only helped with the project, but also provided most all of the tools for it too.  Thanks again Tom!  Thank you, to both of them for all the hard work they put into this.  They both did an excellent job.  I am truly grateful.  They exceeded my expectations and I love the results! 


Over a year ago this past November we were almost at completion of the dream-turned-reality of our new covered porch and patio area.  You can read more on that here.  It was an adventure that lasted from the tear down of our old deck and patio in late July, through to right before and just in time to host our Thanksgiving holiday with family and friends.  

We use the added space quite regularly and even throughout the winter with the use of the fireplace and occasionally an out-door heater.   I shared a post on the curtains we made from drop cloths, and while they do a fairly good job for the most part with keeping the sun out, providing shade and privacy.  We also used them to help keep some heat in during the cooler months, and to cut down on the rain coming in as well.  We found that we get more rain and debris coming in from the west side, even if closing and securing the curtains.

I started thinking about shutters and wondering how, or if, that would be doable, affordable even?  After much looking, and searching, my ideas were then shown to the hubby for approval, and then also to the wood-working man extraordinaire/friend, Tom.  Who in short order put together a plan of action and list of needs.  With said plan a go, they were off to get supplies and begin the creation that proved even more to my liking and total satisfaction, than the original thought or vision.  To say I am pleased with the final result is definitely an understatement!  I'm loving the new shutters and I am truly amazed every time I look at them.   I have jokingly said to them that I better not be asking for more shutters for a while, but don't you think they would look good say, around the whole porch?  Or perhaps just on the opposite side for now!


With the help of my husband here is a brief description of the Shutters:
From 12' x 1" x 8" Cypress lumber they cut 6' and 3' lengths, and then biscuit-cut and joined them to make 1" x 16" panels.  Each panel was reinforced with additional 1" x 4" pieces of cypress, that were screwed horizontally across each joined panel, by counter-sinking the screws and filling the holes with wooden dowels.  Each completed panel was then connected with mortised hinges, creating a bi-fold 32" shutter.  A set of the 32" shutters filled each of the four openings on that area.

When all eight shutters are in the closed position, it provides weather protection for almost a 100sq ft area. Pintle hinges were used to mount the shutters to the deck.  He describes it as "A deceptively complex design that included 40 hinges connecting 32 pieces of cypress."  

We chose to paint the shutters white to match the rest of our porch and house trim using the same "Super Paint", and the black hinges were chosen to match the balusters in our railings which are black powder coated, as are all of the hinges.

We actually began this project in October, and worked mostly over the weekends doing what we could, when we could as time allowed, and allowing for the painting and drying time too.  We were finished just before ringing in the New Year!


Our work area for the painting.  Painted bottom sections completed.


Painted top sections completed.


All hinges added.  Ready for installation!


Installation Day!  This is the area where they will be installed


Hard at work installing the top portion, after the bottom portion has been added to this section.


 I'm loving the look already! "Looking good fellas...Keep up the good work!"


***


Installation complete!  Just a few details left to do, by adding some trim and latches on the inside to lock the shutters while closed.  They are doing a terrific job of keeping out the wind and rain, and the leaves and pine straw from the nearby trees.  I think the shutters are beautiful, and they're a nice addition to the whole look of our covered porch.


Trim added to the top and bottom of these sections and latches added.


Close-up of the trim and latches.  The latches keep the shutters securely closed, especially in windy conditions


***


A view from the outside when all shutters are closed.


View from the outside when just the top shutters are opened.


View from inside with the top shutters open.


(I took this photo before the trim and latches were added.)  The shutters are a beautiful and functional addition to our porch. We are very pleased with the whole process, and the completed look is even better than imagined!  Now we can close off the wind and rain, and maybe even laugh at the weather a little bit!


I just love it when a plan, goes better than planned!...


.

.

.

.
Tammy is the design enthusiast behind the blog, Tips, Treats & Treasures, where her creativity is explored with a mixture of her artistic abilities and style through her home decorating, thrifty finds, DIY and creative craft projects, along with her family favorite recipes. She shares through her blog her ideas and helpful tips on everything she has learned over the years and much of which she is passionate about in the hope of inspiring others, with her own unique style storytelling.