Store those reusable shopping bags


~ Tammy's Tip Today ~


That empty tissue box is a great place to store those reusable plastic shopping bags!


...________________________... 


Do you have a mess lots of these, or bags inside of bags of them even?  


...________________________...


I think most of us hang onto them to reuse.  This is what I do with some of mine.


This is a much neater way to store those reusable bags, and you already know those pretty tissue boxes come in many different colors and designs so you can pick and choose what you like.  You probably already have a pretty box on hand that will eventually be empty of tissues and finished being used as a tissue holder.  Simply refill it with your reusable shopping bags!

...________________________... 


You can keep extra boxes on hand in different rooms, such as the bathroom cabinet for handy small trash bags too. 

...________________________...


You can store them on the ready neatly inside your kitchen cabinet.

...________________________...


You can also store them neatly inside your pantry.


You just might also want to keep a box handy and neatly in your car so you can recycle those bags the next time you go to the store!  Or just grab the box from the pantry before you head out!  Do you shop at one of the big club stores?  You always need your own bags there, so this is also a handy way to have them on the ready for when you shop there too!


I think it's a great idea, and a neat and handy way to store those reusable bags!...


My Favorite Fruit Smoothie

We've all heard it before, "Breakfast is the most important meal of the day!"  Although when it comes to making breakfast for myself, I can admit to being lazy all too often and skipping it.  I know, I know, but I have learned and do realize this is not a healthy way to start my day.  That it won't give me the metabolism boost I desire, especially when trying to lose extra pounds, and I certainly want to get my metabolism revved up for the day if it helps me do that!

I started to see results after watching my diet more closely and including healthier choices, and eating a healthy breakfast.  I really do like having breakfast now, and actually look forward to it, plan for it, and enjoy it!  I don't go all wild, like a full on Uncle Herschel's breakfast everyday-(a favorite choice from Cracker Barrel), but I will have that once in a while as a reward, and because I believe that...deprivation is failure!

I'm choosing to start my day with a better balance of healthy choices now.  One of my favorite quick breakfasts has been a fruit smoothie.  It is quick, simple to make, delicious and very satisfying, also it fills me up and fuels me.  Smoothies have been popular for a while and I can see why!  There are many variations and ingredients that can be used so it's never boring.  I do have my favorites, but occasionally I'll experiment by trying something different and out of the ordinary.  If in a hurry in the morning, this is a great on-the-go take-along.  Kids love these too.  It's like having a milkshake for breakfast!


I'm sharing my favorite fruit smoothie recipe today...Strawberry-Banana!

I think it's great for breakfast or an afternoon snack, and I also make this for my lunch if I haven't had one at breakfast.  This is a basic recipe and can be changed by using different flavor combinations.  That's one of the great things about smoothies, the limitless options!

I tend to always have frozen bananas and strawberries on hand, I simply peel ripe bananas, half them and then place them in freezer bags, then freeze.  I remove the leaf tops from fresh, clean, dry strawberries then place those in separate freezer bags, then freeze.

This works well for most fresh fruits so I am always keeping an eye out for sales on fresh fruits so I can buy extras to freeze.  If you are looking for another great way to add more healthy greens to your diet, a handful of spinach is an added nutritional benefit too, and I can't taste that it's in there!(the color will change, but not the taste!  If the green smoothie appearance bothers you, just put it in a non see-thru cup!)

Juice can be used for the liquid in this recipe if you like.  Typically I have used fat-free milk instead of juice, but I discovered almond milk recently and I've found that I love it!  I prefer using almond milk instead of juice for a creamer fruit smoothie, and the extra nutritional benefits of the almond milk.  I also use a protein powder for the added protein.  I like to add in a few ice cubes too.  I just throw all the ingredients into my Ninja blender and mix until well blended....pour it up and then enjoy!


~ My Favorite Fruit Smoothie ~

Strawberry-Banana Fruit Smoothie


Ingredients:
1 cup almond milk, or fat-free/low fat milk, or juice- orange or pineapple
1/2 to 1 scoop of protein powder
1 frozen banana - in pieces
2 large or 3 small frozen strawberries
1/2 cup ice cubes - more can be added for addition thickness
Optionals-
1/4 cup almonds
1/2 to 1 cup fresh spinach
1 to 2 packets of sweetener(I use Stevia) if sweeter is desired


Directions:
Place all ingredients in blender.  Blend well.  Serve. 
Makes about 16 ounces


Sip-Sip & Enjoy!...


Table for the Big Green Egg


We knew we wanted one and weren't planning on one so soon, but there it was...

An Egg-cellent new nesting table for our Big Green Egg(BGE)!

A trip to the Ace Hardware store for some egg-cessories led us to the temptation of a fully assembled table that seemed too perfect to pass up.  A few measurements taken and the decision was made to go home and see if it would fit where we wanted it to be located on our patio.  Yes!...It will fit!  Now a plan of action to get it moved to it's new place at our home.  


Thanks to the help of our friendly neighbor and his pick-up truck, he and the hubby returned to lay claim to the table that would be ours and they loaded it up to bring it to it's new home.  The fellas made it look easy, and in short order the new table was parked where it would live and be on display nesting our BGE!  

It fits perfectly!

...__________________...


An afternoon of staining the table to match our deck made it all the better.  
Hubby did a fine job of it!


We previously used this BGE nest, it worked well enough and was on wheels.  
It also had lift-up shelves...  


And this is the new nesting place!  
The EGG sits on a metal table nest, which provides airflow beneath the EGG.  
The floor tiles were my great idea, and can be used as a cutting surface, heat pad, etc. 

We are very pleased with our new table!  
This adds even more enjoyment to our cooking experiences. 


Most egg-cellently!... 


Italian Pasta Salad


It's Summer and the heat is on.  Perfect for lots of time cooking outdoors on our grills, having picnics and just spending less time in the kitchen. With all of the grilling going on it's nice to have something on the ready, a make ahead dish that is quick to get to the table and enjoy along side those grilled goodies.  

It's a good time for foods that are cool and refreshing too.  Here's a pasta salad that is easy to make and easy to love!  I enjoy many different types of pasta, and there are certainly many to choose from.  This pasta salad brings two pastas together, penne and cheese tortellini for a nice blend. 

You can make this salad ahead of time, it can be served right away or served later after chilling in the refrigerator.  A great take along dish to parties and picnics too.  I like to enjoy it over the next couple of days after I make it for a quick lunch or an afternoon snack as well.    


Italian Pasta Salad 


Ingredients:
1- 1lb box penne pasta
1 - 8oz pkg tri-color tortellini
1 med can pitted black olives, drained, cut olives in half
1 1/2 cups grape tomatoes, cut in half
1/2 cup red onion, chopped (optional)
1 cup fresh parmigiano-reggiano cheese, grated


For the Dressing:
1/2 cup extra virgin olive oil
1 tbsp italian seasoning or 1/2 tbsp each- dried basil, oregano
1 tbsp Mrs Dash Tomato Basil and Garlic seasoning
1 clove fresh garlic minced or 1 tsp garlic powder
1/2 tsp onion powder
salt and pepper, to taste
balsamic vinegar can be added for addition flavor, to taste


Directions:
Cook the penne and tortellini according to the package directions. Drain the penne and tortellini and rinse with cold water.  Drain well.
Place both pastas in a large bowl.  Add tomatoes, olives, red onion, and cheese.
In small bowl ,whisk together olive oil, seasonings, garlic, salt and pepper.  Pour over the salad and stir until well coated.  Serve immediately or refrigerate until ready to serve.


Enjoy...


A "Golden" Day on the Lake


It was a "Golden" day!

A Golden Retriever reunion with other Goldens and their owners, all from the same lineage as our Aeon.


The Syrah Golden Reunion 
July 5, 2014

We had a beautiful day on the lake with friends, old and new. It was a fun day, and the pups had a blast!  They did lots of swimming and playing together.  It was a perfect day, and what a perfect place to spend it!  The Host and Hostess live right on the lake and they were so gracious to invite all of us for a wonderful time at their place, along with all of our pups.  A Special "Thank you" to the Host and Hostess, along with our Breeder Hollie, for bringing us all together.  A great time was had by all!  Lots of delicious food brought by everyone to share as we spent the day together with our beloved golden babies, sharing stories, taking photos, enjoying the beautiful surroundings and the gorgeous day that it was!  Enjoy the photos from this memorable occasion.


  Dogs left to right: Anya, Rosie, Tucker, Jim, Dakota, Starlet, and Aeon.


Happy July!


Hello JULY! Please linger a while longer than June, I'm certainly hoping you will!

*******************

In just a few days we will celebrate the annual holiday of our nations independence along with many other Americans on the Fourth of July!   A day for sharing time with family and friends while enjoying picnics and bar-b-ques, dazzled by sparklers and fireworks lighting the night with grand patriotic flare.  Viewing countless amounts of our American flags waving as our grand ole flags of red, white and blue are so proudly displayed.  A day of celebration to feel especially proud to be a part of this great nation, and great pride in being an American.  Happy July to everyone, and may we all have a safe and happy Fourth of July!


******************* 

In honor of this month and the Fourth of July holiday, this heart is on my front door proudly displaying our red, white and blue and our love for the USA!  I found this metal heart with the painted flag detail at a country store, and I knew the minute I laid eyes on it that it had to be mine!


*******************


I found this cute sparkly heart at the dollar store and I just had to bring it home, it's now displayed on my frig for July too.


God Bless the USA!...


Grilling it up - More Big Green Egg-ventures


As we are loving all things summer at the moment, our grilling and smoking on the Big Green Egg-(BGE) has become an almost daily ritual.  Hubby and I - aka Mr. and Mrs. Chef, are at least feeling like chefs with all of the tasty goodies we've been cooking,   We rang in the first week of summer with some delicious grilled goodies, so I wanted to share some of the images I captured of what Mr Chef and I were up to, and what we've enjoyed!


More Egg-ventures on the Big Green Egg


Can we say feast?  Well, that's a feast for sure.  Mr Chef came in with all of this food to prepare for dinner one evening.  We had cooked our first Beer Can Chicken about a week before.  It was just after we purchased a Beer Can Chicken Rack that folds flat for storage when not in use.  It's one of those "now why didn't I think of that" kind of items!  We really enjoyed the Beer Can Chicken.  It was one of the juiciest chickens we have ever cooked on a grill.  We knew we wanted to prepare another chicken and this was it.

Another new gadget is the Jalapeno Pepper Rack used to cook Stuffed Jalapeno Peppers.  I made whole stuffed jalapeno peppers, and some I cut in half, then stuffed.  I do think the halved type make a nicer presentation, and they go twice as far in servings.  We really enjoy them as a side dish and make them often!  Here is a link to my recipe for Stuffed Jalapeno Peppers. Skewers of Shrimp, Corn-on-the-cob, and BBQ Baked Beans were additional goodies that added to the meal feast.  I had already seasoned and prepped some boneless chicken breast as my original plan for dinner, so we decided to go ahead and prepare those too.  Needless to say we had some left-overs from all of this great food!


...__________________...


We hadn't grilled any steaks yet, so we decided it was about time that we did!  A nice juicy rib-eye steak was the ultimate main attraction grilled to perfection by Mister Chef, and he was quite proud of that too!  As he did the grilling I prepared the side dishes.

This was my first attempt at making this baked Swedish style of potatoes Hasselback Potatoes that originated in Sweden.  A different take on the baked potato, giving it a crisp outer texture and soft inside, I found lots of different recipes online for preparing these. The Spinach was a simple throw together I created by cooking a little onion in olive oil until nicely golden and caramelized. I removed the pan from heat and added the spinach, some crumbled cooked bacon, a dash of garlic powder and a sprinkle of salt, then gently tossed it all together as the spinach wilted down a bit.  it was delicious!
I made this dish again since this post and have perfected the recipe, Sauteed Spinach.


...__________________...


Our first ribs cooked on the Big Green Egg.  These Beef Ribs were the best ribs we've ever had, ever!  We put a plan together from different ideas and techniques that proved to be for us, the best way to cook ribs.  Tasty and very delicious with a perfect blend of sweet, smoky and spicy.  Can't wait to make some more of those!  I'll add details for that later!!


...__________________...


Our largest Pork Shoulder/Boston Butt to date, ten pounds!  Since we were having family visit us we wanted to share one of our new favorite specialties.  Perfect for serving more than a few people, and it is always a crowd pleaser too!

The pork was prepared in the usual way that we have prepared the others before.  We long smoked it over night for about 13 hours.  It was almost falling apart and off the bone.  This being the fourth and largest one that we have prepared, it was the best one yet.  Each time we've had one we are convinced that they are better and better.  We are so happy that our family also enjoyed this with us, and shared in our Egg-venture too.      


Egg-cited for more Egg-ventures to come!...


Curtain Tiebacks - Easy/No Sew


I created curtain tiebacks for my outdoor curtains that were easy, no-sew, and inexpensive! 


After feeling quite pleased with my creative solution I wanted to share it and show how I did it.  

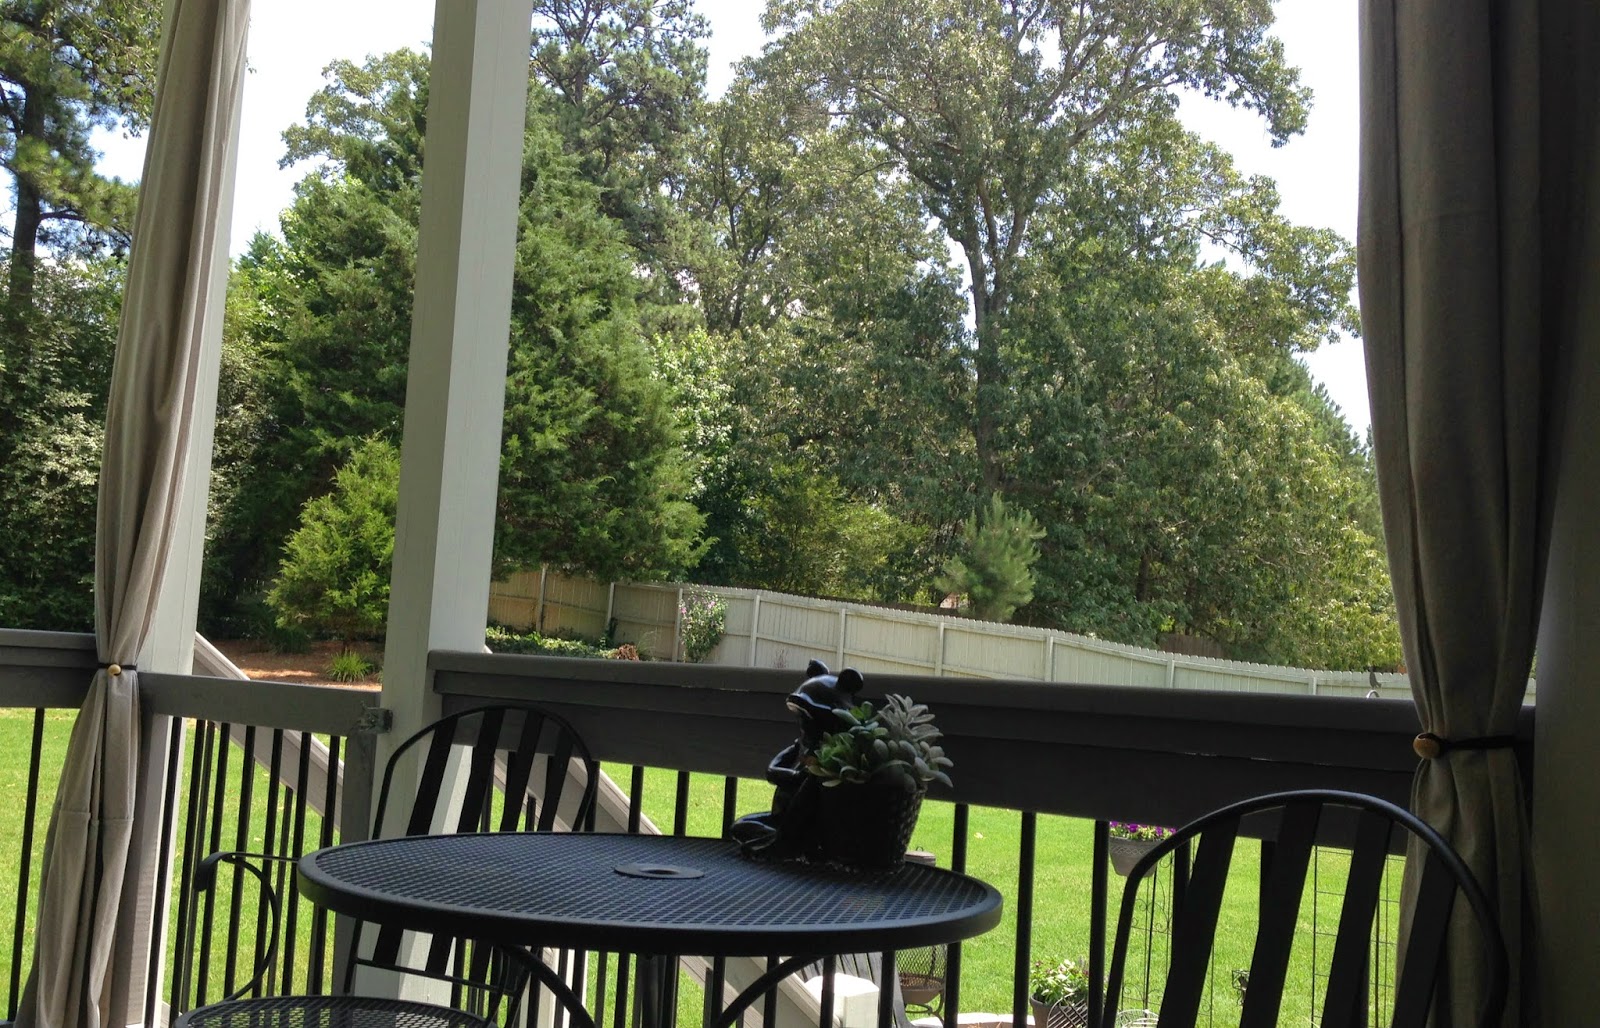
I was in need of something simple, easy to use and inexpensive, to be used as tiebacks for our curtains on our covered porch.  You can learn more about our inexpensive outdoor curtains project here.  We added the curtains not only for privacy, but also for added shade from the sun, and added warmth in the winter when we use our fireplace and an outdoor heater.

They also cut down on the rain that sometimes gets on the porch when it's really raining hard.  We had been using left-over clips from the curtain rings we used to hang the curtains, along with cup-hooks secured to the deck rail to hold the clips and curtains in place when we have them closed, and/or when the wind is blowing them.

However when the curtains are open or pulled back and the wind blows, there's also a need for something to keep them gathered and under control.  I had an extra set of long black shoe laces that worked as a temporary fix when tied around the curtains.  So I purchased a few extra packages of them since I needed several overall, plus they were inexpensive and I was ok with the look.

That works just fine most of the time, but if the curtains have not been tied back and a wind picks up, well I'm out there grabbing them from flight as I think to myself "Auntie Em, Auntie Em!", and I'm trying to tie the laces on quickly!  Whew!  


I knew I needed to come up with a better plan.  A quicker, easier plan!  My creative mind was stumped until the "Ah ha" moment arrived, and I had it!  I was thinking...bungees?  My kids have often called me the "bungee queen", because I can sure find ways where bungees do come in handy and are quite useful in life!

My thoughts are often "I can Tammy-rig it or bungee it!"{wink}  Similar to bungees, I've used stretch hair bands for cord control on many different items and I also did a blog page on that, you can see it here if you like.

(OK, back to the task at hand!)
My original idea was to use large buttons and stretch cord.  While shopping, I discovered some stretch headbands that were already about the perfect length that was needed, but I couldn't find the buttons that I'd had in mind, or that were just-right with large enough holes for the hair bands to fit through, or without metal, or that I thought would hold up well.

I then decided instead to look for some large hole beads and did find round, wooden beads about an inch in diameter.  "Perfect, that will do!"  These tiebacks were a cinch to make and inexpensive as well, which is what I was looking for since they are outdoors after all, and they are not unattractive.  The best part is how quick and easy these are to use, and they do the job nicely!  The cup-hooks secured to the deck rail help to keep them in place.


Now I can add these tie backs rather quickly, and remove them quickly too.  Even when it's windy!


... ... ... ... ... ... ... ... ...


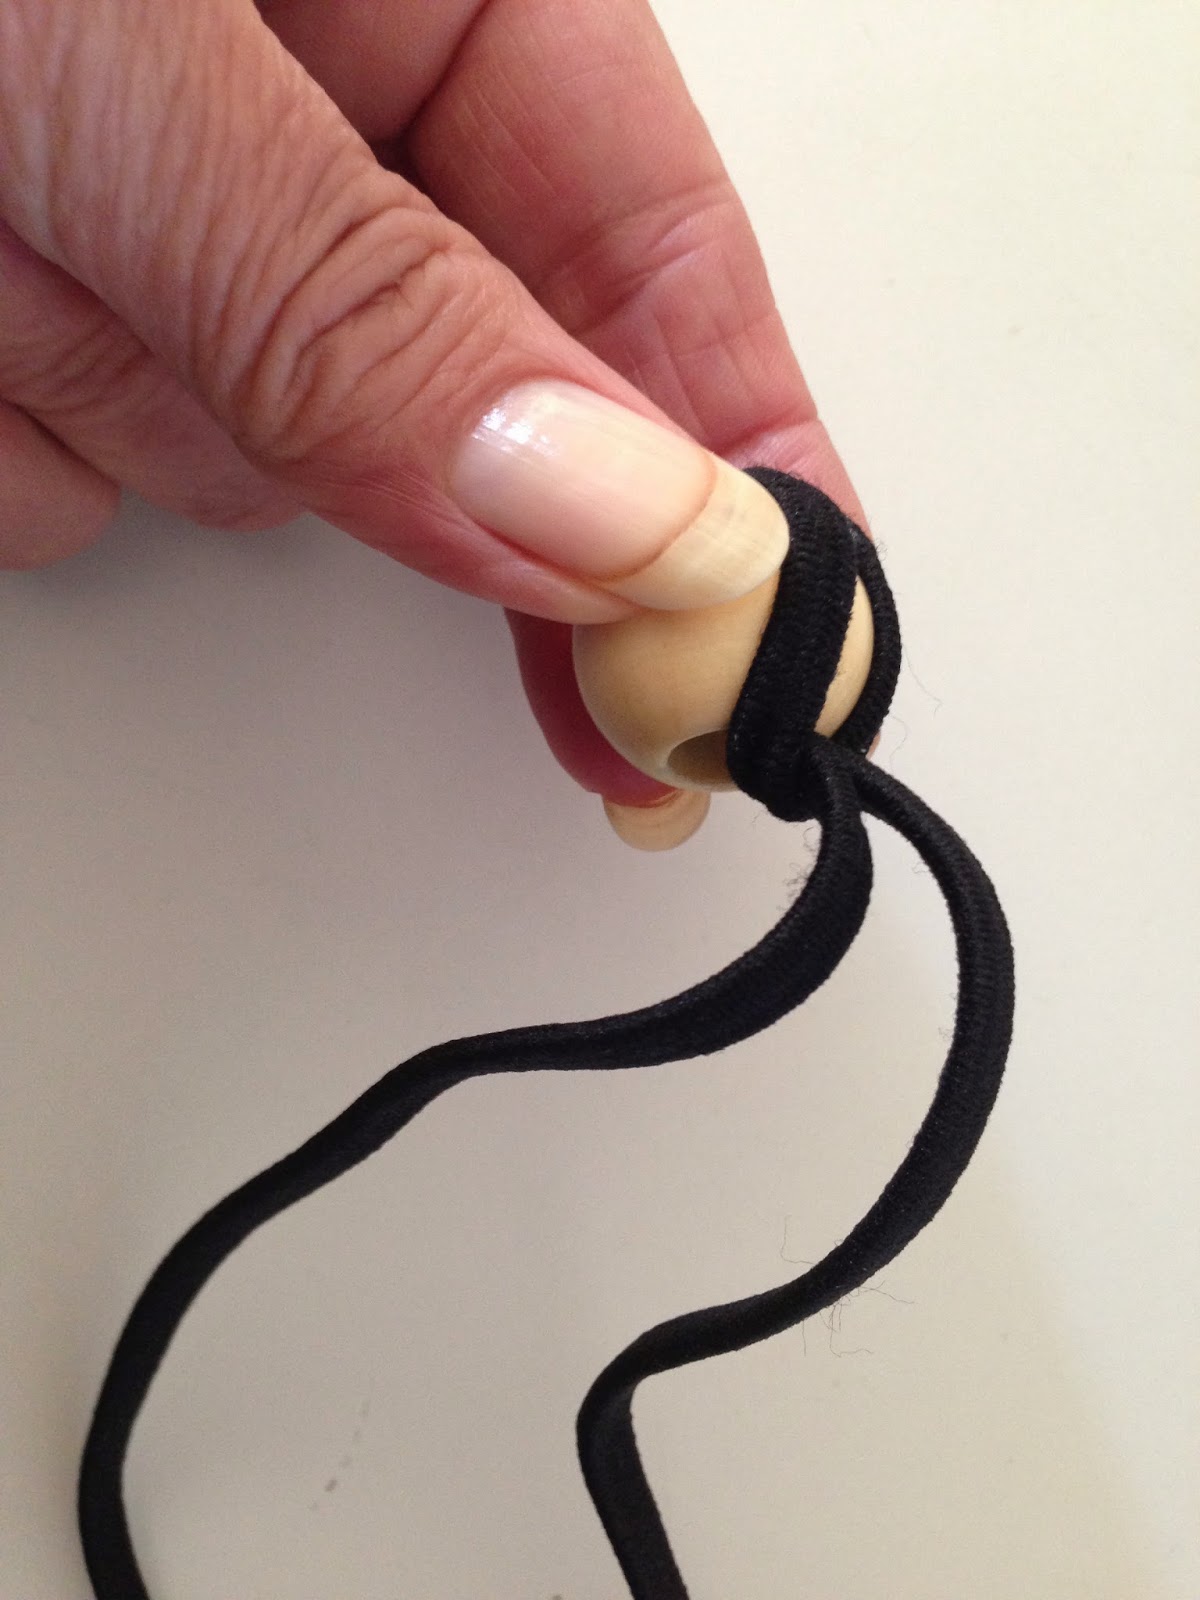
Elastic headbands and large hole beads = Curtain tiebacks


Here are the instructions for how easily I made the tiebacks.

Push elastic band through the bead.


Pull other end through the loop coming out of the bead.


Pull to snug up to the bead.


Loop though one side of the first loop that is around the bead now,
then pull snugly to lock the elastic band in place.


When in use the bead locks on by passing through the loop from the other end.
(These are similar to the pony-tail wraps that have beads on both ends)

ta-da!


A close-up of a tieback in action!


I love it when a plan (ahem)...curtain comes together!


.

.

.

.
Tammy is the design enthusiast behind the blog, Tips, Treats & Treasures, where her creativity is explored with a mixture of her artistic abilities and style through her home decorating, thrifty finds, DIY and creative craft projects, along with her family favorite recipes. She shares through her blog her ideas and helpful tips on everything she has learned over the years and much of which she is passionate about in the hope of inspiring others, with her own unique style storytelling.