Turkey & Dumplings

When it's cold outside I feel the need for comfort food.  One of my favorites is Turkey & Dumplings.  I like both Turkey & Dumplings and Chicken & Dumplings.  I usually save some leftover turkey at Thanksgiving to use for my Turkey & Dumplings, and I make my own Turkey Stock to use also.

Preparing Turkey Stock:
After our Thanksgiving meal I remove all remaining turkey meat from our cooked turkey, some of which we use for turkey & pickle sandwiches the next day (yes I said turkey & pickle sandwiches - and that would be on the freshest white bread, I also like mayo, salt and pepper on mine too.  mmm they are so good!).  The rest of the turkey is placed in freezer bags, then into the freezer.  The remaining, bones, skin and all are placed into a large stock pot, filled about 3/4 full with water, with some onion, celery, and a little poultry seasoning, then placed on a med/high heat til it comes to boil, then turned down to simmer a good while, I give it at least 1 hour.

After an hour the pot of stock is removed from the heat and cooled. Once it's cooled, the liquid is poured through a strainer into freezable containers for freezing-(discard strained items).  First the bowl or bowls are placed into the refrigerator over night, the next day any fat that has settled to the top is skimmed off and discarded.  The liquid has become more gel-like at this point and this is what will be frozen.  This makes some great stock and will be on the ready when I want to make my Turkey & Dumplings, or some good homemade soup.
-This same method can also be used with a whole chicken too, for making Chicken & Dumplings. Although, I often make Chicken & Dumplings a little differently using chicken thighs.  Follow directions below for Easy Chicken Dumplings

I like to use ready-to-bake canned biscuits for my dumplings, it makes for a simple and easy preparation process.  This is a hearty dish and will be good anytime, but when it's cold outside this is like a big warm hug for your tummy.  It is true comfort food for me!  


Turkey & Dumplings     


Ingredients:
8 cups of turkey stock
2 cans of ready to bake biscuits-(not flaky biscuits)
flour
1 to 1-1/2 lb of cooked turkey - cut up/chopped - all white of mixed 
1 tsp. poultry seasoning-optional
Salt & Pepper to taste

Directions:
Place turkey stock into large pot and heat to medium/high heat.  While stock is heating up, open up biscuits and prepare a flat surface i.e., cutting board, parchment or wax paper with a nice dusting of flour, and make a mound of the flour in the center.  Cut each biscuit into quarters and then use fingertips to press each piece on the floured surface, pushing flour onto the piece as you are pressing it, forming a dumpling.  Place each dumpling onto a plate and continue until all dumplings are formed.  The stock should at a gentle boil as you start to add the dumplings one by one to the pan.  Reduce the heat to medium and continue adding dumplings, push them down into the liquid with a large spoon or utensil as you add them.  Gently push the other dumplings aside so each dumpling falls into the liquid.  After all the dumplings have been added, add the turkey and gently combine well.  Reduce heat to low about a half hour, the liquid should have thickened into a sauce and appear thicker and gravy-like, and the dumplings tender but firm.  Serve.     


Easy Chicken & Dumplings
Place 6 chicken thighs in a large pot and add enough water to cover-(approximately 8 cups), place on medium/high heat and bring to a boil, then reduce heat to a simmer and simmer for 25 minutes.  Remove chicken from pot and let cool slightly, remove meat and discard bones, skin or any fat, then set meat aside.  Add one can or 1-1/2 cups of chicken stock/broth to the pot along with other liquid in pot.  Meanwhile prepare dumplings.  Open up biscuits and prepare a flat surface i.e., cutting board, parchment or wax paper with a nice dusting of flour, and make a mound of the flour in the center.  Cut each biscuit into quarters and then use fingertips to press each piece on the floured surface, pushing flour onto the piece as you are pressing it, forming a dumpling.  Place each dumpling onto a plate and continue until all dumplings are formed.  The stock should at a gentle boil as you start to add the dumplings one by one to the pan.  Reduce the heat to medium and continue adding dumplings, push them down into the liquid with a large spoon or utensil as you add them.  Gently push the other dumplings aside so each dumpling falls into the liquid.
After all the dumplings have been added, add the chicken and stir well.  Lower heat to a simmer and simmer about a half hour, the liquid should have thickened into a sauce and appear thicker and gravy-like, and the dumplings tender but firm. 


My daughter and her beautiful sparkle nail polish demonstrates making the dumplings.

ta da!

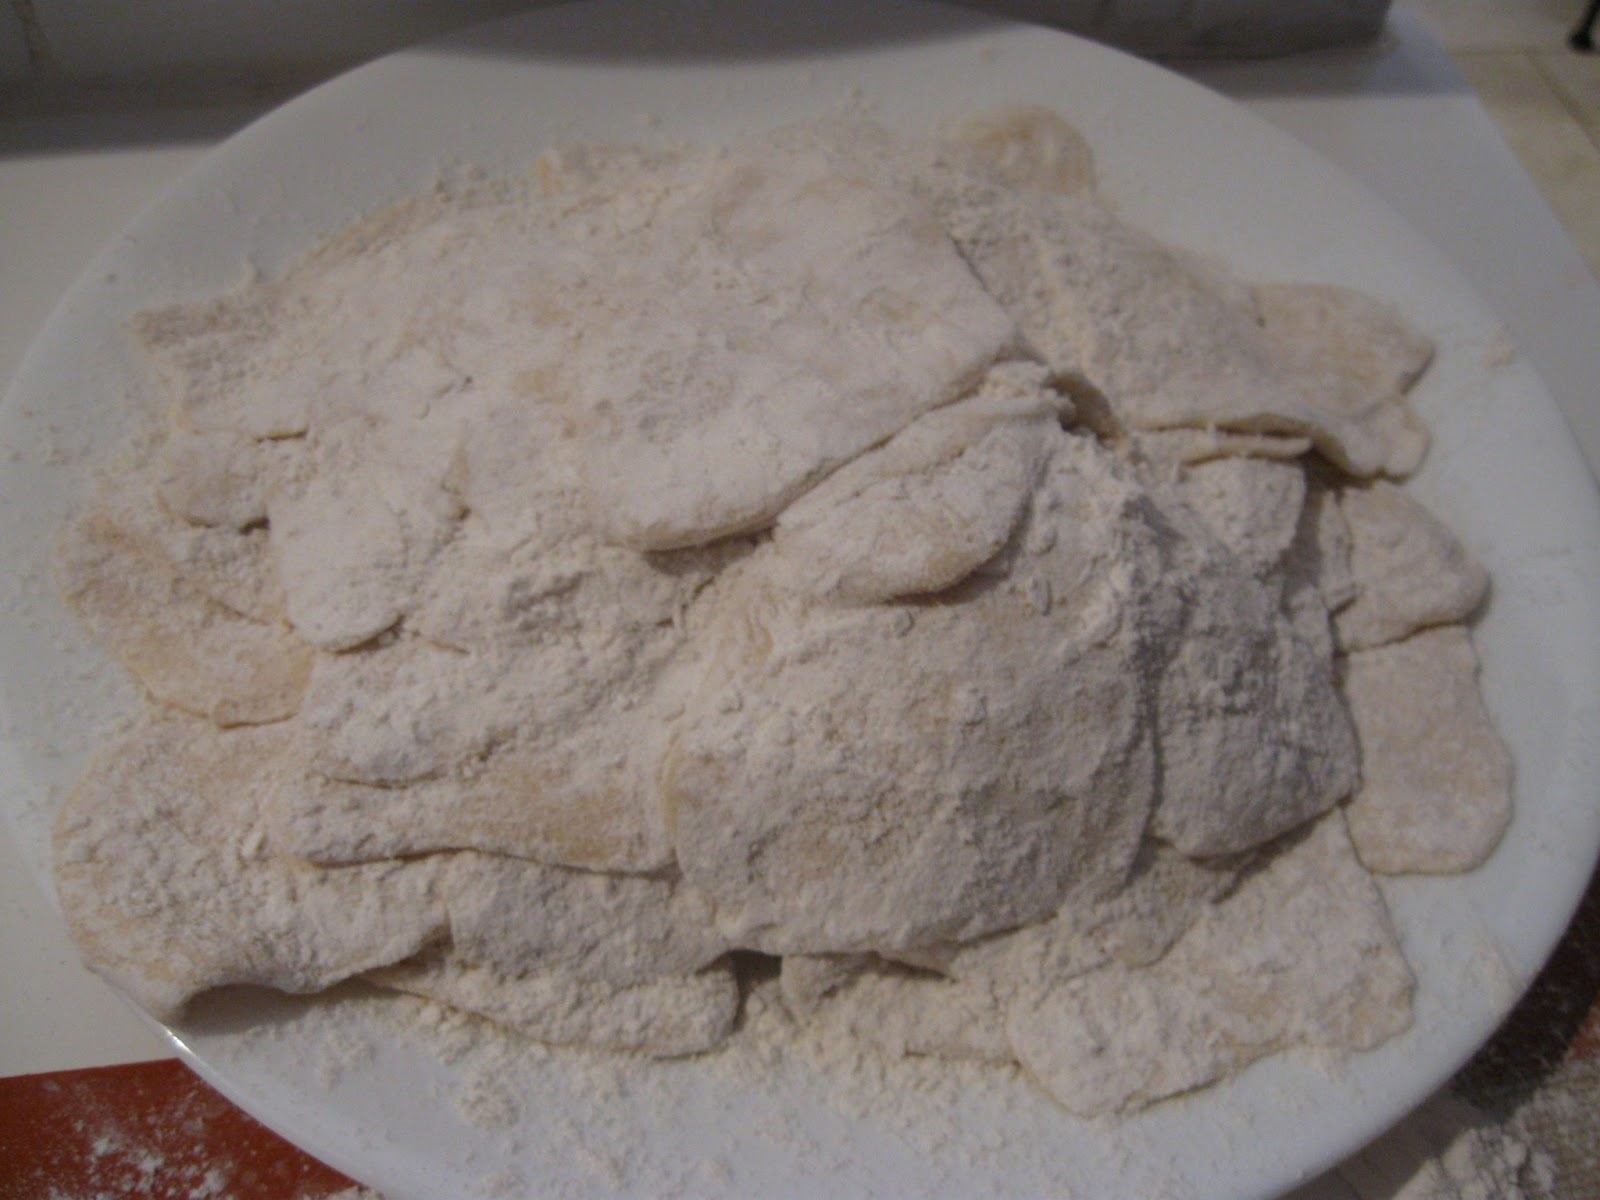
A plate full of dumplings ready to cook.

After adding dumplings.

Simmered to perfection and ready to enjoy comfort!


Enjoy!


Like a big warm hug for your tummy!...


~ Tammy's Tip Today ~ Yogurt my way


Hmm...one might ask, "why would I write about yogurt?"  Well, for starters, I really like yogurt, and it's a beneficial part of eating healthy.  It's a good for you, food!  I discovered greek yogurt a while back and it's the only type of yogurt that I'll buy now.  Did you know that greek yogurt contains about twice the protein of regular yogurt, which can help you feel fuller for longer too.  Also greek yogurt is a good substitute for sour cream, and will save you roughly 200 calories per cup!  I have a few flavor favorites, so I would usually grab half a dozen or so containers of the types I like on each trip to the grocery store.  Yogurt doesn't cost a lot, but most of the time I do find the greek yogurt does cost a bit more.  I like those '10 for 10' sales found at my grocery store, and hey let's face it, saving here and there is always a plus!


Recently, my wise and frugal daughter encouraged me to purchase the large 24 oz. container of plain greek yogurt.  Saying to me, "that it's a much better buy, and I could just add my own fruit to taste."  This sounded like a reasonable idea.  But I really like my favorite flavors, the type in the individual containers, and simply adding some blueberries or sliced peaches (two of my favorite flavors), just wasn't gonna do it for me, and I knew it!  Then I got an great idea, it was kind of a light bulb moment.  I'll buy fruit preserves, or jam in the fruit flavor that I like, and then mix that into the greek yogurt. That's it!  All the better with this idea, because I could control the amounts of the yogurt and the jam, also the calories and sugar amounts by using lighter jams, or low or no-sugar types.  Now I was feeling like that really was a terrific idea, and more of a "why didn't I think of that before?"

This began my no longer having to be disappointed that the store didn't have the blueberry, or the peach that I do so love!  I now purchase the large container of greek yogurt (24 oz.), and I simply mix in my favorite blueberry preserves, peach or strawberry, and I feel frugal, and wise, in doing so.  Also this is less waste since I am only purchasing one container of yogurt, although it's bigger it's not half a dozen or more of them.  Even better, and this pleases my recycling soul!  I really like my new way of enjoying my greek yogurt, the savings, and that I get to make it my way.  I simply add a teaspoon or two of jam to a cup of yogurt ...and it's perfect!


Oh by the way...these preserves are awesome!  I love, love the blueberry!


1 cup greek yogurt + 1 to two teaspoons blueberry preserves = 


My yogurt, my way!...


Cool & Creamy Cucumber Salad


After all of the holiday goodies and sweets, I thought it about time to get at some healthy cuisine!  Here's a nice refreshing salad.  Cool as a cucumber would put it nicely.  But seriously, this is a light salad/side dish you can feel good about.  Cucumbers are a great vegetable to use for many types of salads, they are low in calorie, zero fat, mostly water, and they are mild in flavor but taste good.  I think it's great that you can find cucumbers all year long and that they always seem to be there when you want them.

I like to eat sliced cucumbers with just a little salt and pepper sometimes.  I remember my Mother would often make cucumbers & onions salad, (I need to ask her about making that, so I can share that too!)  I also like to use cucumbers instead of crackers, as in cheese and crackers or hummus and crackers etc, using the cucumbers instead, makes for a lower calorie snack, and the carb conscience can love on that idea!

When a recipe calls for using sour cream, I often use plain non-fat greek yogurt instead, which I did for this recipe, but you may want to use sour cream. I just happen to love greek yogurt and find it works well as a replacement, and I feel it is a healthy choice.  This is something I like to make for myself as a snack, or as a side to go along with lunch.  Just double or triple the recipe of course to make a larger quantity.  


Cool & Creamy Cucumber Salad


Ingredients:
1 medium to large cucumber
1 tbsp plain non-fat greek yogurt or light/fat-free sour cream
1 tsp finely chopped onion or 1/4 tsp onion powder
1 tsp fresh dill, chopped or 1/2 tsp dried dill
1 tsp sugar or 1 packet of no calorie sweetner
1/2 tsp vinegar
salt and pepper to taste
use more or less of the ingredients to your taste.

Directions:
Begin by either peeling the cucumber or not, (I leave a little of the skin on by running a peeler down four sides, and/or scrape down the skin with a fork) and then slicing the cucumber into thin slices (approx1/4 inch).  Set cucumber slices in colander and place where they can drain off some of the moisture.  Meanwhile in a large mixing bowl, mix together the yogurt (or sour cream), onion, dill, sugar and vinegar.  Dry off cucumbers with paper towel if they appear too wet.  Add cucumber slices to yogurt (or sour cream) mixture and toss lightly.  Refrigerate until ready to serve.  Best if it sits in refrigerator for a little while before serving. (I usually just toss in the ingredients as a guess-ta-mation, so I tried to put this together with measurements for sharing, the ingredients can be adjusted per your taste.)


Enjoy!...


Happy Birthday to our Granddaughter


Happy 6th Birthday to our Granddaughter!


We celebrated our Granddaughter's birthday yesterday with a surprise visit to her house to share in celebrating her day!
She had a big time and enjoyed all the special attention and surprises!
That sure is a big cookie!  "Thank you Grandma and Grandpa!"


Me and my grandbabies!  Little Sis likes her finger extensions!


The only thing missing from her birthday was her two front teeth! 


Peanut Butter Cookie Cups


A cookie with a little something extra.  
Peanut butter cookie cups with mini Reese's peanut butter cups inside.

If you like peanut butter, peanut butter cookies and or Reese's cups, well this is thee cookie!  I happen to love all three so, when I got this idea I just couldn't wait to make them!  They were delicious and all I can say is mmmmm!


Peanut Butter Cookie Cups


Ingredients:

1 Peanut butter cookie mix
1 Bag of Reese's mini peanut butter cups


Directions:

I used a packaged peanut butter cookie mix and Reese's mini peanut butter cups.  Prepare the peanut butter cookie mix according to the package directions, fill mini muffin cups about half full, press cookie dough evenly down into cups.  Bake for approximately 10 minutes until puffy and light golden in color.  After removing cookies from the oven, cool slightly , then push mini peanut butter cups into center of the cookies until flush with the top.  Mini peanut butter cups will begin to soften and melt, carefully remove from muffin pan and let set until cooled and chocolate looks firm or hardened again.  Centers may be hot for a while so take care if you try them while still warm!(and yes I know from experience)  They are worth the wait though and even better the next day, if they are still around.*wink*  Enjoy!


Sweet-sational!


Jars Transformed into Decorative Storage

  
This project was a little idea I got after seeing lots of jars re-used for storage containers.  I like that this is another form of recycling since we usually do recycle our glass jars, paper and cans and such on a weekly basis, so this had me feeling good about re-purposing the jars.

I began by saving various sizes of empty food jars.  I decided to only use the tall pasta sauce jars for this project.  Cleaned them well and soaked them in very hot water, this also helped to loosen the labels.  I used Goo-Gone and a good scrubbing to remove all of the sticky residue.

I had planned on using paint for the lids, but tried sanding with a little sandpaper and it worked well for removing the printed ink and paint, and I liked the stainless steel look as an end result.  The addition of a nice decorative knob for the top makes them look a bit more special.  I already had in mind to use the Hugs & Kisses to fill the jars and use as Christmas gifts for my daughters.  They can use the jars for what ever they choose after they enjoy all those Hugs & Kisses, and I'm hoping they will be thinking of me while they are!  


* _________  *  _________ *


Wash jars, soak in very hot water, then remove labels.  Use Goo-Gone to remove sticky residue.


Make a hole in the center of the lid for the knob.  I used an awl and just tapped it with a hammer to pierce the lid carefully while it was on a wooden cutting board, it made the perfect size hole to fit the knobs bolt.


Sand the lid to remove the existing ink print and paint, and you could also paint it. 


A decorative knob for the lid.


Attach decorative knob using the washer and nut.  The knobs I purchased had the washer an nut attached.


I didn't like that the knob had a long bolt attached to it, I cut it off with wire cutters.  This was a bit hard to do, but worth it after all.  (A hack saw might work well too)


A different decorative knob for the other jar.


Both jars ready to fill.


A tag with the words "Hugs & Kisses" on it and tied to the jar with a pretty red bow completes it nicely.


Displaying the two different lids used.


A good re-purpose.
Not bad for something that would've been thrown away...

Christmas Surprises


A couple of my favorite Christmas gifts this year.
I'm so thankful for everything I received this Christmas and I'm feeling very blessed.  I am also very grateful to have had my loved ones put some extra thought into my surprises.  My daughters both spoiled me with many nice gifts, and I had a couple of favorites I wanted to share.  I especially loved a gift from my oldest Daughter and her husband, a family photo collage.  I love it, and I must admit it made me cry when I saw it, happy tears of course.  It's really nice and I know they spent time on it for me.  

I also especially loved a gift from our other Daughter, of a beautiful hand knitted scarf that she made for me, I know she spent time on it for me too and it is so perfectly me, I love it!  Hubby gave me something very special that sparkles, and also a new laptop that I love and am enjoying everyday, and also sometimes into the wee hours of the morning such as right now{*yawn*}, as I type away on this blog post, but I really wanted to share this.  My eye lids may be a bit heavy right now, but my smile is wide and my heart is full.


Family Photo Collage


So many great photos and they did such a great job on it.  I love all the photos they chose to use.  
Our parents placed beside us on the top row, my parents in the upper left corner and Hubby with his parents in the upper right corner (from a trip they took to Yosemite).  I love that they also added a wedding photo of us, and included our beloved dog Jake (who was part of our family, and shared life with us for almost 14 yrs), and the rest of the photos of daughters, son-in-law and granddaughters, and a group photo in the center.  The photos of our granddaughters sitting in leaves shaped into hearts (I love hearts!) are a couple of my favorite recent photos of them too.  And the phrase just completes this.  "Family memories are always close at heart.


Hand Knitted Scarf


This is a beautiful scarf.  
This is an interesting and different type of yarn and knitting technique.  (I'm hoping you can see the detail of it, maybe I should have photographed it on a white background?)  She did a very fine job on this, and it's a one of kind made just for me!  I love it and that it really is so perfectly me.  Black and gold are two of my favorite colors and combinations.  I love how it sparkles too.  Its a big HUG around my neck from her each time I put it on!  


Heartfelt Hugs & Smiles...

Spinach Balls


As I came across a recipe for these Spinach Balls, I thought that they would be great to serve along with the other holiday foods that I had planned to prepare.  I really like spinach, and knowing that there are so many good reasons to eat spinach, any way that I can include it in my diet I will.  These were even better than I had imagined and they were given the thumbs-up by those that tried them.  Some people don't like spinach though.  Can you imagine that?  Well to each his own as they say, or her.  I'll be making these again since they are so easy and so good.          


Spinach Balls


Ingredients:

  • 2 (10 oz.) packages frozen spinach, thawed & well-drained
  • 2 small onions, very finely chopped or 1 tsp. onion powder
  • 2 1/4 c. stuffing with herbs
  • 6 eggs, beaten
  • 1/2 c. melted butter
  • 1/2 c. Parmesan cheese (the type from a can), finely grated
  • 1/2 c. Fresh Parmesan cheese, shredded
  • 2 tsp. garlic powder or 1 clove fresh garlic, finely chopped
  • 1 tsp. black pepper
  • 1/4 tsp. salt


Directions:

Mix all ingredients until well combined.
Form into about 1" balls; place on a baking sheet sprayed with cooking spray, or lined with parchment paper
Bake at 350 for 20 minutes.  Makes approx. 60 balls

Note:
Spinach balls may be frozen, either baked or unbaked.
For pre-baked balls: Remove from freezer about 30 minutes prior to reheating. Reheat in a 350 degree oven for about 10 minutes.
For unbaked balls: Remove from freezer 30 minutes before cooking. Bake as directed (350 for 20 minutes).


recipe adapted from: Spinach Balls


Strawberry Delight


I just whipped up this delicious dessert for the Hubby and I this evening.  I think I could have had a second helping because it really was that good.  It looked so good that I just had to take a few photos, and I thought it was worthy of sharing.  A simple and easy dessert that is sure to please and one that looks as delicious as it truly is.

It took me less than five minutes to put this delicious dessert together.  Slices of angel food cake topped with sliced strawberries and a nice drizzle of melted chocolate, then topped off with whipped cream.  Sounds pretty good doesn't it?  Well, it definitely was!  You can impress your sweetie with this sweetie!  It's a delicious and light dessert, which is why I named it Strawberry Delight!  


Strawberry Delight


Ingredients:

angel food cake (I used a ready made cake from the grocery store) 
package of strawberries 
2 tbsp. chocolate chips or other melting chocolate (I used semi-sweet chocolate chips)
1 tsp. vegetable oil  (I use this to thin the chocolate for drizzling)
whipped cream for topping - (optional)  (I used the type from a can)


Directions:

Slice angel food cake into serving sized pieces and place on plate.  Cut strawberries in half and then into slices.  Spoon sliced strawberries over the cake.  Place chocolate in a microwave safe bowl and melt chocolate in microwave approximately 1 minute, remove and stir in oil (this will thin the chocolate so it drizzles nicely), continue to stir until chocolate drizzles off of the spoon when lifted up above the bowl.  Drizzle the melted chocolate over the cake and strawberries.  Top with whipped topping.   


Slice angel food cake into serving sized pieces and place on plate.

Spoon sliced strawberries over the cake.

Drizzle with melted chocolate.

Top with whipped cream. (optional)


Enjoy!...


.

.

.

.
Tammy is the design enthusiast behind the blog, Tips, Treats & Treasures, where her creativity is explored with a mixture of her artistic abilities and style through her home decorating, thrifty finds, DIY and creative craft projects, along with her family favorite recipes. She shares through her blog her ideas and helpful tips on everything she has learned over the years and much of which she is passionate about in the hope of inspiring others, with her own unique style storytelling.