Showing posts with label Tammy's Tips. Show all posts

Our Garden Perinnials


Sunshine and blue skies always makes me happy!

And, some of my favorite perennials in my garden.

This Privet has been blooming beautifully and so fragrantly for a couple of weeks.
I look forward to it’s white blooms every year, and it’s one of my favorite things in the Spring!
The sun was just popping up and casting a golden glow behind and to the left.


I’m happy to have this beautiful view to enjoy!


Liriope Big Blue, Liriope Variegated, and Hostas. These are easy low maintenance plants that keep on giving! And, they flower in the Summer, the Liriope blooms pretty purple-ish spikes and the Hostas tall white & lavender flowers.
In the Spring I trim the Liriope as the new foliage appears, the Hostas simply pop through the ground and look gorgeous.


My fun tip of the day!


NOT Hot Wings!
Lighter Version -'Tip'


Well, it's that time of year where most of us make resolutions and say "we are going to eat lighter and healthier and vow to lose to weight!"

Every little bit helps so I try to find ways to lighten up or cut the calories of foods I love.

I’ve found a way to satisfy my craving for “Hot Wings” in a much healthier way.
I call this NOT wings!  Grilled Chicken Breast with Buffalo Wing Sauce.

I completed my meal with Roasted Broccoli and a simple side Salad with Chunky Blue Cheese-Yogurt Dressing.   All the flavor without all the guilt!


Yummy!  Enjoy!

You're welcome!


Happy New Year!

Happy New Year!!!  I hope your new year is off to a great start!


~*~


I love my sweet pillow and fun greeting!...Happy New Year!  My friend Charlie at Pillow Panels created these adorable pillows and changeable panels.  Such a cute and creative idea!

I purchased a pillow and panels earlier this year, you can see it here and get all the details to get one for yourself or someone else!  I treated myself to some new panels for Christmas to add to my pillow.  And I gave a pillow panel set to my daughter for Christmas, she loves her’s too.  I also got one for a friend!  It’s truly a gift that keeps on giving!


Happy New Year!


My Christmas Gift Baskets


I made these cute gifts for a few friends, a fun gift basket for making cookies with their kids/grandkids!


~*~


I filled each basket with a cookie mix, sprinkles variety, oven mitt and pot holder, tea towel set, holiday cookie plate, cookie cutter and a few small candy canes, embellished the basket with a Christmas ornament and all tied up with a clear bag with a bow & a bell!


Gift Basket # 1


Gift Basket # 2


Gift Basket # 3


::: Tip of the day :::
If you need a last minute gift idea...This makes a sweet gift! I picked up the basket and contents at Target, the bag, cookie plate and embellishments from the Dollar Tree!


~ I enjoyed making and gifting these, and they enjoyed receiving them!


Thrifty Decor for Summer

These are a few of my favorite things...and colors!


::: I’ve styled this console table in our breakfast area with some thrifted treasures and some items from a few of my favorite stores.

Can you believe I found this beautiful green painted wood & iron piece at goodwill?  Yep, and for just a few dollars, that’s why I enjoy stopping in there sometimes.
You just never know what treasure awaits?


I love decor pieces that you can be creative with, and easily change the look of by adding different elements!

::: This rustic box with metal handles is just the thing to do that with!  I shopped my home and simply added three of my gold painted terra cotta pots, a candle holder lifts the center one, some greenery, curly burlap ribbon, faux grapes and flowers, and voila!

::: I have it sitting upon a thrifted bread box I chalk painted some time ago.  Along with the beautiful green wood and iron piece, which as I mentioned above was also thrifted.
I’m enjoying this look for Summer in front of our breakfast room window.


- Tip of the day -
Try shopping your home before buying new items, and be creative!  It doesn’t have to cost a lot to decorate your home in a beautiful way!


Step Ladder Display Shelf

I often like things that are different, unusual, and out of the ordinary!  So the first time I saw a step ladder used to display items on each step, I knew I had to do that!  I can't take credit for the idea, but I'm so glad someone else thought of it!

We had an old step ladder we'd used over the years and of course it was handy when it was needed, the rest of the time it was stored away in the basement or a closet.  I couldn't wait to grab that little ladder and paint it up!...Chalk paint to the rescue!  Now I enjoy using it to display items and change the decor for holidays and seasons.  Such a fun decor piece!

I'm using it currently to display some of my thrifty treasures!  Isn't it a cute idea?  I sure think so! :)


Pillow Covers


Do you love pillows?  Well, I certainly do!

::: Here’s my tip of the day!:::

Pillow covers make it so easy to change your decor.  And, they take up much less space when not in use.  They’re very cost effective too!  All you need is the basic pillow insert(s) and the pillow cover(s).


I couldn’t resist this sweet roses pillow cover.  I purchased it at Hobby Lobby, you know I love me some Hobby Lobby!  I wasn’t quite sure if I’d love it when I got it home, but guess what? ...I do, I do!  I really do LOVE it!  I love the frayed rosettes, they are so cute.  

It works perfectly here where I wanted to use it!  I love it when that happens!  Now I'm thinking I should have at least two of them!?


Happy decorating!...


Spring Themed Shelf #2


After putting away the Easter decor and the Bunnies, I gave my shelf a little Spring do over.  
I found this cute faux wooden mirror with a removable shelf attached at the bottom, I turned it over and used it with the shelf at the top!


This thrift store find was destined for a paint job, but I haven't made up my mind on that yet.  As is, is doing nicely for now!  I figured turning it over would give me another shelf to decorate on top!  I decided to keep it simple and added some greenery and flowers.

For a fun SPRING display I changed up my "display shelf" using it and some of my other thrifty finds - the metal brackets, glass candlesticks, wreath, scrabble letters, and ceramic tray.


I enjoy finding things and being able to change their appearance or use them in different ways, this was a very easy change!  Think of ways to use an item differently, or not as it usually would be, you'll get more use out of it that way too!


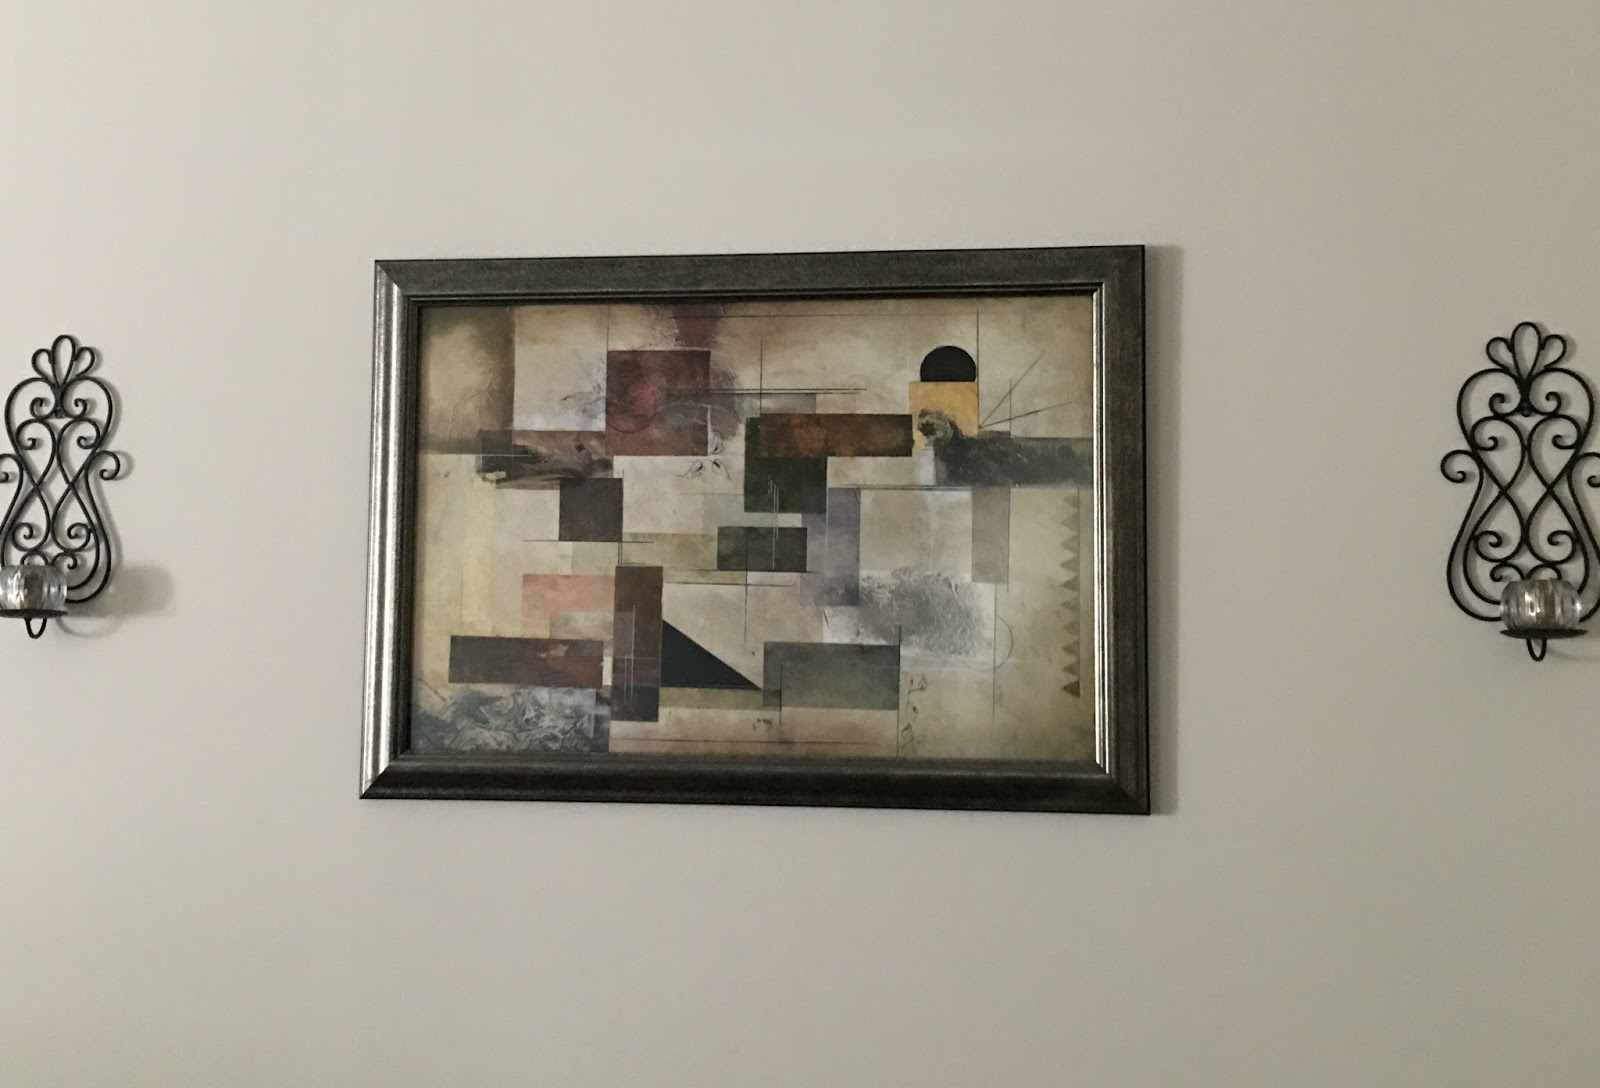
Easy Wall Decor - Find the perfect framed art for your space.


When we did some redecorating in our home a while back, i.e. newly tiled floor, new furniture and accessories, I was having a difficult time finding what I wanted to go on my family room wall to add to the decor.  I couldn't find the "perfect" or just-right framed art piece.  Then an idea struck me!

I did some looking through the poster prints at the craft store [Hobby Lobby] and found an abstract print that I just loved, with the right amount of neutral and color.  I purchased the print and quickly brought it home to see if I really was as confident that this was so perfect, and it was!

I went back to the store with the print in tow, and I then headed to the frame section where I found the perfect frame for my print.  And, lucky for me that day the frames were half-off!  How perfect is that?  Right there near the frames they have custom framing.  For a reasonable fee they turned my print and frame into the perfect piece of art for my family room wall.  I love it! 


If you are having a difficult time finding just the right piece of artwork, I recommend you look through the poster prints and frames at the craft stores.  Then let the professionals put it together for you! 


I picked out a beautiful complementary frame with non-glare glass for the print, and left both the print and frame in their capable care to put together.  They had my new custom artwork ready in just a couple of days.


I really liked the abstract print, and the color tones.  They really were...perfect!


The beautiful frame was so perfect, I almost screamed out loud...OK, I honesty did!  "Yay!"  I couldn't believe it, I was so delighted to have found that frame that day.  All bronze-y and it worked so well with the colors of the print, and my decor!  I felt like a master with my new masterpiece!


Sometimes, everything does turn out just perfectly!...


Cast Iron Skillet - How to Clean and Re-Season


It's amazing how nice my new/old iron skillet turned out after I gave it a good cleaning and re-seasoning.

I couldn't pass up this little cast iron skillet after noticing it at the thrift store.  I thought it would be perfect to use for making desserts for two.  Those skillet desserts are popular at some restaurants and I've been thinking about how nice it would be to be able to make them at home, and now that I have the perfect sized skillet, I can.


This is how the skillet looked when I found it.

At first glance I almost didn't pick it up.  Then I thought about the larger iron skillet I'd gotten from a garage sale some time ago which I brought home, then cleaned and re-seasoned.  I'd had a neighbor/friend tell me all about seasoning and caring for iron skillets.  I knew I could also bring this skillet back to a usable condition just like that skillet I had done before.  The price of three dollars was a great bargain for this thrifty treasure.  I was telling another shopper there how I do this to my iron skillets, she told me she had passed up this skillet and others in similar condition, because she didn't think it was worth keeping and she didn't know how or even that you could, clean and re-season them.

Now that I have done another iron skillet the same way, I wanted to share how easy it really is to clean and re-season a cast iron skillet.  And, no I don't mean just washing it, and then by "seasoning it" simply putting some salt and pepper on it!  Funny thing that this is what the person I was talking to thought I meant!  It really isn't a complicated process, it's well worth the time and effort, and it renders amazing results.

Iron skillets are a worth while investment, and with a little care they will only get better with time and use.  If you have never owned one you will quickly learn it is a pan you can use for many foods, whether frying, baking, or even grilling!  I challenge you to cook a Steak in a cast iron skillet, and then I bet you'll say it's one of the best steaks you ever had!  Oh, and Corn Bread ...it's the perfect pan for that, and Fried Chicken, too!  My Mom has always made her Pineapple Upside-Down Cake in her cast iron skillet, it's the best ever!  I know she has used an iron skillet for just about everything!


Here is how I took the iron skillet from dirty and rusted, to like new again, seasoned and ready to use.


I added about a 1/4 cup of baking soda, along with a little warm water to make a paste, then began scrubbing the inside surface of the skillet.  I used a crumbled up piece of foil and a stiff bristle brush.  I put on some disposable gloves for this step to protect my hands.  I continued scrubbing and the paste began to look dirty and rusty.


I rinsed the skillet and dried it with paper towels.  It didn't look like all of the rust was removed so I repeated the process with baking soda solution and scrubbing until it was all removed, then rinsed and dried it.


Next, I coated the skillet with vegetable oil, I poured in about a cap full, rubbing it all over the entire skillet, the inside, outside, handle and everything!  I rub it on by hand, or use a clean paper towel.  Lard can also be used, I have used oil with much success, and it's what I usually have on hand.


I placed the skillet upside-down in a pre-heated 350 degree oven for 1-1/2 hours.  {Placing it upside-down will prevent the oil from gathering in the bottom of the pan.  I find it best to place a sheet of foil on the rack below to catch any dripped oil or lard.}  I turned off the oven and let the pan cool.  Then it's ready to go!


I recommend not using soap on your skillet.  Some people say it's OK to do that, but the soap can strip away the seasoning, so I rinse the skillet well after each use with warm/hot water, then scrub gently with a little salt if any stuck on foods, then dry it well and give it a nice wipe down with oil before putting it away.  I have also soaked it with a little warm water and then scraped with a foil ball if the other method didn't remove stuck on food.  If your pan is sticking it may just be in need of a re-seasoning.  


With use, and just a little care, your cast iron skillet will get better and better, and it may even become your favorite piece of cookware!


Tammy's Tip Today - Let go and throw out the clutter


I wanted to share a tip today on a couple of useful lists I discovered.  One consists of 200 things to throw away, and the other is 25 Reasons to Get Rid of It.

With Spring approaching, what better time to do some de-cluttering, cleaning out, and organizing throughout the home.


I found these lists to be helpful and perfect for the encouragement of letting go!  Lots of things I hadn't thought about, and I'm sure I have some of them, in duplicate or more even.

I know I for one can admit that I am a bit of a hoarder, but, I also like to have order and organization, too.  Hmm, an organized hoarder, sounds laughable, huh?  It's the crafter and decorator in me.  The Hubby knows all too well what I am talking about.  I've said it before that I do have a need to "hang on" to things, like "I might use that for something, so don't throw that away!"  So my "craft closet" has become an over flow of scattered hiding places where I can put this and that for future use...someday!


*** *** ***

Just getting started may be the hardest part!
Items no longer needed that are in good condition can be donated, recycled, or perhaps sold, maybe via a garage sale if you're planning one and want to make some extra cash from your purge.  Throwing out some of the suggested old, or partially used items is a good place to start for de-cluttering.

Keeping those things that you love or make you happy is a good suggestion, if you really feel you can't part with something.  And, I like the rule of "have you used it in the past six months or longer?"  It may be time to let it go!  Remember to keep in mind not all things are appropriate to just throw out - batteries, paint, household cleaners or chemicals, find out how to safely dispose of those type of items. 

It may be best to start with one room at a time, then decide what to keep, what to donate, what can be recycled, and what to throw out.  Completing the process for each room before moving on to the next should help to keep things in order, and more in control.

Use the lists as a guild to help you let go!  I'll be trying to do just that over the next few weeks, as I get a jump on some Spring-cleaning.  I'm feeling empowered and know I can do this, we all can!

Visit the links at
Embracing Homemaking.net for: 200 things to throw away
Martha Stewart.com 25 reasons to get rid it   Plus: 25 more reasons to get rid of it


Good Luck!...


Celebrating our LOVE for others

With having a day next month that is all about hearts and love, I got to thinking about the things we do in celebrating our love for others and the many ways of showing and expressing it, not just in February, but all throughout the year.

~Giving a "just because" gift to someone you love is always nice.
I like it when I find an item that reminds me of a loved one and I just have to get it for them, and seeing the joy on their face upon receiving it!
Baking something yummy and delicious that I know they love, maybe using a favorite recipe.
A bottle of wine or bubbly to enjoy after a long day.
Surprising them with some of their favorite candy, sweets, or chocolate.
A plant or flowers to add to the home or garden.
A card that expresses my love for them.

~Some just 'because gifts' are not actual items at all.
I find it rewarding to do something special for someone.
An invitation to meet and enjoy lunch or dinner, perhaps at a favorite restaurant.
Offering to give a couple with children a night out alone together, providing child care for them.
A phone call to catch-up, to lend an ear and just listen, or simply to say "I'm thinking of you!"
A big HUG.  I am a hug-ger, hugs can always be expected from me!
A smile, it doesn't cost a thing, and it's very contagious.  And, laughter is too!
Show your appreciation for what others do for you, with gratitude.
Compliment their efforts, achievements, and also their appearance.
Be thankful, kind, and considerate.
Say the words "I love you" out loud, and often!
Small simple gestures with big impact that can brighten someones day.

 ~*~  ~ *~  ~*~      


I enjoy decorating my home and also re-decorating it, too.  That is very apparent for anyone who visits or reads my blog.  I like sharing ideas and tips on home decor, and helping others with what I have learned over the years, both personally and through my blog.  I enjoy sharing my home with my family and friends, and hope they feel a sense of warmth and welcome when they are here.   I feel that my home, and my home's decor, is a reflection of me and my tastes.  It's a part of me, part of the things I love, and part of my heart.  I put time and effort into making my home something I love, and I share it with those I love.

When family and friends are in my home I want them to enjoy being here and have the feeling of wanting to stay a while, being comfortable, relaxed, and most especially, loved!  Having them be a part of my life is important to me and worth celebrating, any day or anytime.  Sharing my home with those I love and care about is one of my favorite ways of showing them my love and appreciation for them.  Whether it's just relaxing on our porch together with beverages and good conversation, or preparing and sharing a delicious meal to enjoy together.


To add to our dining experience, I enjoy setting an inviting table in our dining room, with candles and a beautiful floral arrangement as a focal point.  I love flowers and using them in my home, so I've always enjoyed making my own floral arrangements, often using artificial or faux flowers.  But, I also use fresh flowers, and occasionally combine both fresh and faux.  Fresh flowers make an ordinary day extraordinary and add a special touch. Sometimes I find fresh flowers at the local grocery, it's hard to pass them up once they catch my eye and I literally "stop to smell the roses!"

I recently learned of a flower delivery service.  They reached out to me with the idea for this post.  Upon visiting their website you can enter your zip code to find local florists and unique floral designs that are available.  They also have a blog with a vast amount of information on flowers, and lots of inspiration for those like me who like to make their own arrangements.  But, if you want a professional to do the job for you, or you are planning to send flowers, check them out!  BloomNation, "Unique blooms that are always hand delivered and always local."

~*~ ~*~ ~*~  

I believe flowers are another way of expressing love, whether growing them in your garden to share with those that visit and view them, having them on display in your home to enjoy their beauty and fragrance, making something crafty using flowers for your home or someone else's, giving or sending flowers to lift someones spirit, celebrate their birthday, special occasion, or just to say..."I love you!"

Like flowers, love too, should always be blooming!


Add Sparkle to Chandeliers & Lamp shades

On a recent visit to the craft store I happened to notice something to add a little sparkle to lamp shades.  I have a chandelier I was fortunate to discover a few years ago at an antique shop.  All it really needed was a little TLC with some new wiring and new lamp shades, which with hubby's electrical skills and my good choice of shades, it was quickly good as new.  And, I really love it!  

Now ...back to present day, or to just a couple of weekends ago actually, when I found something I didn't even know existed, let alone that I needed!
Well, OK, wanted.  Something that sparkles.  Sparkle...for my chandelier!
And, I really love sparkle.  Yes, I do.

What I found are Shade Charms, magnetic lamp shade ornaments.  These can be easily added to lamp shades.
There is wire in those lamp shades, ya know? ...so these little beauties just magnetically *click* on to the bottom of them.  Adding a bit of glamour to your lamp shades!


However, I chose to add the charms to my chandelier instead of the shades.  If your chandelier is metal, as part of mine is, the charms can easily be added to the chandelier just like I did for mine.   And, doesn't it look fancy all dressed up with those pretty charms?!


I sure think it does!  It's like added jewelry for my chandelier.

Here's a close-up of a charm, the little silver part at the top is the magnet.


This is what the package of Shade Charms looked like.  


I'm thinking that I must have more of these now!


Notice in this photo below where I added the left-over of the five in the pack to the bottom of my chandelier, and well, now wouldn't you know I'm considering adding more there?


Although I was a bit disappointed that only part of my chandelier is metal (the scrolls), and the lamp shades of course.  I had thought the charms would also look nice under the round part that is just under the white tubes, but sadly it isn't metal there, either!  UGH! :(  And the very bottom also is not metal, which I considered using the fifth charm for. 

I do like the added sparkle on my beautiful chandelier.  And, now to decide, should I get more or not?!  One of those forty-percent off coupons will most likely come into play in helping with my decision.  I'll be considering it, for now!


Here's to adding a little sparkle!...


How to lighten Pine Cones


~ How to lighten pine cones using bleach ~


This was a simple project that was very easy to do, although a bit time-consuming to accomplish.  I have been asked a few times where I got the light pine cones used in my Fall Table Centerpiece.


As much as I'd like to take credit for coming up with the whole idea, it wasn't mine.  I discovered it via eHow, and I had read a few comments that it didn't work for some people who had tried their method.  But, after succeeding with lightening my pine cones, I wanted to share the process I used to achieve the look I got.   


My fondness for neutral colors has me loving the outcome of this project!  I was quite skeptical when I first saw info about doing this, but my curiosity said "do it!"  I figured, what's the harm in trying?  I have an abundance of pine cones around my yard, and bleach doesn't cost very much!

After I had collected a few pine cones from my yard, I placed them in a trash bag, sealed it up tightly, then left it outside on my deck for a few days.  I figured if there were any kind of bugs or critters in there they wouldn't last long!  I surely didn't want them in my house! (I've read about putting the pine cones in the oven to do this and to dry out the pine cones, but like I said, I didn't want any bugs or critters in my house, or my oven either! YUCK!)   

To bleach the pine cones: 
I placed a large plastic pitcher in my kitchen sink and filled it about three quarters full with pine cones, then slowly and carefully poured in the bleach covering them over half way up the pitcher.  It was approximately two thirds full, then I added water the rest of the way to cover the pine cones completely.  I'd say it was a little over a two-to-one measure of bleach-to-water (I didn't have a lot of bleach at the time so I added water, full bleach may be fine and might produce quicker results).  I used my collected pine cones from my yard, and a few other small ones I had gotten from the craft store last year.  

I placed a saucer over the pine cones and weighed it down with a heavy mug filled with water so the pine cones would stay submerged in the bleach solution.  I let them sit like that for about two days, leaving them off to the side of my sink in the kitchen.  During this time the pine cones closed up, and they then took up less room in the pitcher.  


Next, I removed the pine cones carefully from the bleach and pitcher over my sink and placed them into a colander, rinsed them and left them to drain off in the sink over night.  They appeared only slightly lighter in color at the time and I was skeptical as to whether it had worked.  In the morning they were still not dry or opened all the way, I took them out of the colander, placed them on a large cookie sheet lined with paper towels, set them aside and left them to dry out.

The pine cones opened up again as they were drying, but it did take a few days before they were fully opened.  The pine cones I had collected began to look lighter, a beige and taupe color.  The small store bought pine cones didn't lighten up as much.  I suspect they may have been color-enhanced, and might have just needed more time in the bleach.  I may give those another try! 


Overall this project was easy, it did take a while, but the result was worth the effort.  I'm not skeptical anymore!


I used the lightened pine cones in decorating my fall table centerpiece.


And, also in decorating my fall mantel.


As you can see the bleached pine cones are lighter than the other pine cones.  I like the look of both types, but I am a little partial to the lighter, bleached pine cones at the moment.  I like the color results after bleaching.  They work well with my other home decor, and blend in nicely with my neutral colors.  And, I like using both types together because of their contrast.


Saving Money the "Wholesale" way


Do you have a wholesale club membership?


I do, I have a Costco membership.  I re-new it every year.  But, I have to admit to not using it as much as I should.  I do always ask myself after I have been shopping there, "Why don't I go there more often, or even regularly?"  Honestly, it's that although I have two locations that are both about the same distance from me, they are about a half-hour drive away.  I have the other big name warehouse store right around the corner from me, but I do prefer Costco.

*** *** ***

My friend Clark Howard, well, he isn't my personal, actually ever met him friend.  But, he is dear to me just the same.  You see if you don't know who he is, he's the go-to-guy to listen to when he has something good or even not so good to share.  He offers tips and helpful information, whether it's about something you need or need to check-out, something to steer clear of, or something you must have.  I first learned of him on our local news.  
You can follow Clark Howard on his website if you like, and on other social media from there.

The reason I made mention of him is because recently, Clark featured an article that got my attention, "9 Items That Will Pay For Your Costco Membership," originally written and shared on saveoutsidethebox.com.  After checking it out, I asked myself again, "Why don't I go there more often?"  It's really a no-brainer.  Saving money is always a motivator, or at least it should be!

Tires, gas, movie tickets, luggage, rotisserie chicken, pizza, were some of the items listed.  
One might never have thought to purchase tires at Costco.  I read that they often offer $70 to $80 off certain brands, along with free tire balancing and rotation, plus free flat repairs.  And, they do stand behind everything they sell and offer a money-back guarantee.

Speaking of guarantee, Costco offers a free refund for the full cost of the membership fee if you're ever dissatisfied with your membership, at any point.   There's plenty of savings to be had with the basic membership - the Gold Star Membership - but those who shop there more frequently can benefit even more with the Executive Membership and earn an annual 2% reward or more!  My daughter and her husband validated this bit of info since they know first hand by getting reward checks from Costco.  They are huge Costco shoppers, and fans!

Among the list of nine items was also wine.  That's always an attention getter for me.  I do love wine, and saving money when buying it is definitely a plus.  I have scored some great deals on wine when shopping there before.  I learned there is even a blog featuring all their wine at costcowineblog.com, how cool is that?  I have that link bookmarked in my favorites now for sure!

I never knew you could save money on movie tickets at Costco.  I'll also be checking out that deal.     

I have gotten some fantastic deals at Costco.  One deal in particular is a nice camera the Hubby got me last Christmas (along with a little help from me picking it out, and also from my SIL who saw the deal and shared it with me).  I realized the savings on that purchase alone covered my membership fee for last year!

All this great info has me wondering even more about what all I'm really missing out on, along with getting my membership fee covered via the savings!  I hadn't quite looked at it like that before, and now I'm thinking of the money I could, or should be saving!        


I'm off to Costco to see what latest and greatest bargains are available!...


For the love of Bacon


Hey bacon lovers! ...and who doesn't love bacon, huh?  If you haven't heard of this amazing idea you'll be surprised by how simple it is.  And, it just might change the way you prepare bacon from now on after you give it a try.  Bake your bacon.  Yes, bake bacon in the oven instead of cooking it in a pan on the stove top.  It's less-mess, the bacon will cook more evenly, and you don't need to stand over it, turning it and being splattered with bacon grease.


Thanks to Martha Stewart and marthastewart.com for this awesome tip.  Whether you like her, love her, or neither of those-(gasp!), she was one of the firsts sharing all things home.  Good things, that is, cause she always let us know..."it's a good thing!"  There is a reason she is still as popular as ever.  She knows her stuff, and has been sharing it with us for years.  Thanks Martha!

This sure is 'a good thing', and I certainly wanted you to know all about this good thing if you didn't!  Now ...Let's get busy and make some bacon!


Baked Bacon

For one pound of Bacon:
Directions:
Preheat oven to 400 degrees.  Line rimmed baking sheet(s) with aluminium foil, lay each bacon piece flat and do not overlap.  Bake until crisp and browned approximately 15 to 18 minutes or until desired doneness, rotate the sheet(s) once during cooking process.  Transfer the strips to paper towel to drain.  Blot excess grease from top of bacon if necessary or desired.  Thicker bacon will require longer time to cook.

Optional suggestions:  Use parchment paper to line pan.  Sprinkle brown sugar on bacon strips for added sweetness.  Sprinkle black pepper on bacon strips for peppered bacon.  Lightly drizzle on maple syrup for maple flavored bacon. 


Note:
-The first time I cooked the bacon in the oven for 20-22 minutes. I *drained the bacon grease from the pan after baking, and then added a few remaining uncooked pieces to the previously used foil lined pan. The bacon was crispier then the first batch at 20 minutes time. *(I used a glass pyrex bowl to drain the grease into since it was very hot!)

-The next time I prepared bacon, I used the same type and thickness, but drained the grease after 10 minutes then turned the pan and finished for additional 10 minutes.  The bacon was nice an crisp.


And, this is one of my favorite ways to enjoy bacon...

The BLT!  Bacon, Lettuce and Tomato sandwich! ...mmm, hmm.


Here's something else I came across for cooking bacon, you might want to check out this gadget for cooking bacon in the microwave.
 http://www.makinbacon.com/about.php


I much prefer baking bacon now, and it really is so much easier and less messy than cooking it on the stove top!  I feel like I've been doing it wrong all these years!


It's a whole new way of makin' bacon, or bakin' bacon!


Enjoy...


.

.

.

.
Tammy is the design enthusiast behind the blog, Tips, Treats & Treasures, where her creativity is explored with a mixture of her artistic abilities and style through her home decorating, thrifty finds, DIY and creative craft projects, along with her family favorite recipes. She shares through her blog her ideas and helpful tips on everything she has learned over the years and much of which she is passionate about in the hope of inspiring others, with her own unique style storytelling.