Showing posts with label Snacks. Show all posts

Air Fryer Corn Tortilla Chips


Snacking happy!  I’m always looking for new ways to eat healthy, lighter or cut calories.  Snacks are important to help one stay satisfied between meals, but they can throw the balance way off if not careful!


We’ve been enjoying these guilt free Air fryer corn tortilla chips and salsa!  Two whole corn tortillas are only 100 calories, and Salsa is almost no-calorie at only about 10 calories per 2 TBSP!

These air fryer chips are so simple to prepare and so delicious!

To prepare:  I cut the whole soft corn tortillas into chips, put them in a single layer, spray lightly with olive oil spray, place them into the Air fryer and cook at 400° for approximately 8-10 minutes, then serve with some tasty salsa.


~*~


Happy “Cinco de Mayo!”

Today we are enjoying this!  We always love my homemade Guacamole with Salsa and fresh Air Fryer Corn Tortilla Chips!


~ Happy Hour goodness today!


Lemon Zucchini Bread


This delicious Lemon Zucchini Bread is amazingly good!  Yep, there’s zucchini in it!
I adapted an original recipe found on Pinterest a while back and made it my own.  Now don’t be afraid of the zucchini if you’ve never had any type of zucchini bread because you won’t taste it!  Plus, I shred the zucchini very finely and it’s barely even noticeable.  You could peel the zucchini, but I don’t peel mine.  The zucchini is important though, because it makes this delicious bread amazingly good!
And, it’s amazingly easy to make, too!
If you like sweet breads you’ll love this!  I think it tastes very similar to the lemon cake at Starbucks!


~*~


This was fresh from the oven and the house smelled so good!  I found the recipe back in late summer and we have had it a few more times since.  We really like this sweet bread and I think it's perfect any time of the year, no matter the season.  It truly is delicious!  My husband was skeptical at first but he was surprised that it doesn't taste like there is zucchini in it!  I hope you'll give it a try!

I figured it would be great as something different on the dessert table for Thanksgiving!


Lemon Zucchini Bread


Ingredients:


1 1/2 cups all-purpose flour

1/2 teaspoon baking powder

1/2 teaspoon baking soda

1/2 teaspoon salt

3/4 cup granulated sugar

Zest of 1 large lemon

2 large eggs

1/2 cup oil (vegetable or canola oil) -I used melted coconut oil

3 teaspoons fresh lemon juice

1 teaspoon vanilla extract

1 cup grated zucchini


Glaze: Optional 


1 cup powdered sugar

4 teaspoons fresh lemon juice


Instructions:

Preheat oven to 350 degrees F. Grease and flour a 8 x 4 inch loaf pan.  Set aside.
In a large bowl, whisk together the flour, baking powder, baking soda and salt.
In another bowl, combine sugar and lemon zest, and stir well. 
Add eggs, oil, lemon juice, and vanilla, and stir until smooth.  Stir in the dry ingredients until combined. 
Fold the zucchini into the batter and pour the batter into the prepared loaf pan. 
Bake for 45-50 minutes, or until toothpick inserted in the center comes out clean. 
Allow to rest in the pan for 10-15 minutes before removing the loaf onto a wire cooling rack to cool completely.
While the bread is cooling, make the glaze by combining the powdered sugar and lemon juice in a small bowl until smooth. 
Drizzle the glaze over the bread.  Slice and serve.


Enjoy!...


Peanut Butter Caramel Dip


I have a tasty treat to share today!  Well the info all about it, anyway.  I enjoyed every last bit of what I made of it earlier all by myself.  But, had you been here with me I would have shared my treat with you.  I really would have!    

Doesn't it look yummy?  It is! ...or was!    


I noticed a recipe printed on the lid of my Smucker's Peanut Butter for Peanut Butter Caramel Dip.  Yum!  I was salivating as I read through the ingredients, while I made note of what would be needed on my next trip to the grocery store so I could make 'my own' version of the recipe.  I was making plans!

I love Caramel Apples and this dip got me thinking that it's almost that time of year when they start to make an appearance.  Dare I use the 'F' word and say Fall, even though we do have the better part of September to enjoy the remainder of Summer yet, since Fall doesn't officially begin until the 23rd of this month.  I don't really hate Fall mind you, I'm just one who likes Summer much better!


I altered the recipe printed on the lid above!  To make my Peanut Butter Caramel Dip I picked up some crunchy peanut butter, because I only had smooth at home, and I thought the crunchy would give me more of a 'caramel-apple' appeal.  After all there are usually nuts on caramel apples, and that's just one more thing I like about them.  I left out the cinnamon, and I used the regular sweetened caramel topping.  Actually, I didn't even see any of the sugar-free variety at the store, and I figured I'd prefer the regular caramel topping anyway.

I only used about two tablespoons each of the first two ingredients since I was making this only for myself, and I also added just a couple teaspoons of milk (you can use honey if you prefer to not add milk, either way works, I've done it both ways), this recipe can be altered to your preferences, and I sliced up one apple for dipping.  The Gala apples are a favorite of mine and were perfect with this delicious dip, but I'm sure what ever type of apple you prefer will be good too.


Peanut Butter Caramel Dip


Ingredients:
1/2 cup peanut butter, crunchy or smooth 
1/2 cup caramel topping
2 tablespoons milk / or use honey instead
2 apples cored and cut into wedges


Directions:
Mix peanut butter and caramel topping in bowl until blended.  Stir in milk to make a smooth consistency, adding more milk as needed.  Serve with apple wedges.
Makes 2 to 4 servings


Enjoy!...


My Favorite Fruit Smoothie

We've all heard it before, "Breakfast is the most important meal of the day!"  Although when it comes to making breakfast for myself, I can admit to being lazy all too often and skipping it.  I know, I know, but I have learned and do realize this is not a healthy way to start my day.  That it won't give me the metabolism boost I desire, especially when trying to lose extra pounds, and I certainly want to get my metabolism revved up for the day if it helps me do that!

I started to see results after watching my diet more closely and including healthier choices, and eating a healthy breakfast.  I really do like having breakfast now, and actually look forward to it, plan for it, and enjoy it!  I don't go all wild, like a full on Uncle Herschel's breakfast everyday-(a favorite choice from Cracker Barrel), but I will have that once in a while as a reward, and because I believe that...deprivation is failure!

I'm choosing to start my day with a better balance of healthy choices now.  One of my favorite quick breakfasts has been a fruit smoothie.  It is quick, simple to make, delicious and very satisfying, also it fills me up and fuels me.  Smoothies have been popular for a while and I can see why!  There are many variations and ingredients that can be used so it's never boring.  I do have my favorites, but occasionally I'll experiment by trying something different and out of the ordinary.  If in a hurry in the morning, this is a great on-the-go take-along.  Kids love these too.  It's like having a milkshake for breakfast!


I'm sharing my favorite fruit smoothie recipe today...Strawberry-Banana!

I think it's great for breakfast or an afternoon snack, and I also make this for my lunch if I haven't had one at breakfast.  This is a basic recipe and can be changed by using different flavor combinations.  That's one of the great things about smoothies, the limitless options!

I tend to always have frozen bananas and strawberries on hand, I simply peel ripe bananas, half them and then place them in freezer bags, then freeze.  I remove the leaf tops from fresh, clean, dry strawberries then place those in separate freezer bags, then freeze.

This works well for most fresh fruits so I am always keeping an eye out for sales on fresh fruits so I can buy extras to freeze.  If you are looking for another great way to add more healthy greens to your diet, a handful of spinach is an added nutritional benefit too, and I can't taste that it's in there!(the color will change, but not the taste!  If the green smoothie appearance bothers you, just put it in a non see-thru cup!)

Juice can be used for the liquid in this recipe if you like.  Typically I have used fat-free milk instead of juice, but I discovered almond milk recently and I've found that I love it!  I prefer using almond milk instead of juice for a creamer fruit smoothie, and the extra nutritional benefits of the almond milk.  I also use a protein powder for the added protein.  I like to add in a few ice cubes too.  I just throw all the ingredients into my Ninja blender and mix until well blended....pour it up and then enjoy!


~ My Favorite Fruit Smoothie ~

Strawberry-Banana Fruit Smoothie


Ingredients:
1 cup almond milk, or fat-free/low fat milk, or juice- orange or pineapple
1/2 to 1 scoop of protein powder
1 frozen banana - in pieces
2 large or 3 small frozen strawberries
1/2 cup ice cubes - more can be added for addition thickness
Optionals-
1/4 cup almonds
1/2 to 1 cup fresh spinach
1 to 2 packets of sweetener(I use Stevia) if sweeter is desired


Directions:
Place all ingredients in blender.  Blend well.  Serve. 
Makes about 16 ounces


Sip-Sip & Enjoy!...


Roasted Chickpeas - A Crunchy Healthy Snack


I've discovered a new snack that I love, and it's one that I can feel good about enjoying!  Chickpeas seasoned and roasted to a crunchy and chewy goodness that fulfills my need for something crisp and tasty.  I'm like most folks when it comes to loving potato chips, all types of chips that is.  It's hard to resist that crunch, handful after handful.  Until, "Uh oh, I know I shouldn't have eaten that!"  We've all done it!  If you are trying to watch what you are eating, looking for a better snack for when cravings start and don't want to fill-up on potato chips.  Well, this is a great way to satisfy that want/need, more like overwhelming desire, to stuff thyself with chips.

You can eat these Roasted Chickpeas and feel much better knowing it's a healthier, good-for-you snack instead.  Chickpeas are a good source of protein and fiber, very low in fat, and are low in calories too!  I have always liked chickpeas and enjoy them in salads.  I like to make hummus using chickpeas too, and you can find my recipe for hummus here.  These roasted chickpeas would be great on salads as well.  I like spicy, so I added a little jalapeno seasoning to the batch I made today.  I'm not missing those high fat jalapeno chips so much now!    


Roasted Chickpeas


Ingredients:
1 can chickpeas, drained (I use the low sodium)
1 tbsp olive oil
Original Mrs. Dash Seasoning (or preferred seasoning of choice)
1 clove crushed garlic (optional)
salt and pepper, to taste


Directions
Preheat oven to 400 degrees. Rinse, then drain chickpeas throughly, then gently dry them off on a kitchen towel or paper towels.
In mixing bowl add chickpeas, olive oil, seasoning, garlic, salt & pepper.  Stir gently to mix well.  Place on cookie sheet(can line cookie sheet for easier clean-up). Bake at 350 for 50-60 minutes until golden and crunchy.  Remove, let cool.  Serve.  Store left-overs in an air-tight container and refrigerate.


source: Recipe adapted from: Redbook-Low Calorie Snacks


S'more S'mores


Say "S'mores" and I think of summertime, and an evening campfire.  Although we can also make them late into the fall sometimes too, since here in the south it is often nice enough to have an evening that is warm with a bit of chill in the air, perfect for a cozy fire in the backyard.  Also having a fire pit in the yard is common now days.  A campfire or backyard fire is always a great time for making and enjoying s'mores.  The thought often reminds me of the many times I would allow my kids and their friends to camp-out in the backyard during the summertime.  They just thought is was the coolest thing, real tents and everything, and especially the campfire!  I liked it because they were right here at home with all the benefits of home, but enjoying the benefits of camping too.  No camp-out would be complete without making s'mores, so they were always included in the plan.  

On one occasion, while having the campfire all ready and the kids excited to make s'mores, I realized I totally forgot to pick up some graham crackers when I had been shopping for all the camp prep.  "Seriously?"  Well it didn't stop me from making s'mores fun.  Sometimes you have to try something a different way.  Luckily I had chocolate chip cookies on hand...Yep, good ole Nabisco Chips Ahoy, chocolate chip cookies.  They were a huge hit, and most of the kids liked them even as much or better than the traditional way.  Personally, I to this day still prefer to make them using those chocolate chip cookies.  Give it a try, you might be surprised and find that you do like them too.  You can still add the chocolate candy bar if you like, or the chocolate chips in the cookies may be enough chocolate for you.  Although there's always room for more chocolate if you ask me!  Toast up those marshmallows and then squish 'em (don't you just love that technical term?), between two Chips Ahoy chocolate chip cookies, and mmm, mmm!  S'more please!


...__________________...


...__________________...


This got me thinking about making s'mores cookies.  I found many recipes on my search and there are a gazillion different recipes for s'mores cookies that look easy and tasty, and would offer that s'mores flavor.  I came across a couple that can be made on the grill.  That's something I had never tried.  And who wants to turn on the oven when it's 90 degrees outside?


This S'more Pizza makes for a great dessert, also a fun treat for the kids to put together.  After cooking dinner on the grill, you make dessert on the grill too!  Yummy!

Grilled Chocolate Chip S’more Pizza


Recipe from  Pillsbury


...__________________... 


I'm a huge fan of Nutella, and I also love bananas so this is very much to my liking.  Another interesting way to make s'mores on the grill.

Banana-Nutella S'Mores


image source
Recipe from Food and Wine


I think both of these could also be adapted to prepare in the oven.  How about a treat during winter to make you feel like it is summer again?!  I'll have to give that a try later on.  Oh my, did I just say...winter?  Pffft!


No worries!  It's still summertime, it is August 31st, and the temperature was 88° today! ;)...


Cool & Creamy Cucumber Salad


After all of the holiday goodies and sweets, I thought it about time to get at some healthy cuisine!  Here's a nice refreshing salad.  Cool as a cucumber would put it nicely.  But seriously, this is a light salad/side dish you can feel good about.  Cucumbers are a great vegetable to use for many types of salads, they are low in calorie, zero fat, mostly water, and they are mild in flavor but taste good.  I think it's great that you can find cucumbers all year long and that they always seem to be there when you want them.

I like to eat sliced cucumbers with just a little salt and pepper sometimes.  I remember my Mother would often make cucumbers & onions salad, (I need to ask her about making that, so I can share that too!)  I also like to use cucumbers instead of crackers, as in cheese and crackers or hummus and crackers etc, using the cucumbers instead, makes for a lower calorie snack, and the carb conscience can love on that idea!

When a recipe calls for using sour cream, I often use plain non-fat greek yogurt instead, which I did for this recipe, but you may want to use sour cream. I just happen to love greek yogurt and find it works well as a replacement, and I feel it is a healthy choice.  This is something I like to make for myself as a snack, or as a side to go along with lunch.  Just double or triple the recipe of course to make a larger quantity.  


Cool & Creamy Cucumber Salad


Ingredients:
1 medium to large cucumber
1 tbsp plain non-fat greek yogurt or light/fat-free sour cream
1 tsp finely chopped onion or 1/4 tsp onion powder
1 tsp fresh dill, chopped or 1/2 tsp dried dill
1 tsp sugar or 1 packet of no calorie sweetner
1/2 tsp vinegar
salt and pepper to taste
use more or less of the ingredients to your taste.

Directions:
Begin by either peeling the cucumber or not, (I leave a little of the skin on by running a peeler down four sides, and/or scrape down the skin with a fork) and then slicing the cucumber into thin slices (approx1/4 inch).  Set cucumber slices in colander and place where they can drain off some of the moisture.  Meanwhile in a large mixing bowl, mix together the yogurt (or sour cream), onion, dill, sugar and vinegar.  Dry off cucumbers with paper towel if they appear too wet.  Add cucumber slices to yogurt (or sour cream) mixture and toss lightly.  Refrigerate until ready to serve.  Best if it sits in refrigerator for a little while before serving. (I usually just toss in the ingredients as a guess-ta-mation, so I tried to put this together with measurements for sharing, the ingredients can be adjusted per your taste.)


Enjoy!...


Caramel-n-Nut Grape Bites


When I first heard of this idea it was claimed they tasted just like caramel apples.  I thought "what a great idea."  I knew I just had to try them for myself.  I've always loved, loved, loved caramel apples, so this sounded like something that I needed to try and hoped I would like too.  Let me tell ya...No disappointment what so ever!  And, they were a huge hit when I served them.  

So easy to prepare and it's a great little appetizer or snack.   I served these along with other mini appetizers over the holidays and they were a perfect addition.  Fruit, caramel and nuts, I think that's a perfect combination.


Caramel-n-Nut Grape Bites


Ingredients:

  • seedless grapes
  • package of caramels
  • chopped nuts
  • toothpicks (optional)

Directions:

Melt caramels according to package directions, dip grapes in melted caramel, then into chopped nuts.  Place on wax or parchment paper.   Serve.
(I placed them into the refrigerator after preparing, and then removed them to sit at room temperature before serving.)


Enjoy!...


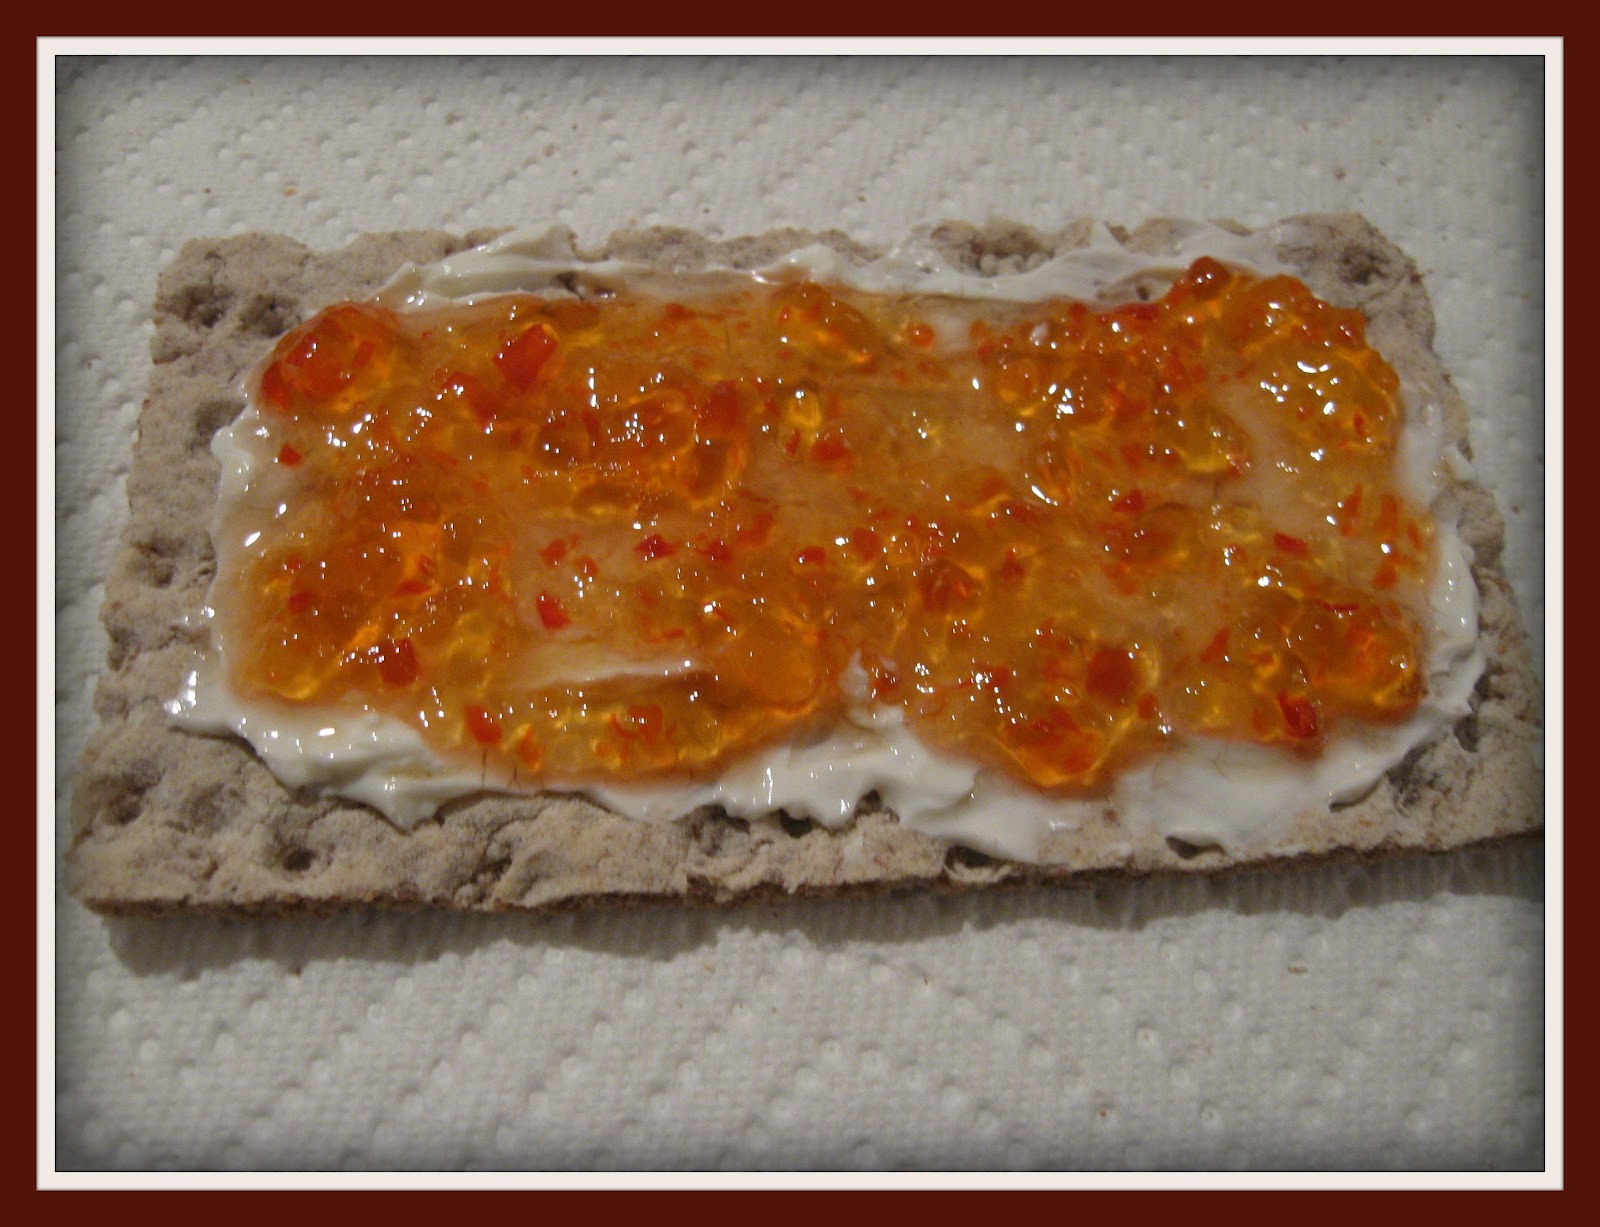
Rye Crispbread with Cream Cheese and Red Pepper Jelly


I'm always on the lookout for something to snack on, that isn't a calorie overload, is a healthy alternative, and that tastes good too.  

This is an easy and tasty snack!  Rye crispbread with Cream Cheese and Red Pepper Jelly.  I wasn't sure I would like this the first time I was encouraged to give it a try!  Although I do like the ingredients, I didn't think I would like them all together.  I was surprised and delighted by the taste, and I did indeed like it!  The red pepper jelly has a little heat to it, it's sweet and hot which I like.  

The light rye crispbread is only 30 calories per slice, the pepper jelly is 35 calories per Tbsp. and I use the fat-free cream cheese which is 30 calories for 2 Tbsp., so this adds up to a low calorie snack of about 150 calories for 3 crispbreads with cream cheese and pepper jelly.  

I enjoy this for a snack, it's easy and quick to prepare and satisfies the "I could eat a whole bag of chips right now" in me!   

Spread a thin layer of cream cheese onto a crispbread, then spread red pepper jelly on top of that!
You just might be surprised, if you'll give it a try. 

*** *** ***


*** *** ***


*** *** ***

Products needed:
Red Pepper Jelly
Cream Cheese
Rye Crispbread


I used the following brands for mine:


Lip smackin' snackin'!...


Hummus - Cheese & Red Pepper


I enjoy making Hummus, it's easy to prepare, tastes great, and is great for a snack or appetizer.  Hummus is good on crusty bread, crackers or pita bread slices, and I often use sliced cucumber instead of crackers (even better if you're carb conscience).  I use Garbanzo/Chick Peas beans in my recipes for hummus.  Beans are a good source of protein, little if any fat, and low in calories.  Which makes them a good choice for healthy eating.  There are many ways to make hummus and many ways to enjoy it.  For this recipe I use a few basic ingredients, items that I usually have on hand.


Cheese & Red Pepper Hummus


Ingredients:
1 can - 16 oz. Garbanzo/Chick Peas beans - drained
1/4 cup shredded cheese blend or preference
Roasted Red Peppers, 1/2 of one pepper - approx 2 Tbsp. chopped
Fresh Basil 3or4 medium size leaves - or 1 tsp. dried Basil
1 clove Garlic or 1/2 to 1 tsp chopped garlic
2 Tbsp. Olive oil
Black pepper and Salt - to taste

Directions:
In a food processor or blender add all ingredients.  Pulse, then blend until looking paste like.  If too dry add more oil or tbsp of water and blend more.  Serve.
Also can be chilled in the refrigerator and served later, cover or place in container with lid.


Enjoy!...


.

.

.

.
Tammy is the design enthusiast behind the blog, Tips, Treats & Treasures, where her creativity is explored with a mixture of her artistic abilities and style through her home decorating, thrifty finds, DIY and creative craft projects, along with her family favorite recipes. She shares through her blog her ideas and helpful tips on everything she has learned over the years and much of which she is passionate about in the hope of inspiring others, with her own unique style storytelling.