Grilling it up - More Big Green Egg-ventures


As we are loving all things summer at the moment, our grilling and smoking on the Big Green Egg-(BGE) has become an almost daily ritual.  Hubby and I - aka Mr. and Mrs. Chef, are at least feeling like chefs with all of the tasty goodies we've been cooking,   We rang in the first week of summer with some delicious grilled goodies, so I wanted to share some of the images I captured of what Mr Chef and I were up to, and what we've enjoyed!


More Egg-ventures on the Big Green Egg


Can we say feast?  Well, that's a feast for sure.  Mr Chef came in with all of this food to prepare for dinner one evening.  We had cooked our first Beer Can Chicken about a week before.  It was just after we purchased a Beer Can Chicken Rack that folds flat for storage when not in use.  It's one of those "now why didn't I think of that" kind of items!  We really enjoyed the Beer Can Chicken.  It was one of the juiciest chickens we have ever cooked on a grill.  We knew we wanted to prepare another chicken and this was it.

Another new gadget is the Jalapeno Pepper Rack used to cook Stuffed Jalapeno Peppers.  I made whole stuffed jalapeno peppers, and some I cut in half, then stuffed.  I do think the halved type make a nicer presentation, and they go twice as far in servings.  We really enjoy them as a side dish and make them often!  Here is a link to my recipe for Stuffed Jalapeno Peppers. Skewers of Shrimp, Corn-on-the-cob, and BBQ Baked Beans were additional goodies that added to the meal feast.  I had already seasoned and prepped some boneless chicken breast as my original plan for dinner, so we decided to go ahead and prepare those too.  Needless to say we had some left-overs from all of this great food!


...__________________...


We hadn't grilled any steaks yet, so we decided it was about time that we did!  A nice juicy rib-eye steak was the ultimate main attraction grilled to perfection by Mister Chef, and he was quite proud of that too!  As he did the grilling I prepared the side dishes.

This was my first attempt at making this baked Swedish style of potatoes Hasselback Potatoes that originated in Sweden.  A different take on the baked potato, giving it a crisp outer texture and soft inside, I found lots of different recipes online for preparing these. The Spinach was a simple throw together I created by cooking a little onion in olive oil until nicely golden and caramelized. I removed the pan from heat and added the spinach, some crumbled cooked bacon, a dash of garlic powder and a sprinkle of salt, then gently tossed it all together as the spinach wilted down a bit.  it was delicious!
I made this dish again since this post and have perfected the recipe, Sauteed Spinach.


...__________________...


Our first ribs cooked on the Big Green Egg.  These Beef Ribs were the best ribs we've ever had, ever!  We put a plan together from different ideas and techniques that proved to be for us, the best way to cook ribs.  Tasty and very delicious with a perfect blend of sweet, smoky and spicy.  Can't wait to make some more of those!  I'll add details for that later!!


...__________________...


Our largest Pork Shoulder/Boston Butt to date, ten pounds!  Since we were having family visit us we wanted to share one of our new favorite specialties.  Perfect for serving more than a few people, and it is always a crowd pleaser too!

The pork was prepared in the usual way that we have prepared the others before.  We long smoked it over night for about 13 hours.  It was almost falling apart and off the bone.  This being the fourth and largest one that we have prepared, it was the best one yet.  Each time we've had one we are convinced that they are better and better.  We are so happy that our family also enjoyed this with us, and shared in our Egg-venture too.      


Egg-cited for more Egg-ventures to come!...


Curtain Tiebacks - Easy/No Sew


I created curtain tiebacks for my outdoor curtains that were easy, no-sew, and inexpensive! 


After feeling quite pleased with my creative solution I wanted to share it and show how I did it.  

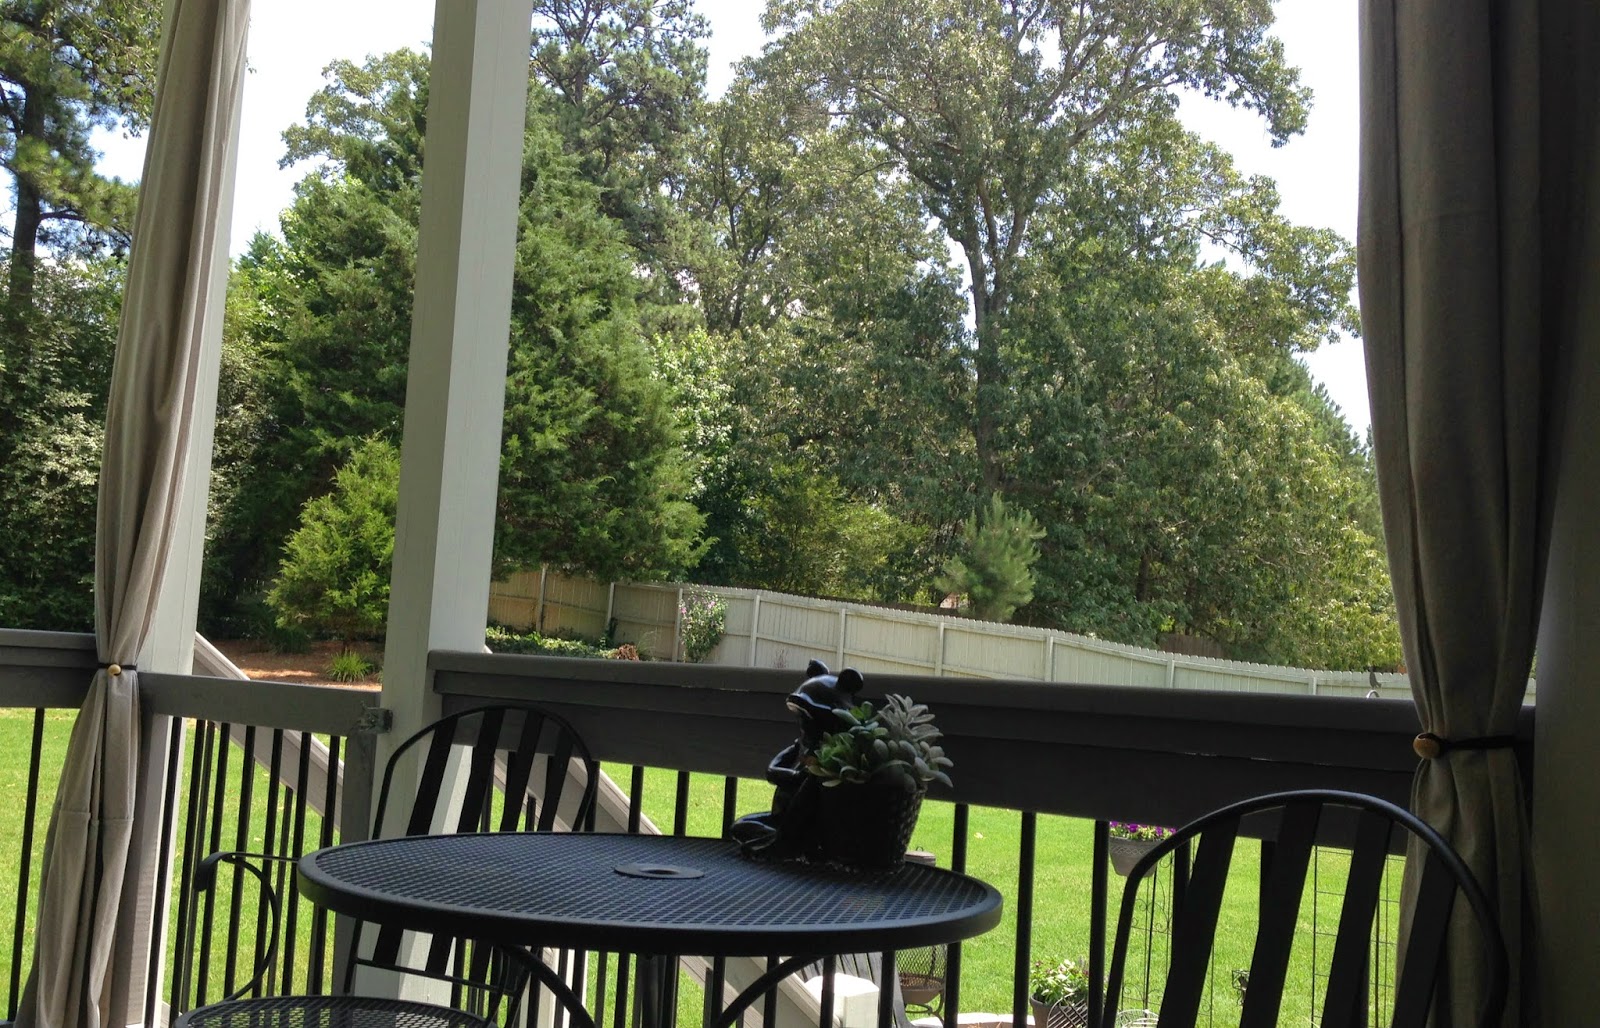
I was in need of something simple, easy to use and inexpensive, to be used as tiebacks for our curtains on our covered porch.  You can learn more about our inexpensive outdoor curtains project here.  We added the curtains not only for privacy, but also for added shade from the sun, and added warmth in the winter when we use our fireplace and an outdoor heater.

They also cut down on the rain that sometimes gets on the porch when it's really raining hard.  We had been using left-over clips from the curtain rings we used to hang the curtains, along with cup-hooks secured to the deck rail to hold the clips and curtains in place when we have them closed, and/or when the wind is blowing them.

However when the curtains are open or pulled back and the wind blows, there's also a need for something to keep them gathered and under control.  I had an extra set of long black shoe laces that worked as a temporary fix when tied around the curtains.  So I purchased a few extra packages of them since I needed several overall, plus they were inexpensive and I was ok with the look.

That works just fine most of the time, but if the curtains have not been tied back and a wind picks up, well I'm out there grabbing them from flight as I think to myself "Auntie Em, Auntie Em!", and I'm trying to tie the laces on quickly!  Whew!  


I knew I needed to come up with a better plan.  A quicker, easier plan!  My creative mind was stumped until the "Ah ha" moment arrived, and I had it!  I was thinking...bungees?  My kids have often called me the "bungee queen", because I can sure find ways where bungees do come in handy and are quite useful in life!

My thoughts are often "I can Tammy-rig it or bungee it!"{wink}  Similar to bungees, I've used stretch hair bands for cord control on many different items and I also did a blog page on that, you can see it here if you like.

(OK, back to the task at hand!)
My original idea was to use large buttons and stretch cord.  While shopping, I discovered some stretch headbands that were already about the perfect length that was needed, but I couldn't find the buttons that I'd had in mind, or that were just-right with large enough holes for the hair bands to fit through, or without metal, or that I thought would hold up well.

I then decided instead to look for some large hole beads and did find round, wooden beads about an inch in diameter.  "Perfect, that will do!"  These tiebacks were a cinch to make and inexpensive as well, which is what I was looking for since they are outdoors after all, and they are not unattractive.  The best part is how quick and easy these are to use, and they do the job nicely!  The cup-hooks secured to the deck rail help to keep them in place.


Now I can add these tie backs rather quickly, and remove them quickly too.  Even when it's windy!


... ... ... ... ... ... ... ... ...


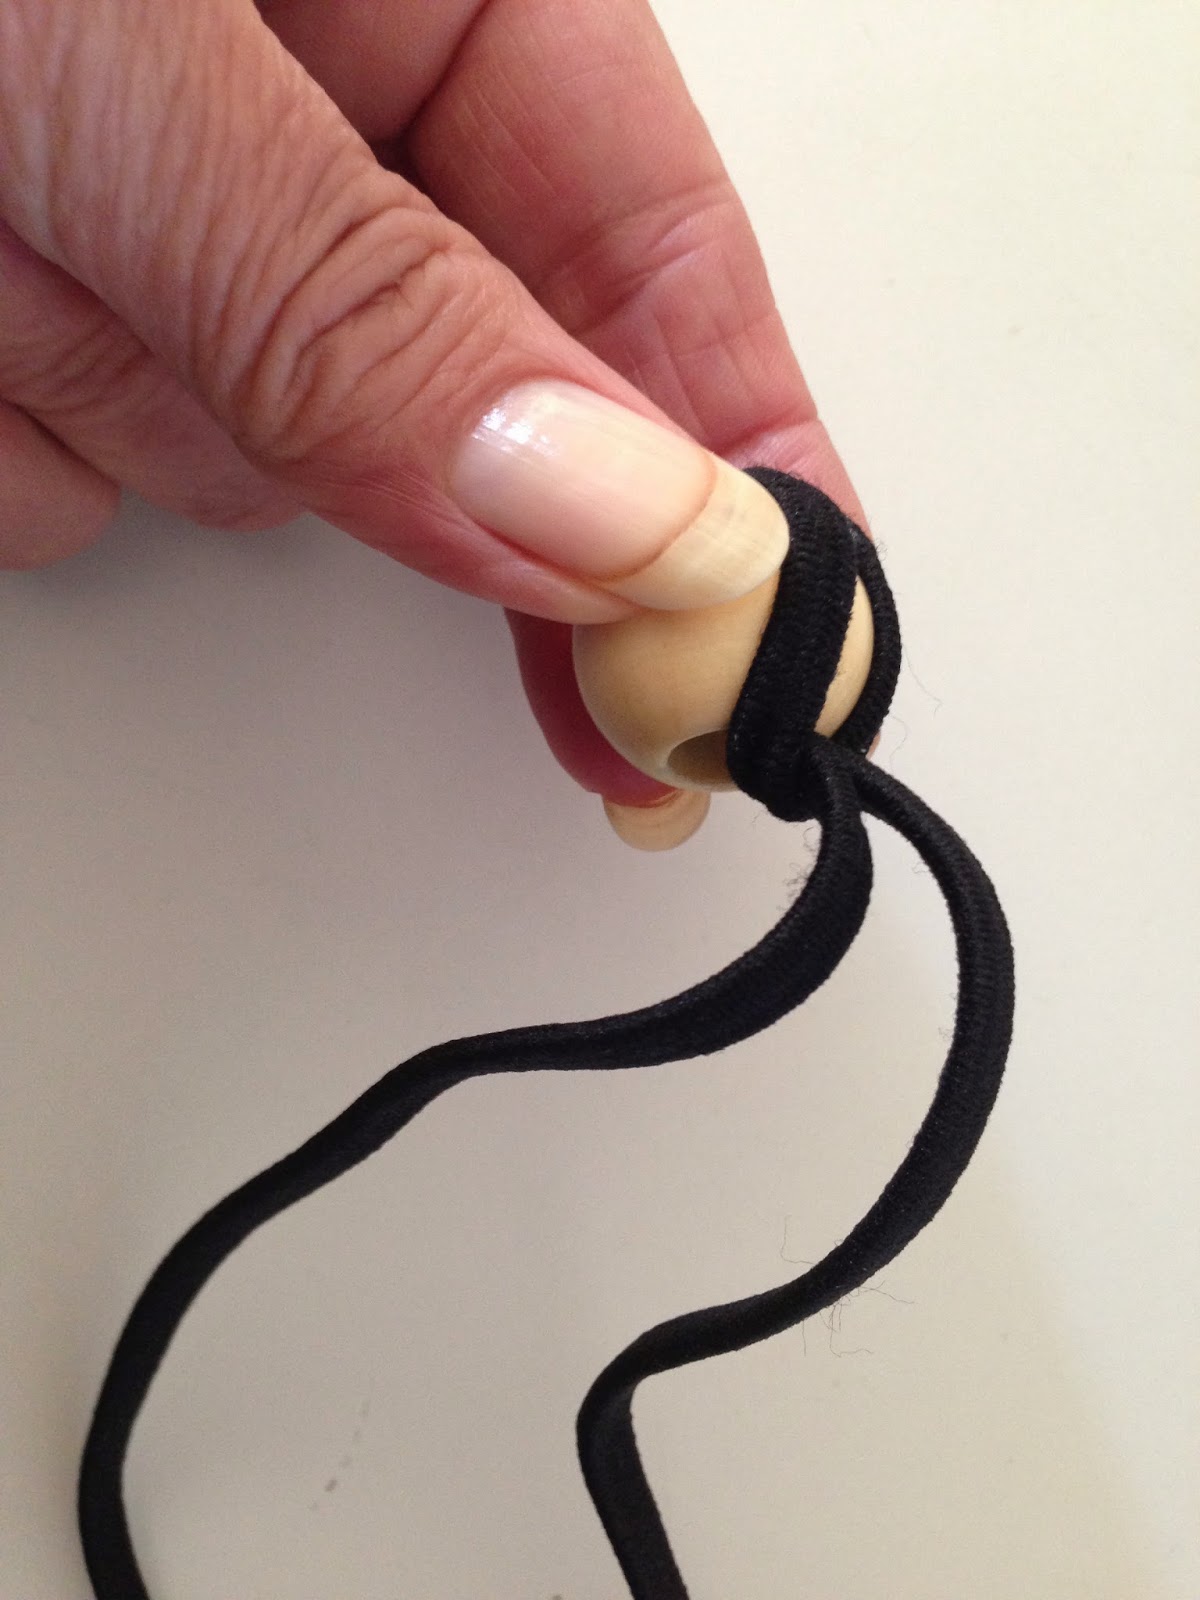
Elastic headbands and large hole beads = Curtain tiebacks


Here are the instructions for how easily I made the tiebacks.

Push elastic band through the bead.


Pull other end through the loop coming out of the bead.


Pull to snug up to the bead.


Loop though one side of the first loop that is around the bead now,
then pull snugly to lock the elastic band in place.


When in use the bead locks on by passing through the loop from the other end.
(These are similar to the pony-tail wraps that have beads on both ends)

ta-da!


A close-up of a tieback in action!


I love it when a plan (ahem)...curtain comes together!


Summer!


It's official today... 
Summer begins!  


(singing)-Summertime...and the living is easy...  


Summer!  One of my favorite seasons.  I have always longed for summer to arrive, and that's one thing that has never changed about me.  I feel like a kid as my inner child is all giddy and I'm full of happy thoughts along with many, many memories of when I was a young girl and how I loved when summer would come around each year!    It seemed like it was going to last forever with the whole summer ahead of us, with plans to do everything and anything, and nothing at all too!  Those long sunny days and warm nights that make all things more enjoyable, just because it's summer!


Time to enjoy all things summer.


Happy SUMMER ya'll!
Wishing you sunny days, warm nights, and lots of summer fun!...


Glittery-Gold & Gladiola Wreath


It was a gloomy and rainy day that led to my crafting this little lovely.  Hmm, maybe I should start that differently?...
"Once upon a time, it was a gloomy and rainy day, the sun was nowhere in sight.  I needed something to lighten my spirits, and brighten my day.  A craft project would be just the thing!"...

I had picked up a wreath form and some decorative mesh ribbon at the craft store some time ago.  I already had lots and lots, and lots of other ribbon in my stash - especially of the glittery and gold variety - from the after holidays sales.

I figured it was time to put those to good use and make something new and different for my door.  It is after all almost officially summer!  Yay!  Although this looks as if it could be used or the holidays, it goes quite well with my home's decor and suites my taste perfectly,  And, it adds a bit of glam to the 'inside' of my door, in our foyer area.  I can see being able to change it later on by adding different elements to it also.  I enjoy seeing it from different points of view, since I can see it from a couple connecting rooms, and I think it looks perfect there!


Decorative Mesh has become very popular.  I have seen many wreaths decorated using it, but I hadn't made one of that type yet.  I viewed a few tutorials on -decorating a wire wreath form using mesh ribbon- to get ideas.  I considered some of the methods used, then decided to use my own technique to make one.

I'm pleased with the results, and I'm lovin' the look of my new oh so 'glam' wreath!  Something I really like and enjoy about crafts and making things, is that sometimes I don't really have a firm plan and I just have fun with it, and it turns out well.  That makes it especially nice, and rewarding too.

-This was a quick and easy project, that took only minutes to complete.
I used a sixteen-inch wire wreath form, one roll of mesh ribbon measuring six-inches wide by ten yards long.  I simply pulled the mesh ribbon up through the inner, middle, and outer sections of the wreath form from behind, going around a few times and filling in each of the sections.

-I wrapped the mesh around and then through the wreath form covering all of the exposed wire that crossed the sections.  I used a gold wire edged ribbon on top, weaving it under each place where the mesh was wrapped around.  Adding a white gladiola, secured with craft wire, finished it off beautifully.


Glad it's so GLAM!...


~ Happy Father's Day ~


A Father is someone you look up to

...no matter how tall you grow.


To the many Fathers in my life, including most especially my Father, Father-in-law, Husband, Brothers-in-law and Son-in-law.


Happy Father's Day...


Skillet Potatoes


Potatoes are one of those versatile foods and there are numerous ways to prepare them.  They are a breakfast, lunch or dinner food.  Potatoes are always easy to find, pretty inexpensive, and they can really stretch a meal.  The term meat and potatoes comes to mind and with those two, one is as important as the other.

These skillet potatoes are delicious and full of flavor, are both creamy and crisp.  A great side dish that will satisfy your potato lovin' palette.  Try these the next time you want something different.

Whether serving them with your steak, chicken, or whatever meat dish they will stand-out and you'll want to make them again.  So simple and easy to prepare, this just might become a new favorite potato side dish choice.  If you like fried or sauteed potatoes, you'll love these, and they require only a small amount of olive oil and just a touch of butter.  Try my skillet potatoes, I don't think you'll be disappointed!     


Skillet Potatoes


Ingredients:
baby golden potatoes-whole (about 30-35, 1 inch size)
2 cups-low salt chicken broth
3 tbsp extra-virgin olive oil
1 tbsp unsalted butter
1/2 teaspoon salt
1/2 teaspoon garlic powder-(optional)
1/2 teaspoon onion powder-(optional)


Directions:
Place enough potatoes to form one layer, leaving a little room into a 10-inch non-stick skillet .  Add chicken broth along with olive oil, butter and salt to the potatoes-(I also add garlic powder and onion powder at this point.)  Bring to a boil over high heat.  Reduce heat to medium then cover pan leaving lid just a little off set and boil until potatoes are fork tender, about 15 to 20 minutes.  Remove pan from heat, then using a small ceramic bowl/ramekin or glass measuring cup press firmly but gently on each potato until it cracks open.  You are just trying to crack them open, not completely smash them.  Place pan over medium heat and cook uncovered, until all liquid has evaporated and potatoes sizzle until browned, and are crispy on one side, about 10 minutes. Gently turn the potatoes and brown other side.  Serve.


Baby golden potatoes-whole.  
(As you can see next to the tablespoon these are small/baby potatoes.)


Boil until fork tender, press firmly to crack open.  
Cook until all liquid has evaporated and potatoes sizzle until browned.


Turn potatoes and brown other side.  Serve.


Enjoy...


Monday Message


~ My Monday Message ~


Thought provoking, and so true.


Here's to having less weeds in our garden.
May your flowers always be plenty, your weeds very few!...


Flowers, Pots, and Hanging Baskets


I have been planning on adding a few new things out back, well flowers that is.  A thought came to mind that there's the saying..."April showers brings May flowers."  I figured I had better get on it then, since May has turned to June after all.  I have some hanging baskets and a few pots that are great for changing out as the seasons change.  I like the use of pots and hanging baskets since they are relatively easy to change or move, are perfect for both annuals and perennials, and offer focal points to the garden too.  Plus my four-legged child can't trample on them as freely as ones planted in the ground.

A couple of my hanging baskets have been home to some lovely pansies, which served well as something pretty in them over the cooler months, but they were starting to take notice of the higher temps here and were looking less than happy to say the least.  I moved the pansies out and off to a shadier place, if they make it fine, if not as I said they served their purpose well, and can be replaced easily enough.

Off I went with the Hubby in tow to the local home and garden store.  My focus was all preplanned and I greatly hoped it could be achieved.  Just a few wants on the list, not going all crazy or overboard mind you, I picked a few beauties to bring home that I will nurture with great care, water, fertilizer, and lots and lots of love!

~~~ ~~~ ~~~ ~~~ ~~~ ~~~ ~~~ ~~~ ~~~


First on the list was purple petunia's and there they were calling out to me with their beautiful, vibrant purple color!  They are perfect, and they're the perfect replacement for the pansies that were in the hanging baskets.

~~~ ~~~ ~~~ ~~~ ~~~ ~~~ ~~~ ~~~ ~~~


The second on the list was white vinca, and much to my surprise there is a nice deep purple color now, I have only ever seen the white or pink types before.  Thank you flower Gods!
So happy to add another purple to the mix!

~~~ ~~~ ~~~ ~~~ ~~~ ~~~ ~~~ ~~~ ~~~


One more on the list was purple salvia, and that finished off the desired selections nicely.  This pot is now home to a mix of the salvia, with both the white and purple vinca.
I look forward to this filling out!

~~~ ~~~ ~~~ ~~~ ~~~ ~~~ ~~~ ~~~ ~~~


These petunias are a beautiful shade of purple!  

~~~ ~~~ ~~~ ~~~ ~~~ ~~~ ~~~ ~~~ ~~~ 


I did two of each of these, two baskets and two pots, just the same.
These should fill out quickly and add a touch of beauty to this area (a work in progress), where I can enjoy seeing them and their beautiful colors.                     


My beautiful rewards of an afternoon working playing in the dirt!...


.

.

.

.
Tammy is the design enthusiast behind the blog, Tips, Treats & Treasures, where her creativity is explored with a mixture of her artistic abilities and style through her home decorating, thrifty finds, DIY and creative craft projects, along with her family favorite recipes. She shares through her blog her ideas and helpful tips on everything she has learned over the years and much of which she is passionate about in the hope of inspiring others, with her own unique style storytelling.