Showing posts with label Chalk Paint. Show all posts

Chalk Painted Caddy Makeover

I loved this cute little caddy, but I wasn’t in love with the color it was when I found it. I knew I could fully love it after a paint makeover though…And now I do, I do!

I’ve used and styled it in a few different ways to store, and display.

It was perfect for these snack & dessert plates...


And some dish towels...


And I also tucked in a couple small faux plants...


I’m sure I’ll find many other ways to use it!


~ * ~


Below is an image of it before and just as I had started painting it.


And after...


So much better!


I always encourage others to use paint! Don’t be afraid, it’s so simple. It’s such an easy and inexpensive way to transform an item! If you don’t like the color paint it!
*** My tip of the day! ***


Mini Wooden Books Makeover using Chalk Paint


A crafty makeover to this little set of wooden books found at a thrift store. I knew I could make them better & more to my liking by simply using paint!


Crafty ideas came to mind of painting them white and adding words. I’m loving them in this new look and have left them as is ...for now!

Below is the before of the these mini wooden books!  I'm so pleased with this little crafty project!


“Finding joy in the little things!”


Thrifty Painted Medallion Transformation
~ Simple makeover using paint & wax!


I transformed this beautiful medallion with a makeover using paint.


~*~


I picked up this medallion for two dollars at GW.

I knew I wanted to paint this the second I saw it! I’ve added a few images of the process. And isn’t it lovely with its new look?!


~*~


I gave this a layer of white chalk paint then after dry, distressed it using an emery board nail file.  Next I gave it some clear and dark wax and then did some buffing with a soft cloth.

~*~


It’s now the piece I envisioned it to be! I love the details and how the distressing and wax make them pop! I’ve seen similar pieces for twenty-five dollars and up!

Using chalk paint and wax is the easiest way to transform a piece!  Don’t be afraid to give it a try!


Fall Centerpiece Basket


I created this lovely Fall centerpiece by adding some lamb’s ear greenery, sunflowers, and a faux pumpkin to this pretty basket I recently found at a thrift store.


The basket was only two bucks and it was already painted in a neutral color, which matches well with my decor.  I love it when that happens, don’t you?!

I always encourage others to have a look at the thrift stores and antique markets!  You never know what treasures you'll find!


~ I’ll enjoy styling this thrifty treasure throughout the seasons!...


Thrifty Treasure
Wooden Pedestal and Vase/Candle holder


My latest thrifty treasure and fabulous find is this beautiful wooden pedestal and wide glass cylinder vase/candle holder.
~ A cost of six dollars total for the two items!
I dressed them up with a pretty candle and some faux greenery I already had on hand.


The tray is a thrifty treasure from awhile back.  I chalk painted it white since I have another one that I originally purchased from “Southern Living at Home” some years ago for much more than the five bucks I paid for this thrifted one!
(Upon doing a little search, the pedestal above may also be a SL@H item?)

I’m so pleased with my thrifty treasures!  And, I love the beautiful arrangement I created using them!  All it took was just a few dollars, a little imagination and some creativity!
Decor doesn’t have to be expensive to be beautiful!!!


~ Happy Decorating!...


Summer Tiered Tray Styling

“Home” it’s my favorite place to be!!


::: It is my happy place!
Creating and decorating our home is one of the things I truly enjoy doing for our home.

::: And, I always enjoy styling my tiered trays, they’re such a fun decor item.  I’m liking this summer vibe, and that it’s about “HOME!”
~ The mini houses were my inspiration for styling my tiered tray for Summer, and a "home" theme.  Most of the items here are from a Thrift store, the Dollar store and Target Dollar Spot, even the tiered tray and items which I already had.  I shopped my home and did this for no extra cost.  That's my kind of inexpensive decorating!


Thrifty Decor for Summer

These are a few of my favorite things...and colors!


::: I’ve styled this console table in our breakfast area with some thrifted treasures and some items from a few of my favorite stores.

Can you believe I found this beautiful green painted wood & iron piece at goodwill?  Yep, and for just a few dollars, that’s why I enjoy stopping in there sometimes.
You just never know what treasure awaits?


I love decor pieces that you can be creative with, and easily change the look of by adding different elements!

::: This rustic box with metal handles is just the thing to do that with!  I shopped my home and simply added three of my gold painted terra cotta pots, a candle holder lifts the center one, some greenery, curly burlap ribbon, faux grapes and flowers, and voila!

::: I have it sitting upon a thrifted bread box I chalk painted some time ago.  Along with the beautiful green wood and iron piece, which as I mentioned above was also thrifted.
I’m enjoying this look for Summer in front of our breakfast room window.


- Tip of the day -
Try shopping your home before buying new items, and be creative!  It doesn’t have to cost a lot to decorate your home in a beautiful way!


Step Ladder Display Shelf

I often like things that are different, unusual, and out of the ordinary!  So the first time I saw a step ladder used to display items on each step, I knew I had to do that!  I can't take credit for the idea, but I'm so glad someone else thought of it!

We had an old step ladder we'd used over the years and of course it was handy when it was needed, the rest of the time it was stored away in the basement or a closet.  I couldn't wait to grab that little ladder and paint it up!...Chalk paint to the rescue!  Now I enjoy using it to display items and change the decor for holidays and seasons.  Such a fun decor piece!

I'm using it currently to display some of my thrifty treasures!  Isn't it a cute idea?  I sure think so! :)


Spring Tiered Tray Styling

Live Laugh Love...
A favorite phrase of mine!

And, speaking of favorites, tiered trays are so fun to decorate and this is one of my favorites!  I have a few tiered trays ...or many!


I chalk painted this tiered tray, it was originally a rusty red color.  I much prefer in white now!  I’ve simply styled it for Spring using some pretty white flowers, greenery and that sweet “Live Laugh Love” painted wooden heart!

These tiered trays are a great way to add seasonal and themed decor to your home, without taking up a lot of space!  It's fun finding smaller items to add to my trays, so I'm always on the lookout for them!


Happy Decorating!...


Fall Decorating
~ Ladder decorating for "Fall" ~

It’s a bright and beautiful Fall day today!  I’m still over here enjoying my Fall decor, and pumpkins.  It takes a while for it to actually feel like fall around here too.  


I like to style this little ladder with seasonal decor, it’s fun to get creative with it and so simple too!  This is my fall theme.

I painted this old step ladder last year and have enjoyed using it in my decor.  I have fun changing it up seasonally and finding new ways to decorate it!  

It's easy to use in any room, and easy to store away if I chose not to use it.   I kept it simple with a few pumpkins, some greenery and flowers, and a few brass items to give it a little bling!  It sits in my breakfast area corner for now, and makes me smile when I see it!


~*~


Here’s to all those who are hosting Thanksgiving and are knee deep in planning and preparing, as I am!


I’m seeing some beautiful Christmas inspiration and lots of ideas are swirling around in my head!

-They’ll need to stay there til after Thanksgiving!  I’m a one holiday at at time kind of gal!


~ I hope all of your holiday planning is going well!...


Painted Pumpkin Centerpiece

My pretty painted pumpkin!
An orange pumpkin no more, thanks to some white chalkpaint!

I got my “craft” on with this beautiful makeover.


This large faux pumpkin is a resent thrift store find and it was only a dollar.  It looked new and was the traditional orange color, but I knew I could make it even better, or more my style.

I love what a little paint can do!

- I gave it just enough paint coverage to change the look from the original color and leave a subtle peachy color.  It was so easy!

It’s looking ready for Thanksgiving in my beautiful pedestal bowl and dressed with a vine of velvety lambs ear.


I’m staying focused on Thanksgiving for now, while enjoying lots of Christmas inspiration.


~ I hope you all have a beautiful day!


Thrifty Table Makeover

I truly enjoy refurbishing furniture and decor items.
This sweet little table is one I recently completed, I found it at a thrift store for five bucks!

I knew I could make it beautiful by giving it some TLC and chalk paint!


~*~  ~*~  ~*~


It had potential, and I had a vision!  I loved the style, and the iron and wood combo.


First I prettied up the wood top with chalk paint.


And then decided to give the iron a dry brushing of chalk paint too!


I love the new look, and isn’t she so pretty now?!  I mean, I believe she must be a "She" with all those pretty curves!;)

As I so often say..."Don't be afraid to giving painting a try!  It's the easiest way to transform an item!


~ Hope you find some joy today!


Fall has arrived!
~ Chalk Painted Pumpkins


Hello FALL!  It’s officially here.  We're having a beautiful Saturday and first day of Fall.  It's hard to believe that Summer is gone so soon!


Pumpkins are a sure Fall statement!  I love the neutral toned pumpkins and fall decor available over the past few years.  Some can be a bit over priced though!

- I gave some orange pumpkins a makeover using chalk paint.  They're much more to my liking and more my style now.  Such an easy way to change their appearance!  I simply used two light colors of chalk paint, a white and an off-white beige color to give them a little variation in color.
*See my original post here for all the details!


~ Hope you have a wonderful first day of Fall!


Cutting Board/Serving Board
~ Chalk Painted & Stenciled


It’s always nice to love something all the more. And, so gratifying when you’re pleased with your own work!
- I changed the look of my sweet cutting board with some chalk paint, and a stencil!


I just love what a little paint can do. And, I love the new look of my cutting board. It gets used as a serving piece rather than a cutting board, so I chose to paint it!


I really loved the cutting board, I was just wanting a different look for it.  I decided to paint it to lighten it up.


I gave it a coat of white chalk paint, then let it dry completely.  After that I used a stencil.


I did the stencil in the same white paint so it was a subtle embellishment. I gave the board a coat of wax after everything was all dry to seal the paint and add a little sheen.


~ Happy is my crafty heart!


Gold Leaf Project


My first experience using gold leaf, and I’m in love!


This gift from my daughter, a wooden heart with a little heart cut out had silver leaf where I have added gold leaf!  She said as she gave it to me “I know you’ll probably chalk paint this!”  She knows my love for gold, and for changing items to better suit my taste, or for using paint to do so!

Painting it just wasn’t going to do it, and since it already had silver leaf on it, I figured gold leaf was definitely the way to go!  I love this beautiful heart set all the more now!


Materials needed:
leaf metal
metal adhesive
small paintbrushes

I purchased my supplies at the craft store.  The Leaf metal and metal leaf adhesive, they were about fifteen bucks total, and I had some small paintbrushes on hand already.  There are easy to follow instructions on both items.  There was more than enough materials to do this project and I have plenty left over.  This project was super easy, a little messy, but easy!  It took some drying time for the adhesive to become tacky, but the project didn't take long overall.


Basically all that is needed it brushing on the metal adhesive, let it dry until tacky, then use small torn pieces of the metal leaf and place on the tacky areas, then brush or rub over the metal covered areas.


The edge of the large heart here is finished, the small heart is still in the original silver leaf.   I just prefer gold more than silver!


I'm so pleased with the results! 

It was a fun and rewarding project!  Now I’m looking around my house and wondering “hmmm, what else can I gold leaf!”

PS: I did chalk paint the other heart piece here, it once was all gold - I used white chalk paint to paint it and then after dry wet sanded away the paint on the raised design revealing the gold detail.
I am so pleased with the results of these beautiful heart items!


Spring Table Centerpiece


For Spring I've been enjoying this beautiful flower arrangement and centerpiece I created for our breakfast table!  You may remember a post I shared awhile back about my Chalk Painted Iron Tray.  I had it decorated as a winter themed centerpiece at the time.  

I brought back the tray, and wreath, and created a Spring floral arrangement in my glass vase.  I added some pretty beads around the neck of my vase to dress it up and I thought they worked well with the natural tone of the wreath.  Tulips are always a good go-to for spring!  I'm partial to the white ones of course!  I enjoy dressing my table with that thrifty table runner I found a while back, too.

We have under a month left of Spring and I'm going to enjoy every minute of it!


Happy Decorating!...


Hello June!


Happy Friday and first day of June!


I’m kind of feeling like it’s June to soon!  I just wasn’t ready to give up May yet.
Well at least I get to hang onto Spring for a few more weeks!  And, while doing so I'll continue to enjoy the Spring touches I've used throughout my home.  

This partial view of my console table has a couple of my favorite items to decorate with, I've had both of them for a while.  The cute little metal chair and the sweet ceramic bird.  I chalk painted the little chair because it was orange when I found it.  I love birds, so when I found this one I had to get it.  It has a little bag of potpourri inside, so it's pretty and it smells pretty too!  I never tire of using it somewhere in my decor, no matter the season!


Here's another favorite of mine.  This bird and books.  I think this sweet bird looks like it’s singing, I purchased this a while back and just love it and how it’s perched upon the books.  I always say use what you love when decorating your home.

I love the beautiful sounds of birds singing,  I can hear them singing outside my window right now.  It sure seems like they sing even prettier in the spring!


Happy Decorating!...


Bread Box Makeover


I love a good a makeover!  Especially if it's done by using paint.   I picked up a simple and plain looking bread box at the thrift store.   I knew I could give it a new look with paint.


I gave this bread box a new look using chalk paints and wax.  I’m so pleased with the results.  Paint it such an easy fix!  I am always amazed at what a little paint can do!


I used two different colors of chalk paint.  I watered down the paint a little and used the lighter color all over first.  Then used the darker color.  I alternated between the two to achieve the look using long slow strokes and a mostly dry brush.

I chose the colors "timeless" and "lace" both are from DecoArt.   I got these paints from the craft store, they are easy to use and clean up easily with water.


After the paint was dry I gave the bread box a light coat of clear wax and then gently buffed it.  The wax gives it a protective finish.


Here is the before of the bread box.  It was in great condition, just not what I'd envisioned or wanted it to look like.  I even painted the metal handle!  That is another thing that I really love about chalk paint, you can paint just about any type of surface or item.


A recent thrift store find for only three bucks, some paint, an afternoon of my time, and now it looks so much better!  I love it!


For now, I’m using it here next to my breakfast table to store cloth napkins on the ready.  It looks right at home here with my Spring decor.


I really love what a little paint can do!


Winter Decor
~ Our Breakfast Area ~

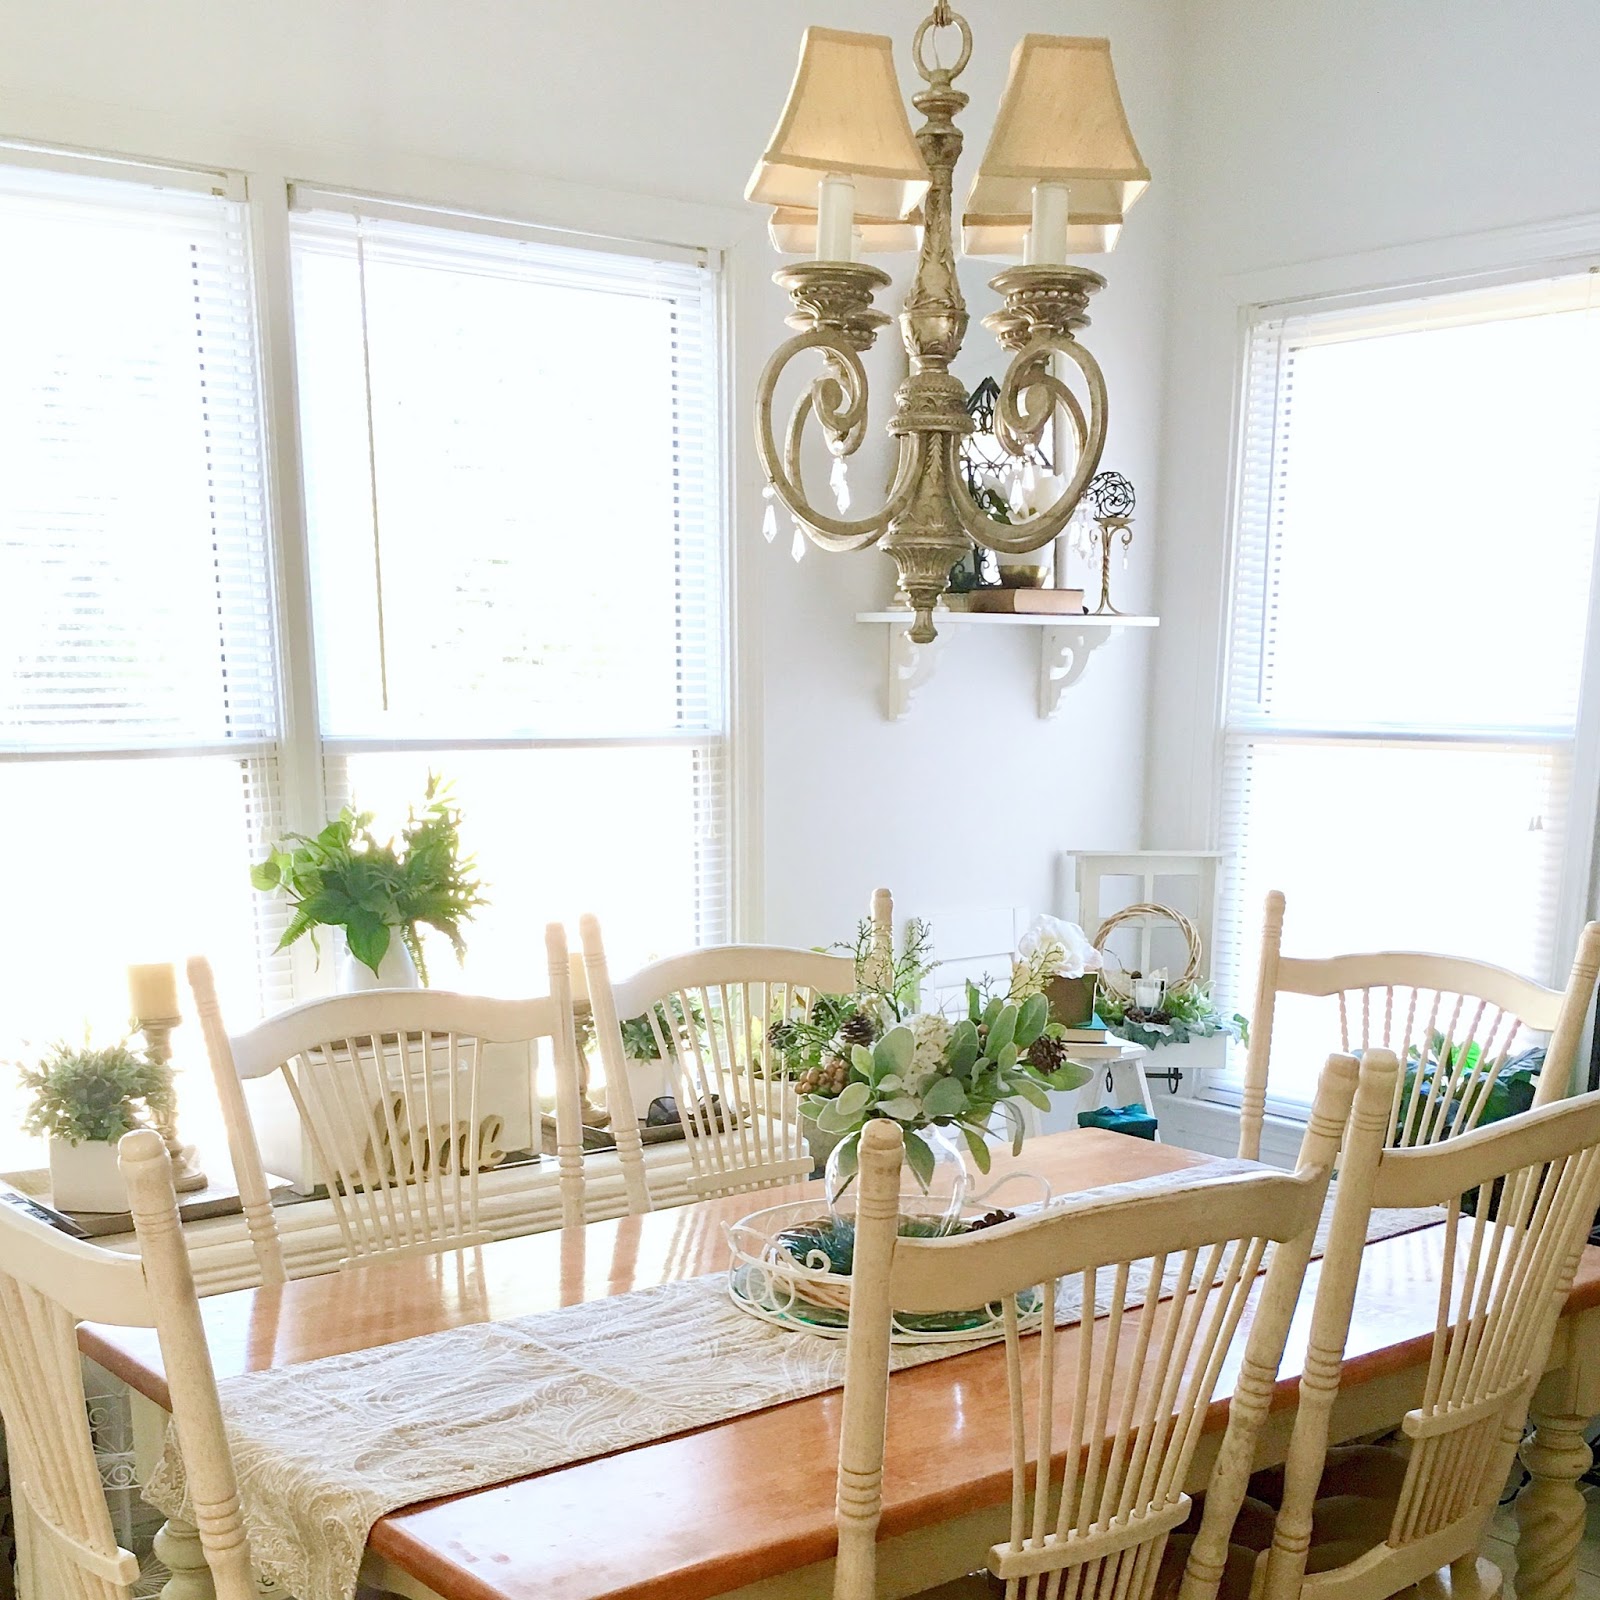
Just sharing some of the decor ideas I've used to get through the winter blahs!  After the holidays it's a time of transition to get things back to a more normal kind of feeling and appearance.  But, I love to decorate and I enjoy pretty things so, I find ways to make the winter a little more cheery!  And, because I'll admit to it not being my favorite time of the year!
  

The sun was pouring in and brightened up this space,  The sunshine always makes me happy, it brings a smile to my face and a warm feeling to my heart!

Many of the items here in our breakfast area are thrifty treasures, even the beautiful chandelier!  I recently shared the tray I chalk painted and used here as my centerpiece.  I found the table runner a few days ago from a local thrift store.  Over in the corner you may recognize the window with planter box, and the old ladder I refreshed with paint a while back.


This sweet window with planter box is also a thrifty find, it’s a great piece to restyle and change with the seasons. The old step ladder we'd had a long time and it was freshened up in white with some of my chalk paint treatment. White flowers are a favorite of mine, no matter the season!

Flowers and greenery are some of my favorite decor items, whether fresh or faux, I have to have flowers and some greenery!  I found some books to add a little lift and more green color.  The white shutter is one of a few that I have found at various thrift stores or antique markets.  I find them useful in many ways.

A simply styled area with something to brighten these winter days, beat the winter blahs, and warm my heart!


~Oh Winter, how I long for the warmth of Spring!


Chalk Painted Iron Tray


I love what a little paint can do!  I picked up this iron tray at a thrift store a while back, actually it was my daughter that pointed it out to me.  I was happy to get it, even though I had one identical to it at home.  I'd been thinking of painting my other tray for some time, but was torn about doing it.  

Finding this one gave me the idea that I could now have both!  So, I gave it a quick once over with some white chalk paint, (not being overly perfect with complete coverage), and I'm loving the new look of it!  And, I love that I still have the original one I purchased years ago!  Win!  Win!


~*~   ~*~   ~*~


I enjoy putting floral arrangements together, I created this one for winter using items I already had and three winter picks with evergreen and pine cones purchased from the dollar store.

That led to creating this winter centerpiece for our table using my thrifty, chalk painted, iron tray, along with a simple natural wreath, and some long needle evergreens. 


This sweet & simple winter vignette makes me smile!


.

.

.

.
Tammy is the design enthusiast behind the blog, Tips, Treats & Treasures, where her creativity is explored with a mixture of her artistic abilities and style through her home decorating, thrifty finds, DIY and creative craft projects, along with her family favorite recipes. She shares through her blog her ideas and helpful tips on everything she has learned over the years and much of which she is passionate about in the hope of inspiring others, with her own unique style storytelling.