Showing posts with label reNew-reUse-rePurpose. Show all posts

Thrifty Centerpiece
~Styled Four Ways


I’ve truly gotten my money’s worth from this thrifty decor piece I scored last spring for a couple of dollars!  I’ve changed it with the seasons.  It’s back to the look I gave it originally last spring, except I’ve added some pretty roses.


It began as a simple candelabra that I found at a thrift store.  My original post shows how it looked when I found it and what I did to it after I got it home, pictured below.  I was so pleased with my new treasure, and the minimal price paid for it.


I enjoyed the look for Spring and right into Summer!  


A little trip to the dollar store and I had some new items to change it up for Fall!


When the holidays were approaching I used different candle holders and candles, along with some holly with berries, pine cones and red tulle bows tucked in for a new look!


Crafty Christmas Ornaments

Aren’t these the cutest ornaments?!  I think they are so adorable!


I received them as an early Christmas gift.  My daughter and her daughters/my granddaughters crafted and hand painted these!  A fun Pinterest inspired idea.  And, if you hadn’t figured it out, they’re wine and champagne corks!  So perfect for a wine lover, which I definitely am!


~ Such a fun gift to treasure!


Christmas/Holiday Centerpiece


Merry Christmas & Ho~Ho~Holiday Greetings!


I did a little Christmas-ing to my thrifty candelabra centerpiece by changing out the previous candle holders & candles for plain glass candle holders & gold candles, added some holiday/winter accents/picks & red sparkly tulle ribbon!

This candelabra has been a fun decor item to decorate, and re-decorate throughout the seasons!
Such a great thrifty find this year!

Sources:
-Glass candle holders, Gold candles & Red sparkly tulle ribbon - Dollar tree
-Candelabra centerpiece - Thrift store
-Greenery, holiday/winter accents/picks Hobby Lobby & Michael's


Visit these links to see my original Centerpiece MakeoverFall Centerpiece 


~ Happy Christmas-ing!


Fall Centerpiece


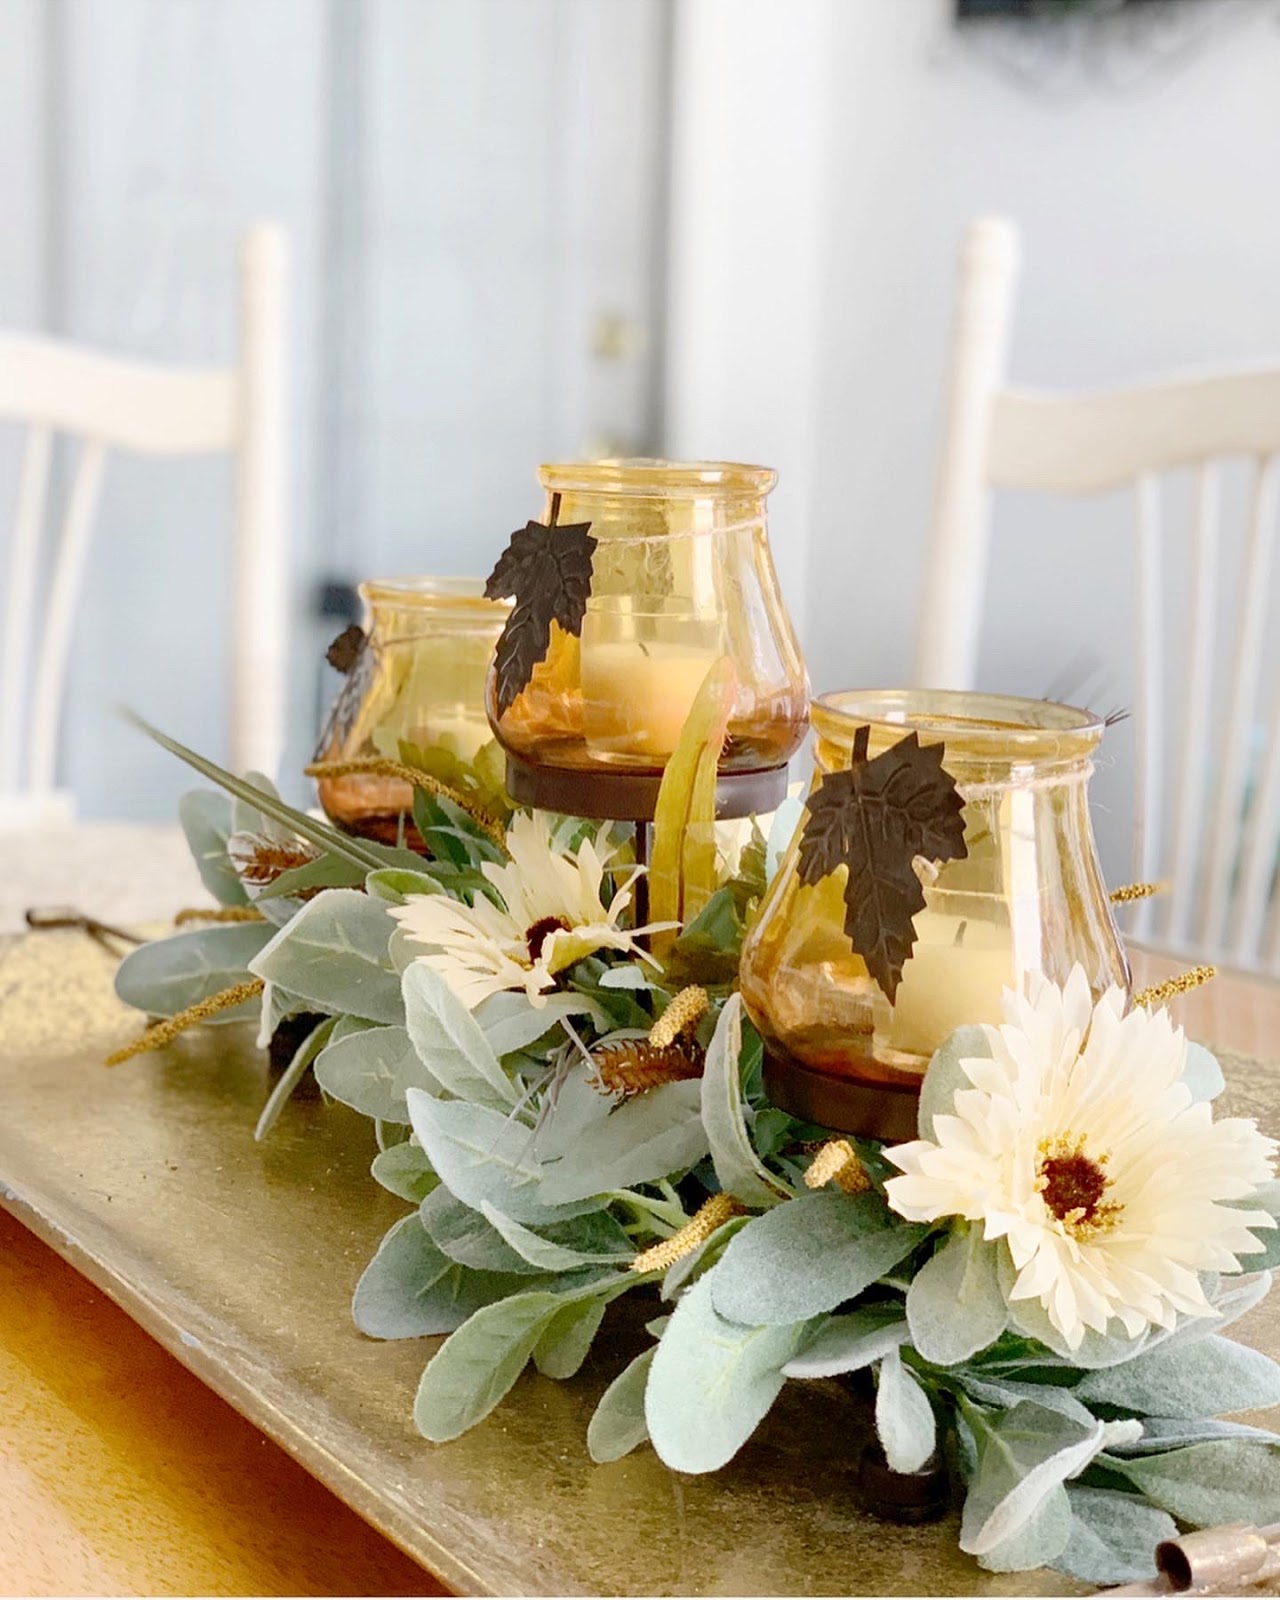
I recently did a little restyling to my thrifty centerpiece that I shared back in the summer, and now it’s updated for Fall!


I visited the Dollar Tree and found these cute auburn colored candle holders, each with a sweet little metal leaf attached to it! And, I also got some Fall florals to tuck into the lamb’s ear greenery I had on it before!


Just a couple bucks to transform and update it!  That's my favorite kind of decorating!


A glimpse of the before, after the original makeover.  See the original post here!


Next I'll be sharing a thrifty fall tablescape!  I'm off to do some shopping!


Fall Framed Art
~Easy Craft DIY


And then it was FALL!

Adding a simple touch of Fall. So easy to create, too!


I picked up a cute copper colored frame and a Fall greeting card at the Dollar Tree. Yep, just two bucks! The frame was a bit shiny, so I took a metal nail file and gave it some distressing! I loved the beautiful pumpkin scene on the card. I simply cut it to fit the frame and voila!


I just love a quick inexpensive project that gives me new & beautiful decor. Oh, and white pumpkins, I LOVE little white pumpkins!


Happy Fall Ya'll!


Thrifty Treasure
Wooden Pedestal and Vase/Candle holder


My latest thrifty treasure and fabulous find is this beautiful wooden pedestal and wide glass cylinder vase/candle holder.
~ A cost of six dollars total for the two items!
I dressed them up with a pretty candle and some faux greenery I already had on hand.


The tray is a thrifty treasure from awhile back.  I chalk painted it white since I have another one that I originally purchased from “Southern Living at Home” some years ago for much more than the five bucks I paid for this thrifted one!
(Upon doing a little search, the pedestal above may also be a SL@H item?)

I’m so pleased with my thrifty treasures!  And, I love the beautiful arrangement I created using them!  All it took was just a few dollars, a little imagination and some creativity!
Decor doesn’t have to be expensive to be beautiful!!!


~ Happy Decorating!...


Fall Decorating
~ Ladder decorating for "Fall" ~

It’s a bright and beautiful Fall day today!  I’m still over here enjoying my Fall decor, and pumpkins.  It takes a while for it to actually feel like fall around here too.  


I like to style this little ladder with seasonal decor, it’s fun to get creative with it and so simple too!  This is my fall theme.

I painted this old step ladder last year and have enjoyed using it in my decor.  I have fun changing it up seasonally and finding new ways to decorate it!  

It's easy to use in any room, and easy to store away if I chose not to use it.   I kept it simple with a few pumpkins, some greenery and flowers, and a few brass items to give it a little bling!  It sits in my breakfast area corner for now, and makes me smile when I see it!


~*~


Here’s to all those who are hosting Thanksgiving and are knee deep in planning and preparing, as I am!


I’m seeing some beautiful Christmas inspiration and lots of ideas are swirling around in my head!

-They’ll need to stay there til after Thanksgiving!  I’m a one holiday at at time kind of gal!


~ I hope all of your holiday planning is going well!...


Thrifty Table Makeover

I truly enjoy refurbishing furniture and decor items.
This sweet little table is one I recently completed, I found it at a thrift store for five bucks!

I knew I could make it beautiful by giving it some TLC and chalk paint!


~*~  ~*~  ~*~


It had potential, and I had a vision!  I loved the style, and the iron and wood combo.


First I prettied up the wood top with chalk paint.


And then decided to give the iron a dry brushing of chalk paint too!


I love the new look, and isn’t she so pretty now?!  I mean, I believe she must be a "She" with all those pretty curves!;)

As I so often say..."Don't be afraid to giving painting a try!  It's the easiest way to transform an item!


~ Hope you find some joy today!


Cutting Board/Serving Board
~ Chalk Painted & Stenciled


It’s always nice to love something all the more. And, so gratifying when you’re pleased with your own work!
- I changed the look of my sweet cutting board with some chalk paint, and a stencil!


I just love what a little paint can do. And, I love the new look of my cutting board. It gets used as a serving piece rather than a cutting board, so I chose to paint it!


I really loved the cutting board, I was just wanting a different look for it.  I decided to paint it to lighten it up.


I gave it a coat of white chalk paint, then let it dry completely.  After that I used a stencil.


I did the stencil in the same white paint so it was a subtle embellishment. I gave the board a coat of wax after everything was all dry to seal the paint and add a little sheen.


~ Happy is my crafty heart!


Spring Table Centerpiece


For Spring I've been enjoying this beautiful flower arrangement and centerpiece I created for our breakfast table!  You may remember a post I shared awhile back about my Chalk Painted Iron Tray.  I had it decorated as a winter themed centerpiece at the time.  

I brought back the tray, and wreath, and created a Spring floral arrangement in my glass vase.  I added some pretty beads around the neck of my vase to dress it up and I thought they worked well with the natural tone of the wreath.  Tulips are always a good go-to for spring!  I'm partial to the white ones of course!  I enjoy dressing my table with that thrifty table runner I found a while back, too.

We have under a month left of Spring and I'm going to enjoy every minute of it!


Happy Decorating!...


Bread Box Makeover


I love a good a makeover!  Especially if it's done by using paint.   I picked up a simple and plain looking bread box at the thrift store.   I knew I could give it a new look with paint.


I gave this bread box a new look using chalk paints and wax.  I’m so pleased with the results.  Paint it such an easy fix!  I am always amazed at what a little paint can do!


I used two different colors of chalk paint.  I watered down the paint a little and used the lighter color all over first.  Then used the darker color.  I alternated between the two to achieve the look using long slow strokes and a mostly dry brush.

I chose the colors "timeless" and "lace" both are from DecoArt.   I got these paints from the craft store, they are easy to use and clean up easily with water.


After the paint was dry I gave the bread box a light coat of clear wax and then gently buffed it.  The wax gives it a protective finish.


Here is the before of the bread box.  It was in great condition, just not what I'd envisioned or wanted it to look like.  I even painted the metal handle!  That is another thing that I really love about chalk paint, you can paint just about any type of surface or item.


A recent thrift store find for only three bucks, some paint, an afternoon of my time, and now it looks so much better!  I love it!


For now, I’m using it here next to my breakfast table to store cloth napkins on the ready.  It looks right at home here with my Spring decor.


I really love what a little paint can do!


Winter Decor
~ Our Breakfast Area ~

Just sharing some of the decor ideas I've used to get through the winter blahs!  After the holidays it's a time of transition to get things back to a more normal kind of feeling and appearance.  But, I love to decorate and I enjoy pretty things so, I find ways to make the winter a little more cheery!  And, because I'll admit to it not being my favorite time of the year!
  

The sun was pouring in and brightened up this space,  The sunshine always makes me happy, it brings a smile to my face and a warm feeling to my heart!

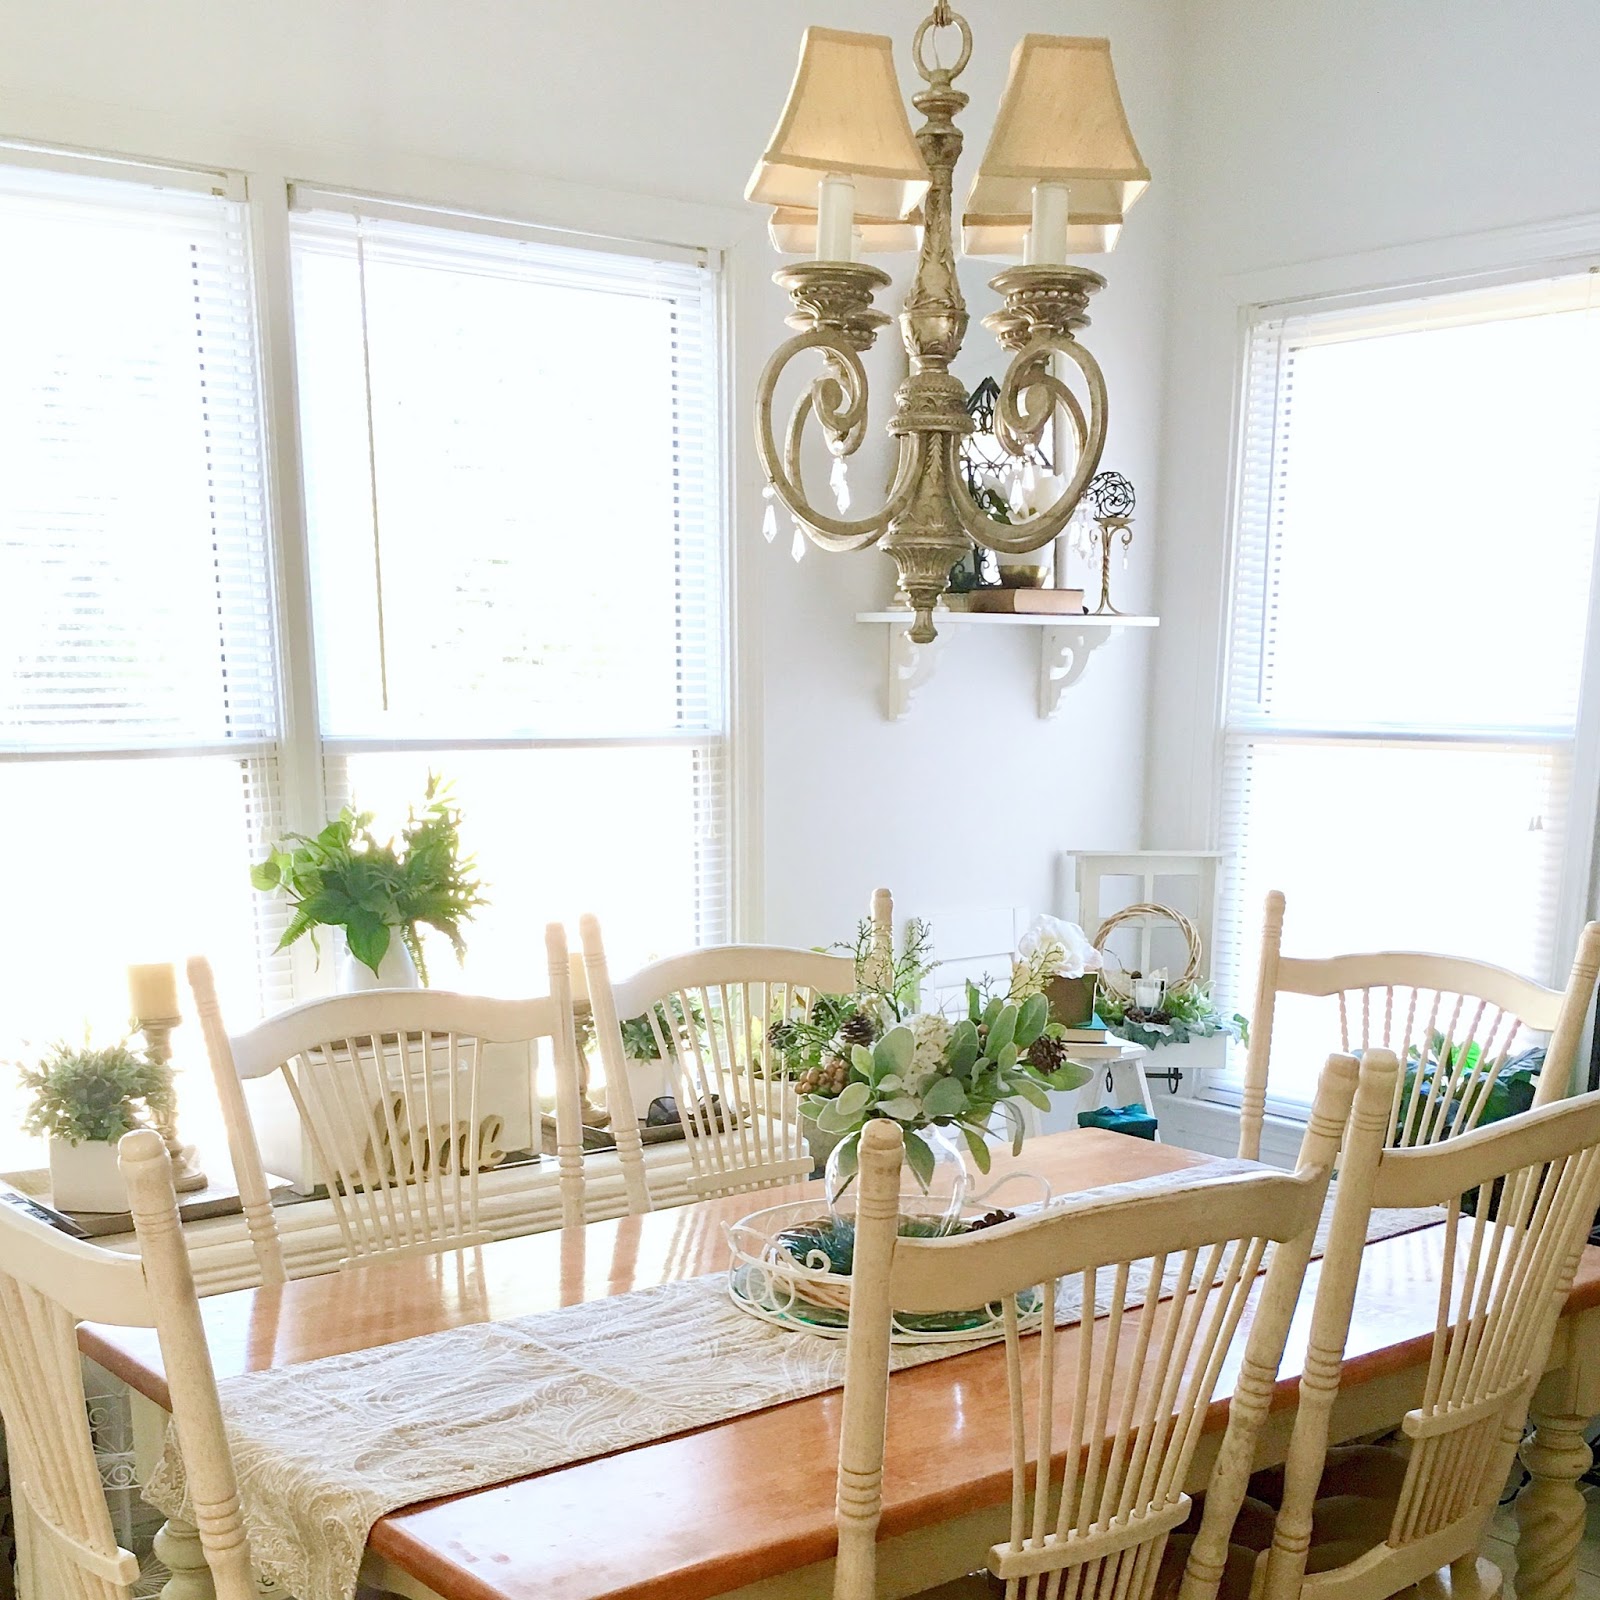
Many of the items here in our breakfast area are thrifty treasures, even the beautiful chandelier!  I recently shared the tray I chalk painted and used here as my centerpiece.  I found the table runner a few days ago from a local thrift store.  Over in the corner you may recognize the window with planter box, and the old ladder I refreshed with paint a while back.


This sweet window with planter box is also a thrifty find, it’s a great piece to restyle and change with the seasons. The old step ladder we'd had a long time and it was freshened up in white with some of my chalk paint treatment. White flowers are a favorite of mine, no matter the season!

Flowers and greenery are some of my favorite decor items, whether fresh or faux, I have to have flowers and some greenery!  I found some books to add a little lift and more green color.  The white shutter is one of a few that I have found at various thrift stores or antique markets.  I find them useful in many ways.

A simply styled area with something to brighten these winter days, beat the winter blahs, and warm my heart!


~Oh Winter, how I long for the warmth of Spring!


Chalk Painted Iron Tray


I love what a little paint can do!  I picked up this iron tray at a thrift store a while back, actually it was my daughter that pointed it out to me.  I was happy to get it, even though I had one identical to it at home.  I'd been thinking of painting my other tray for some time, but was torn about doing it.  

Finding this one gave me the idea that I could now have both!  So, I gave it a quick once over with some white chalk paint, (not being overly perfect with complete coverage), and I'm loving the new look of it!  And, I love that I still have the original one I purchased years ago!  Win!  Win!


~*~   ~*~   ~*~


I enjoy putting floral arrangements together, I created this one for winter using items I already had and three winter picks with evergreen and pine cones purchased from the dollar store.

That led to creating this winter centerpiece for our table using my thrifty, chalk painted, iron tray, along with a simple natural wreath, and some long needle evergreens. 


This sweet & simple winter vignette makes me smile!


Planter Box with Window - Winter styled
~ After the holidays - Winter decor ~


We’ve had a very lazy day today, after our special holiday celebration with our family.  It was nice to unplug and focus on family and spending quality time together.


I’m pretending now in my mind that I have all the Christmas decor packed up and put away.  That will happen this weekend!  I did manage to dress this sweet little window and planter box with a “winter” theme, so it’s just fine as part of the decor that will stay around a while.

I shared a post about finding this window and planter box at a thrift store earlier in the fall.  I just did a little changing of the contents to give it a winter feel.

”Baby it’s cold outside!” I think I’m ready for hibernation mode, now that the holidays are over!...Brrrr!


~This GA gal is hoping for an early Spring!!!

Chalk Painted Ladder


A little paint on an old step ladder makes for a nice display stand.  I love all of its character and may give it more distressing!?  I wasn't going for perfect, this old ladder had some rough spots but they just add to it's rustic charm.  Hubby offered to give it a good sanding for me.  I told him I liked the look and would prefer not to change the character of it!

I have so many ideas for this sweet little ladder! This was just the first simple and quick decor idea! I wanted to share and offer a bit of inspiration before all the pumpkins and Fall decor are put away over here soon.


I used two different colors of chalky finish paint by Americana Decor - Everlasting[white], and Timeless[beige/tan].  I gave it a layer of white and then a light wash with the tan color. {We've had this ladder around for many years and home painting projects!} 

This once ugly duckling is now a swan!  As you can see by the 'after' image above and the 'before' image below!


I do think that my husband is thinking if he sits still long enough, I'll paint him too! Ha!

I'm enjoying a few more days of pumpkins and Fall decor.  I'm looking forward to Thanksgiving and enjoying some family time together!


I do love the magic of paint!...


Terra-cotta Pots - Chalk Painted


I often say "if you don't love something the way it is, it can probably be painted!"
That's exactly what I did to these terra-cotta pots! I picked up this faux plant pair at Hobby Lobby on a 'half-off florals' week. I loved them, but knew I'd love them even more after I painted the orange-y terra-cotta!


I used white chalk paint, clear and dark wax to transform them. I'm so pleased with the way they turned out and really, really 'love' them now!


This is how they looked when I brought them home.  I liked their style and size, and felt I would get to use them year round in my decor.  I wanted to lighten them up, and give them a look that would work better with my decor.


I first gave them a coat of white chalk paint, and then let them dry thoroughly.  After the paint was dry I applied a thin layer of clear wax.  I let them sit awhile as the wax dried and then gave them a buffing with a clean dry cloth.

I wanted a different look, slightly darker than the bright white, so I added small amounts of dark wax in a few places at a time, then quickly wiped away the dark wax.  Another buffing with a clean dry cloth gave me the result I was after.


That's more like it!  This was the look I was after.  So much better if you ask me!


They are now much more my style and coordinate perfectly with my neutral decor!

Have you painted anything lately?


~I love what a little paint can do!


My DIY Table Runner

I had some interest and questions inquiring about my table runner, after posting an image of my Spring table decor.  A few asked where I'd gotten it, or purchased it.  I was happy to share a post about it. 

This was a very simple DIY project that took me only a matter of minutes.  The runner was once a curtain valance!  I found it at the thrift store and immediately saw it as a table runner instead.


Pictured here is how the curtain valance looked when I found it.  I loved all the lace detail, and the hearts and flowers within it.  I figured I could do some trimming on it and it would work as a table runner.


I began by cutting the bottom edge off, trimming closely and carefully.  You can see it taking shape now.


Next, I cut the top portion in the same manner as I had cut the bottom portion.


The sides of the curtain valance were now the ends of the table runner.  Having already had the finished edges I didn't need to do anything to them!


It made a nice long table runner with enough length to hang over both ends of the table.  I chose to use it on our breakfast table which it smaller than our dining room table.  It turned out well.  The once curtain valance now looked great as a table runner!  


With my ever changing desire to change my decor, and do it in an inexpensive way, I really love my unique one of kind table runner.  Not a bad find for just a buck and a little craftiness!


Happy Decorating!...


.

.

.

.
Tammy is the design enthusiast behind the blog, Tips, Treats & Treasures, where her creativity is explored with a mixture of her artistic abilities and style through her home decorating, thrifty finds, DIY and creative craft projects, along with her family favorite recipes. She shares through her blog her ideas and helpful tips on everything she has learned over the years and much of which she is passionate about in the hope of inspiring others, with her own unique style storytelling.