A Beautiful Surprise


Sometimes we get little unexpected surprises, even from nature.

Just as I was thinking it's high time I get busy cleaning up and adding some pretty touches outside, I saw color, a very pretty color, a color I really like!  I was quite surprised to find these little beauties popping up in my (much in need of attention) planting bed next to our patio.  


It suddenly occurred to me I'd had pansies that looked a lot like these in hanging baskets not far from this area, a while back.  Actually, the winter before last.  

I didn't plant these here, they are a surprise that just appeared.  And what a pleasant surprise!


It's always nice to get little unexpected gifts, and this one certainly made me smile.  Pretty, purple pansies.  

I'm not sure how long these will last, Spring gets going here and the heat quickly makes us think it's summer in no time flat. 


But, for now I have these little beauties sharing my patio with me, and I'm enjoying their company!  I'll be keeping a close eye on them and perhaps move them to a more shady spot, and maybe they will hang around for a while.  

I now have even more motivation to get on that task of cleaning up and adding some pretty touches outside.  This area truly was begging for some attention!  Now if only all of my other pots and planters would magically bloom!

I guess I best be off to the garden center to see what other little beauties I can find to add those pretty touches to my outdoor space. 


These sure are a beautiful color and a beautiful surprise!...


Color of the Year - Marsala


Marsala - Pantone Color of the Year


"Much like the fortified wine that gives Marsala its name, this tasteful hue embodies the satisfying richness of a fulfilling meal, while its grounding red-brown roots emanate a sophisticated, natural earthiness. This hearty, yet stylish tone is universally appealing and translates easily to fashion, beauty, industrial design, home furnishings and interiors."


...


When thinking about color, Pantone is thee resource to use for choosing or deciding on colors, and many of those which will be noticeable when shopping, whether it is fashion or home furnishings.  These are the colors the designers use each season, so you probably have already noticed them out in the fashion world with clothing and accessories, and also with home furnishings and decorating accessories.  


Taking a cue from nature, this year's colors are cooler, softer choices with subtle warm tones following a minimalistic theme.


Spring 2015 Pantone Fashion Color Report, gives an introduction to this season's colors, color pairing suggestions, and more.


A few of my favorites from this 2015 Spring Season: 
Toasted Almond - A perfect color choice for me with my love for neutrals.
Lavender Herb - A beautiful color!  Lavender, from the purple family, is one of my all time favorite colors.
Marsala - I like the color Marsala and I think it works well for fashion, as well as furniture.  I can see this color being very popular!


It's a colorful world!...


Thoughts and Things - This week ...Nutella Brownie Bites & More


I admit to having a love affair with Chocolate.  Another would be Nutella.  I love the stuff, and as an adult I have been making up for not knowing about it in my younger years!  It would be untruthful if I said that I only enjoy it occasionally.  Although I don't eat it everyday, I feel like I certainly could or would like to!

I shared a recipe for Nutella Brownie Bites a while back, and let me tell you ...not only are they delicious, they only require three ingredients.  Yes, three ingredients!  With just those few ingredients and a short amount of time, you too can make and enjoy them.  Give these a try!  You can click on the link just below the image for the recipe.


Being the lover of Nutella that I am, I'm always happy to come across new ways to enjoy it.   And, because there are many more ways you can enjoy Nutella besides simply spreading it on warm toast or on a banana, or just licking it off a spoon ...those are all some of my personal favorites.{wink}


***


Here are a few more ideas I found to get you on a Nutella adventure, they all sound delicious to me!  The hardest part will be choosing a favorite.  I think I just might have to try them all!  Sounds like a fun and delicious adventure to me!


Visit the following link: Delicious Nutella Desserts, and you just might discover an even greater reason to love, or fall in love, with Nutella!!


Enjoy!...


DIY Spring Topiary


I was reminded by a sweet reader complementing and also asking me about my topiary I had mentioned in a recent post, and that I had not shared the project yet.  {Oops!}  So, I put together the simple instructions for making my Spring Topiary, it was both an easy and inexpensive project that came together quickly.

I see different types of topiaries for sale all the time.  They've been growing in popularity among home decor for a while.  I had seen some a short time ago that cost a bit more than I wanted to pay, so that got me planning to make my own.  In no time at all I had this little cutie made and on display.  It really was very easy to make, and could be done using any number of other items, similar to what I used.


I started with a pretty floral ball I purchased from the craft store, it was only three dollars since it was marked half-off along with the other Spring items.  I love it when that happens!  I knew when I spotted it, it was perfect for using to make my topiary.  The floral ball looked like it was covered in little rose petals with pretty glitter sparkles, and it also had a ribbon loop attached, for hanging I assume.  I simply cut the loop in the middle and left it attached, because I felt it added a little bow-like tail to the bottom of the topiary.

I found the small clay pot at the same store for around a dollar, and knew it would be perfect for the base.  I painted the clay pot using white chalk paint, then after drying lightly sanded to distress the paint before adding a layer of clear wax.  I only painted about a third of the way down on the inside of the pot since it would not show later.


These are the items I used in making my topiary:
A small clay pot, floral ball, bamboo skewers, white tape, newspaper, and dried moss.


I wrapped the white tape around the wood skewers after I had cut them in half, giving me four parts overall to create my stem.   I then gently poked the stem into the bottom of the floral ball.


I sat the other end of the stem down into the center of the pot, then stuffed the newspaper tightly into the pot around the stem, which held it up and in place nicely.  


I finished it off with a bit of dried moss to cover the newspaper.   It was as simple as that.


A much less expensive topiary, and I like mine so much better than the over-priced one I had seen before!  My topiary only cost me a few dollars to make, it's much more to my liking, and it fits in nicely with my other Spring decor.  I hope my Spring Topiary has inspired you to create one for your home.  Remember to keep it simple and have fun!


Happy Crafting!...


full 'SPRING' mode!


I feel it is safe to say we really are in full SPRING mode now.  And, I think it's terrific!  I've been enjoying starting the day out on our porch in the mornings while feeling the warmth of the sunshine.  Although the pine pollen is trying to be a nuisance at the moment.  "This too shall pass", is what I say about that!  The pollen doesn't seem as bad as it was last year though, and the rain is our friend with helping to wash it away for now.


Since Spring began I've been adding a few 'touches of Spring' to freshen up my home decor, I shared a bit of it in an earlier post, and if you missed it you can see it at this link: A Touch of Spring Decor.

I've also added a few more Spring touches over the past week since putting away my Easter decorations, and completing a couple projects.   It feels light and bright, and fresh!   


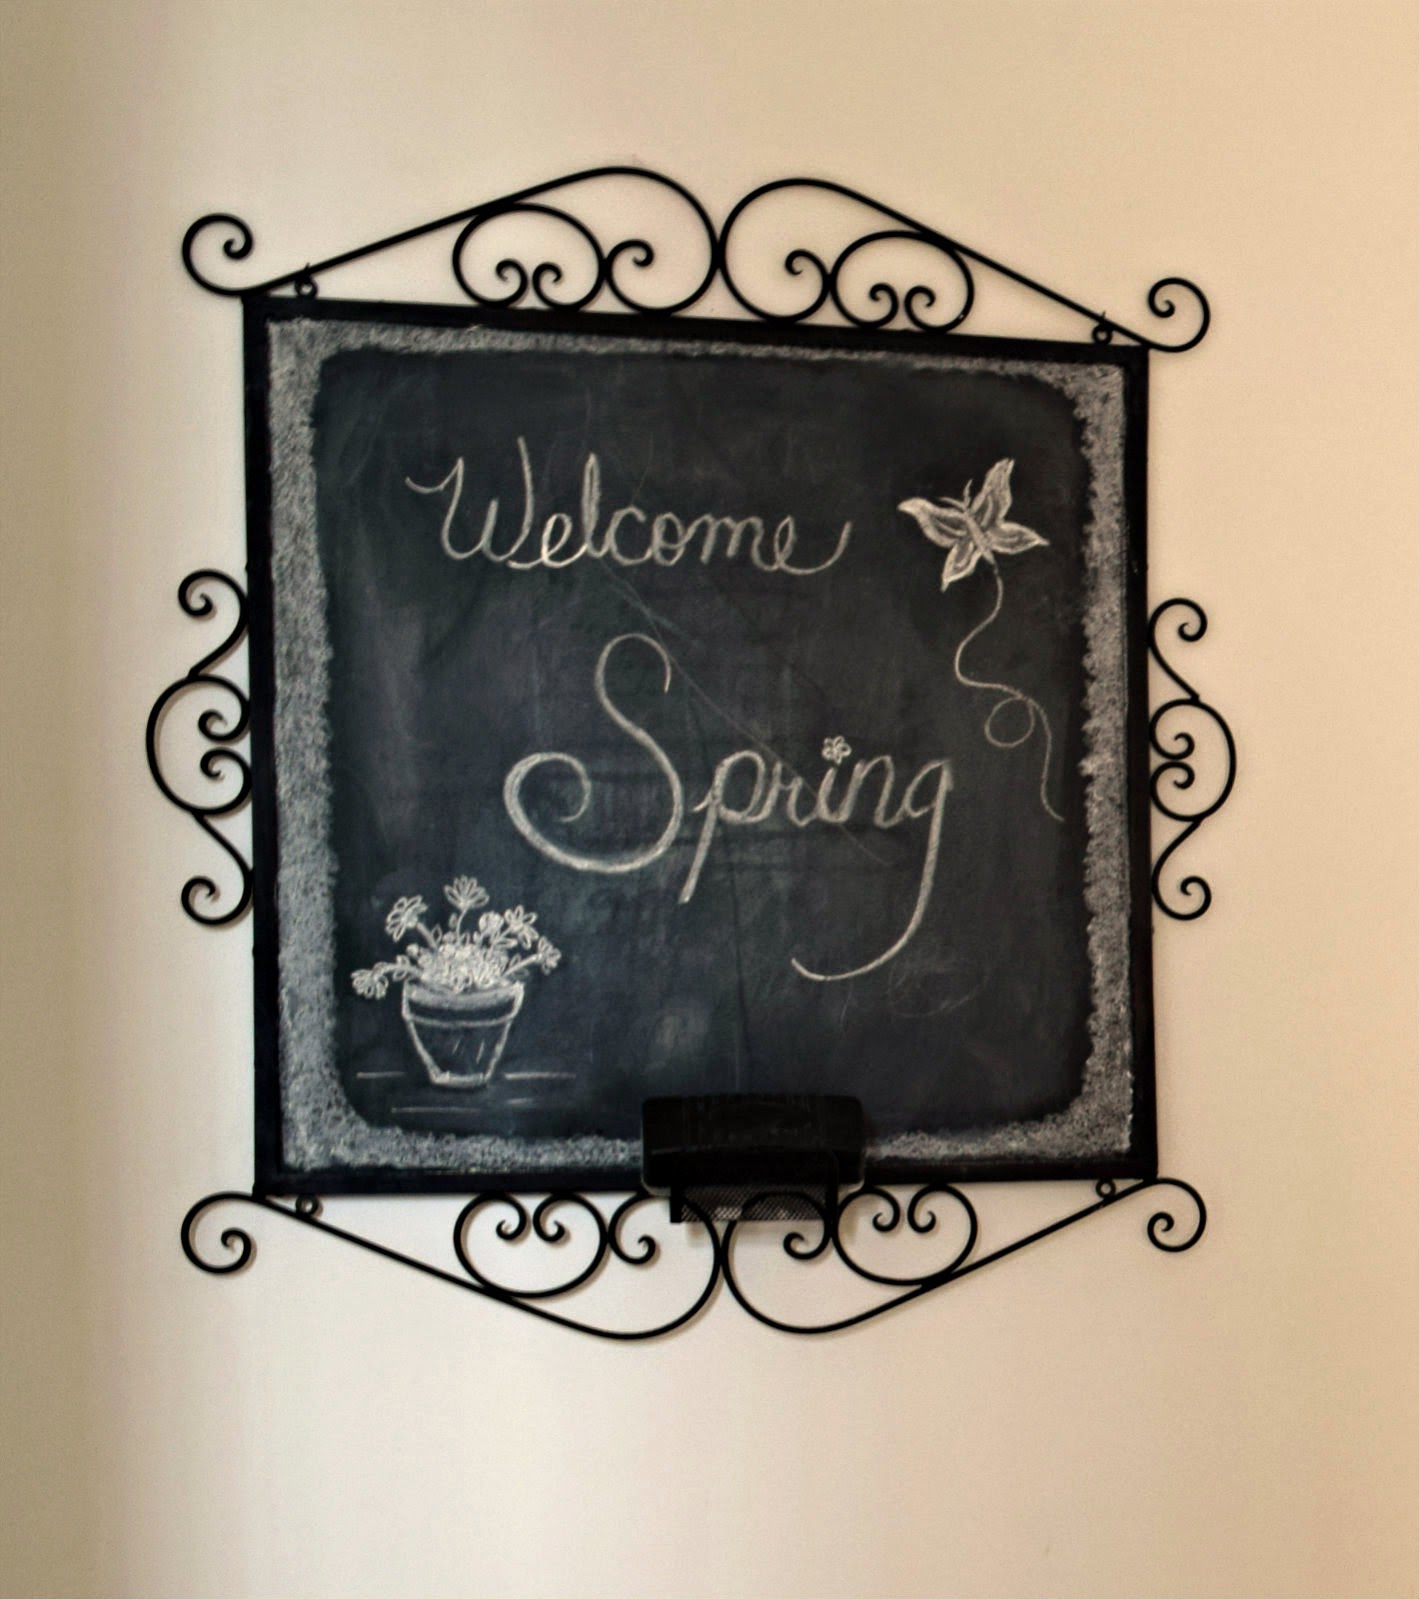
I found this cute DIY chalkboard banner a couple of weeks ago.  There are several pieces to it and I figured it would be fun to use for different occasions.  Spelling out the word S-P-R-I-N-G by hand using chalk was an easy and fun way to welcome SPRING!


My pretty chalkboard is another fun way that I add to my home decor, so 'Welcome Spring' was a perfect choice of words.  I just have fun with it and do what comes to mind when I get the chalk in my hand.  


It's wonderful to have all the natural light and sunshine, and the lush green backdrop outdoors adds to my fresh Spring decor.  I'm quite pleased to say ..."Welcome Spring!"


I'm so happy it's Spring!!...


A little Chair make-over


I spotted this little iron chair at the craft store, and it was on sale at half-off.  My kind of bargain!  

I thought it would be perfect on its own or for displaying small items on, maybe a small plant or giving a lift to smaller items.  

I liked this sweet little chair, and felt it was so me! 

...Although I wasn't in love with the original color!  


Rusty, orange, and so not me!  What's the best solution to use in this case?  Paint of course!


Suddenly I had a whole new outlook for this little chair, so I grabbed it up for just a few dollars and then made my way to the paint supplies to get what was needed for my plan.


I used white chalk paint to paint my chair.


The chalk paint covered in one coat and after it dried I added a coat of clear wax, which I had picked up at the same time that I bought the paint, to seal and protect the paint as was recommended per the instructions.   


I love my cute little chair!  I can say I really do love it now, everything about it!  It's nice to be able to take something you kind of like and turn it into something you love!  Don't be afraid to give something a make-over using paint, it's one of the easiest ways to change something you kind of like, into something you truly love


My Easter Tablescape


I love an unexpected find!  You know? ...You're not really looking for it, and then there it is and now you have to have it!

While shopping I was fortunate to come across these pretty faux Easter eggs with specks on them.  I noticed them on the seasonal isle of my local grocery, priced at next to nothing.  Uh, three and a half dollars!  I grabbed the two boxes of them quick as I could.  I'd have spent that much on two dozen real eggs easily, and these are already decorated for me.  Awesomeness!

I felt that placing the eggs in my clear glass vase was an elegant way to display them, while dressing up my dining room table for Easter.  A little dressing of the vase with some white organza ribbon was just enough embellishment.


Easter feels like the perfect time to embrace Spring, especially after enduring winter!  And, it's the perfect time to have a little fun with decorating, too.

I enjoy dressing the table in my formal dining room in a 'formal' way, but it is also fun to add a touch of whimsy every now and then, as well.  I honestly could count the number of times we use the formal dining room throughout the year on one, well OK, maybe two hands.  Even if not using it for everyday dining, I still like to dress it up.


Just look at those bunny ears!  I had a lot of fun with these, and I think they are simply the cutest things.  I would like to take full credit for the idea, but I had a little help with that.   The original idea called for using paper napkins though, so the idea to use cloth napkins is mine, all mine!  They were simple enough to create, and you can find all of the info and a tutorial at this link: DIY Bunny Napkins.


I smile every time I look at those bunny ears.  I do!


I made the sweet 'Happy Easter' printable over the weekend.  I wanted a little something extra, and these are an inexpensive way to add to your decor, especially for holidays and it's also another great way to add more color.  

After I created the graphic, all I did was print it and then add it to an acrylic frame.   Instant affordable art!  If you would like to download a free copy of my printable for your personal use, you can find it and the instructions at this link: Free Easter Printable-Happy Easter


Mr. Bunny was another unexpected find while thrifting over the weekend.   He only set me back one dollar.  And, he had me as soon I saw his sweet face, along with the decorated eggs in his basket, oh and those ears reminded me of my bunny ears waiting at home.     


I'm all set now and so is my dining room table.  This was easy to pull together and only took a few minutes of prep time.  I had most of the items already and the new, or new to me items were low cost, and that is my kind of decorating!  Easy, fun and affordable, that's just the way I like it.  My tablescape is simple and has a touch of whimsy that makes it all the more fun.  I hope you are having a little fun with your decor.  Happy decorating!


Have a Blessed and Happy Easter!...


DIY Bunny Napkins

OK, I ask you...are these not the cutest?  I can't stop smiling every time I look at them!

I put these sweet Bunny Napkins together to use at each place setting on my dining room table for Easter.

Here is an easy project you can do, one that doesn't require a lot of materials, and it only takes a few minutes to make each one of them.

I had a lot of fun with this project!


I've seen some cute ways to fold a napkin before, but this one might be at the top of the favorites list for me!  I'd like to take credit for the idea, the original idea called for using paper napkins though, so the idea to use cloth napkins is mine, all mine!  Plus, I feel the steps to make my cloth Bunny Napkins may be even more simple.  


I put each of my bunny napkins together by using one cream cloth napkin, and one pink cloth napkin. 


Begin by placing the pink napkin on top of the cream or white napkin.  (My napkins were slightly different in size which was perfect.  If yours are not, simply add a little fold to the pink napkin to slightly shorten the corners that will be exposed.)


Fold two opposite corners in to meet in the center.


Fold each of the folded edges inward, approximately one inch on both sides.


Continue equally folding each side inward toward the center.


The final fold should leave you with approximately a one inch wide folded napkin.


Pick up the folded napkin carefully and fold it in half.  (I used a napkin ring to hold mine together, a ribbon can be tied on to hold the napkin also).  Slip the napkin ring over the top and slide downward, leaving enough room in the bottom for an Easter egg.


Twist and adjust the 'bunny ears' toward the front, and then place an Easter egg into the opening.


Now make more.  As many as you like, or need!

Note: Mine were study enough to stand up on their own, with just a little adjusting.  They could be placed in a wine glass to hold them upright also.


I think they add a nice touch to the Easter table.  I do smile every time I look at those Bunny-ears.  I find them adorable!


If you like the 'Happy Easter' printable pictured above.  You can download a free copy for personal use, and then frame one to display with your Easter decor, too. You can find the printable and the instructions at this link, Free Easter Printable - Happy Easter.  Happy decorating!


Adapted from: Easter Bunny Napkin


Happy Easter!


Free Easter Printable: Happy Easter


I made this sweet 'Happy Easter' printable to add to my decor for Easter.  After I created the graphic, all I did was simply print it, then put it into an acrylic frame.  Printables are an inexpensive and easy way to add to your holiday decorating.  So easy to print and simply add to your frame of choice.


If you would like to download a free copy of my printable for your personal use, you can click on the image below, then right click on it to choose "save image as..." to save to your computer.  I used my printer settings to choose the size to print!  I made it as a 5 x 7 and that is the size frame that I used.  Happy decorating!


Have a Happy Easter!...


.

.

.

.
Tammy is the design enthusiast behind the blog, Tips, Treats & Treasures, where her creativity is explored with a mixture of her artistic abilities and style through her home decorating, thrifty finds, DIY and creative craft projects, along with her family favorite recipes. She shares through her blog her ideas and helpful tips on everything she has learned over the years and much of which she is passionate about in the hope of inspiring others, with her own unique style storytelling.