I love seeing a beautiful wreath hanging on display. I also love to decorate and make them. I am often surprised when someone says they can't make or decorate one, or they don't have the time to. I'm also quite surprised by the price on the decorated wreaths for purchase at the craft and home decor stores. Especially when there is so much available to pick and choose from these days for decorating them yourself, for far less.
You can go from simple, to over the top, and still save money on decorating your own wreath. Just adding a bow will look nice, and you can also add other items and embellishments. It's easy to do, I'll show you how.
I purchased a faux evergreen wreath at 60% off just the other day and decorated it the next afternoon, in just minutes. I spent just over three dollars for the wreath, and two and a half dollars for a holiday floral pick. I got some wire-edged ribbon for another project, it was two dollars and used only a little in making a bow. Total cost was under ten dollars for my finished wreath. Compared to wreaths I saw that were selling for upwards of thirty dollars, and that was on sale!! *gasp*
I purchased a faux evergreen wreath at 60% off just the other day and decorated it the next afternoon, in just minutes. I spent just over three dollars for the wreath, and two and a half dollars for a holiday floral pick. I got some wire-edged ribbon for another project, it was two dollars and used only a little in making a bow. Total cost was under ten dollars for my finished wreath. Compared to wreaths I saw that were selling for upwards of thirty dollars, and that was on sale!! *gasp*
Items used:
- wreath
- floral pick
- wired-ribbon
- floral wire
I began with a plain wreath and a fancy floral pick.
I bent the stem [or it can be cut off] leaving a short amount just past the bottom flower on the stem, and then attached it snuggly to the wreath with floral wire, which I had on hand.
I pulled one of the smaller stems to the other direction once in place. I could have called it done at this point, but I also wanted to add a bow to my wreath.
To start the bow I began making loops with the ribbon, leaving a tail longer than the loops.
I continued until I had three loops on each side of the center where I was holding it, and an even tail on both sides. [Adding more loops will give the bow a fuller look-if desired]
Next I placed a good length of wire [about 8 in] over the center.
The wire was twisted firmly to secure the loops. [An extra piece of ribbon can be used in place of or to cover the wire]
At this point it starts to look like a bow.
Each loop is pulled out and separated from the other loops, spreading out each side.
The bow looks like this after separating all of the loops.
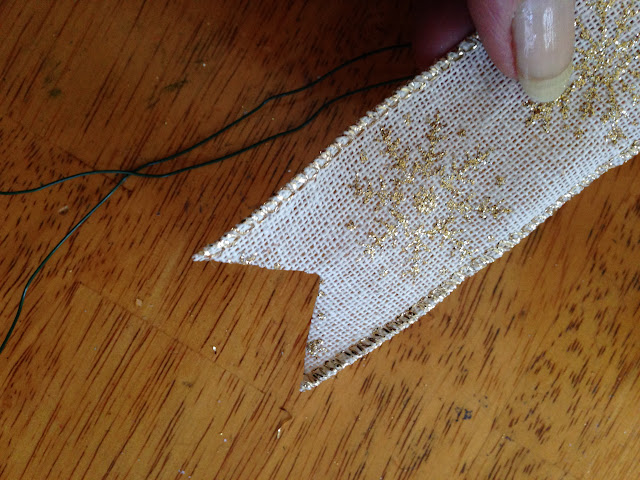
To finish off the tails of the bow I like to point-cut them. Simply fold the tail in half, then cut upward from the outside edges, that's just how easy it is. I cut the other tail the same way, and the same length.
The point-cuts will look like this.
The bow is finished and can be attached to the wreath, then shaped and adjusted once attached. A great thing about the wire-edged ribbon is the bow will hold its shape.
I placed the bow off to the side of the floral pick and then secured it to the wreath with the wire already attached to the bow.
I chose to fan out my bow to the side because I liked the look, and since I have limited space between our front door and storm door, I didn't want it to appear smashed.
And, this is my finished holiday wreath. It literally took me only minutes to make! I'm hoping this step by step tutorial will help those who say they can't do this, and they will find how easy it truly is!
Now my beautiful wreath hangs on my front door. My holiday decor this Christmas is lots of sparkle. My wreath certainly has that!
Happy Crafting!...


